
Often when I’m working a project, I’ll work through a series of ideas before settling on something that fits the bill. I try to write down these ideas and keep them around on the off chance that I could utilize them for a future project. Not long ago, I was working on a different computer project, assessing the cooling requirements, and I thought to myself, “It sure would be a cool to build a fully functional, small scale wind tunnel as a case for a computer.”
Unfortunately, I didn’t have time to investigate this wind tunnel-computer idea, and it sat around in some distant corner of my brain, until I decided to build a new computer. A medical research computer that would donate its time to cancer research.
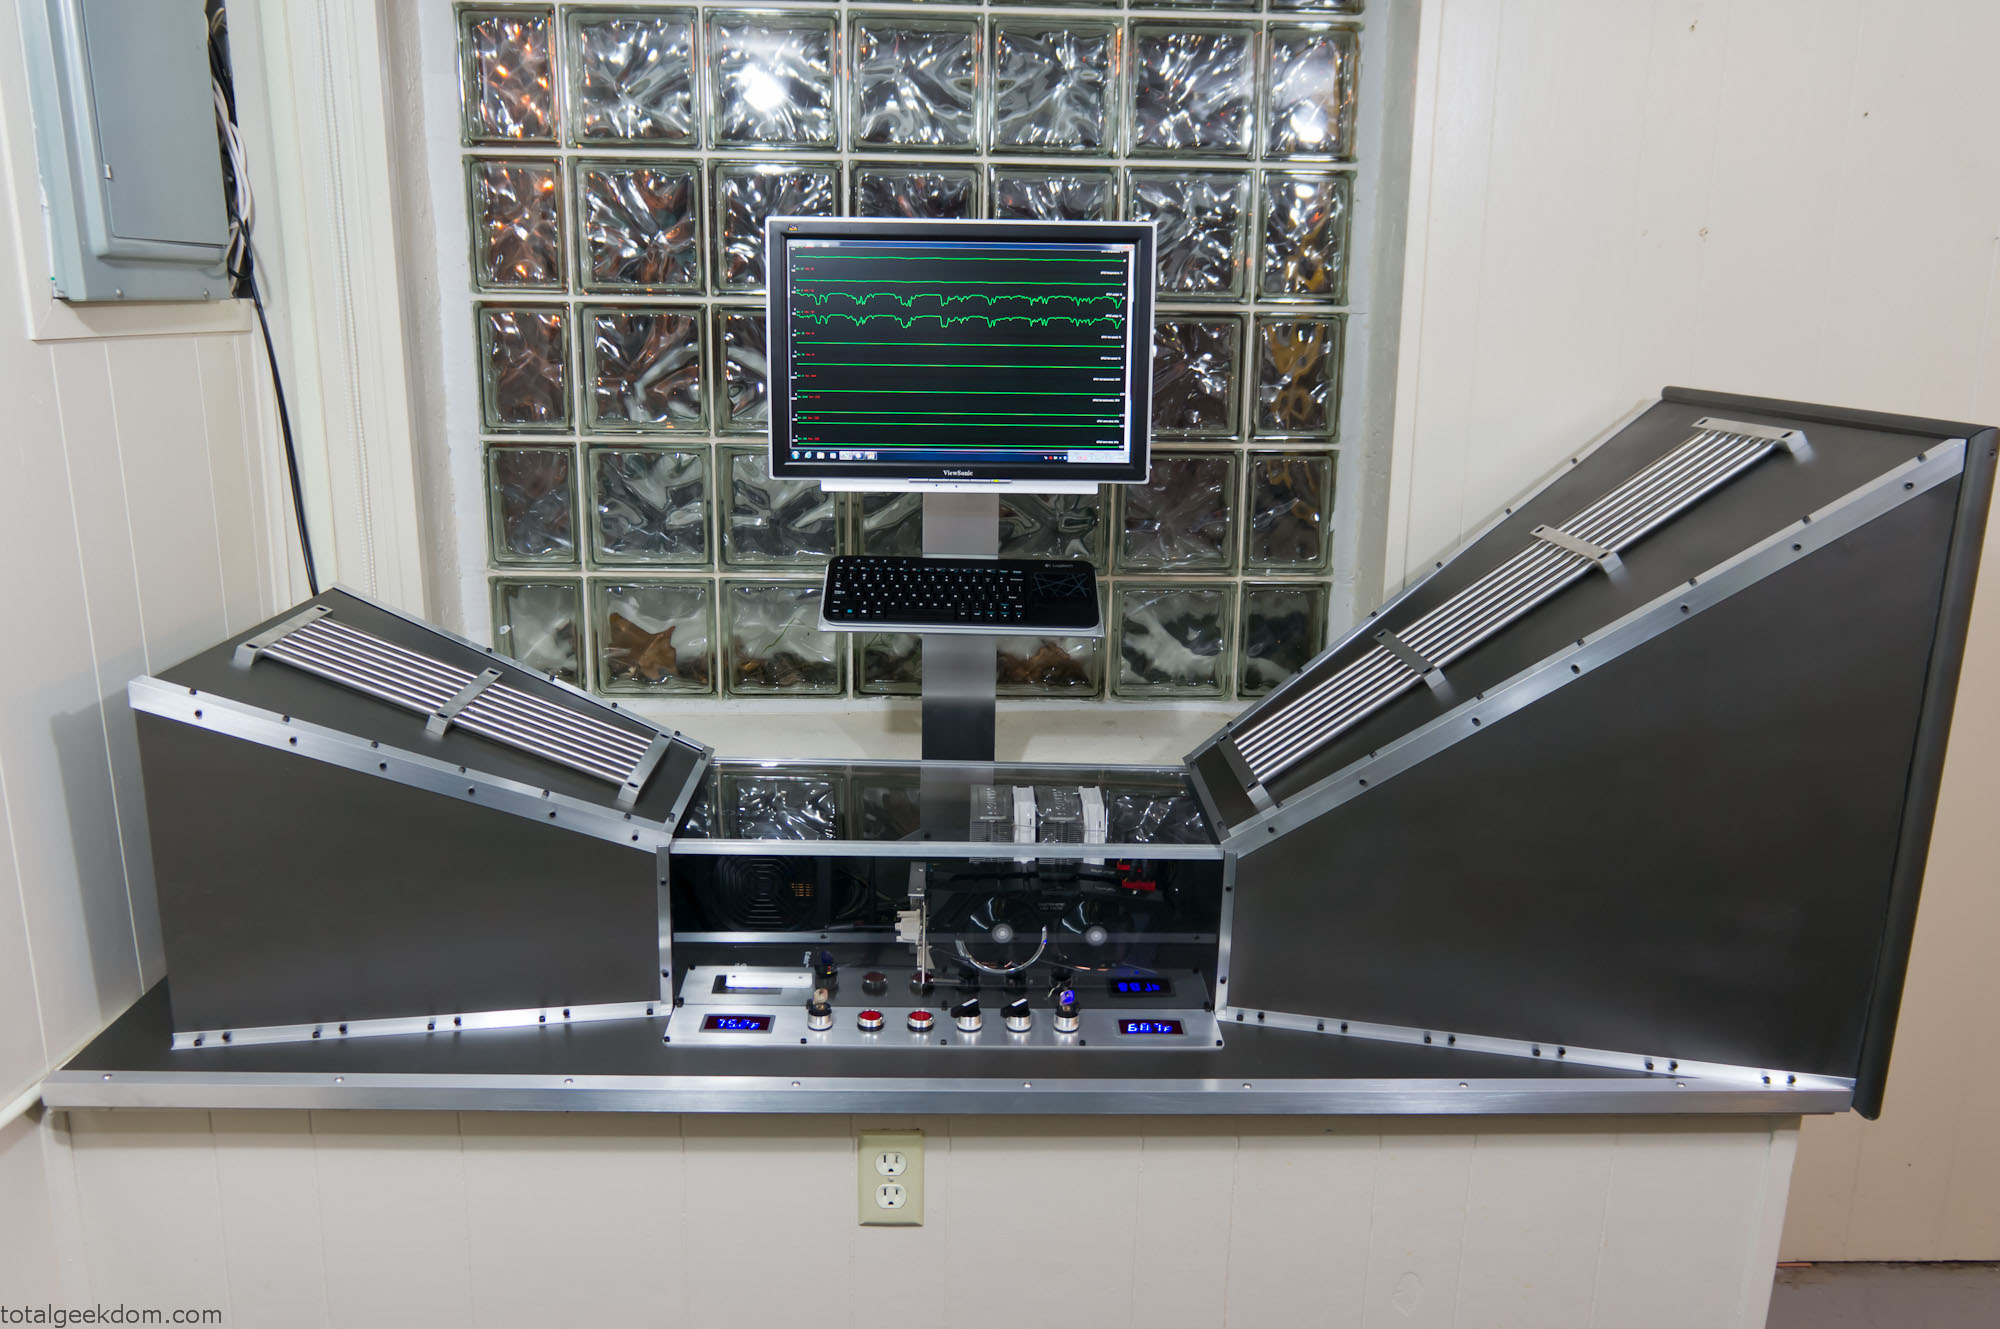
Wind Tunnel Computer
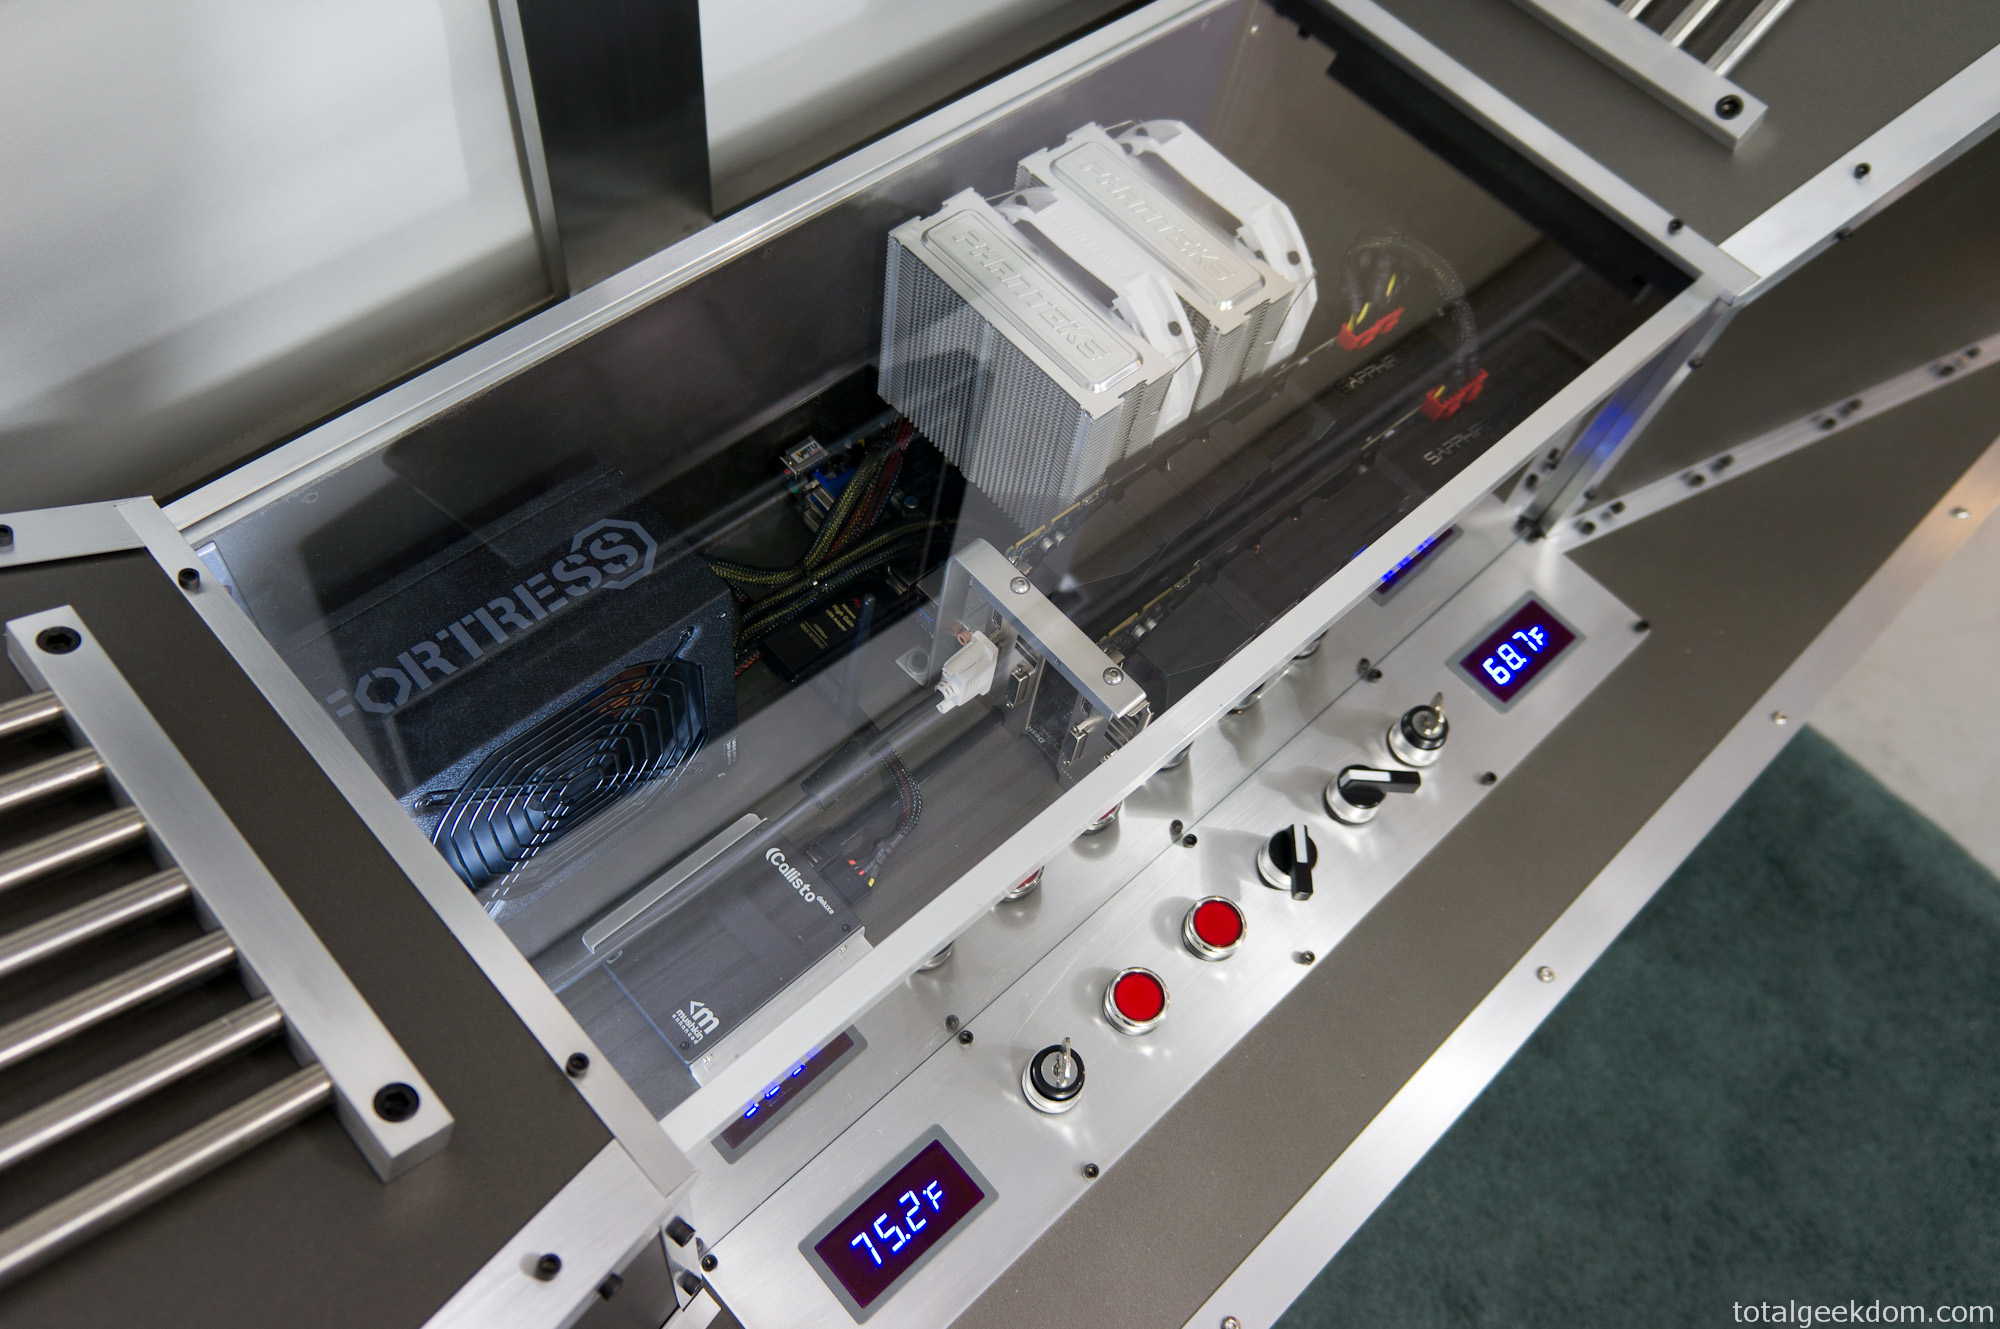
Wind Tunnel Computer Components
Project Conception
In 2011 I became actively interested in grid computing, and specifically in World Community Grid.
The idea that I could build a computer, or use existing computer resources and donate their power so scientists and researchers could process medical and humanitarian research was extremely interesting.
By donating computer processing time, you actively contribute towards a great cause. World Community Grid has numerous projects available; finding cures and treatments for cancer, AIDS, malaria, muscular dystrophy, etc.
As I became more interested I found myself connecting all the computers I had in my home. Eventually I decided I wanted to do even more; I wanted to build a computer that could donate all of its time to processing medical and research data. That project culminated in the creation of the Lego Folding Farm. This system housed three separate computer systems, all running in one giant Lego case. The system went online in July of 2011 and has been running 24/7 ever since.
In the past year, World Community Grid moved closer to enabling a GPU (Graphics Processing Unit) based project, the Help Conquer Cancer project. GPU computing allows a project to utilize the full processing power of the GPU. In most cases, a project written to run on a GPU is significantly faster than its CPU counterpart. In the Help Conquer Cancer project, a single CPU workunit took around an hour for my other computer to run, where the GPU enabled version completed in less than 10 minutes.
While the GPU version of Help Conquer Cancer project was being developed, I felt personally challenged to donate more towards cancer research. I’ve had people in my family affected by various forms of cancer, and I’ve always felt like I wanted do more to help. But beyond donating money to cancer causes or doing cancer walks (which are also a great way to help show support) it’s hard for regular folks like myself to feel like I’m helping contribute. It seemed like perfect timing that World Community Grid was bringing onboard a project that would allow for significant increases in the speed at which cancer research could be completed. I felt very compelled to actively pursue adding more resources towards this cause.
My Lego Folding Farm is a farm of CPUs and was built to process numerous different medical and humanitarian projects. At the time it was built there was not a GPU enabled project that ran on World Community Grid, so I focused all of my efforts on CPU processing power. The GPUs that the Lego folding farm uses are nothing special. While they can process a GPU enabled project they don’t really have a lot of processing power for that task. With that in mind I decided to build a GPU processing system that would solely dedicate its time towards cancer research.
I investigated the expenses to build and run this system and realized that the component costs would be high, as were the added electricity costs required to keep the system running 24/7. I had already added a significant expense 2 years ago with the electricity required to power the Lego folding farm. I wasn’t sure I could afford the cost of the system itself, as well as another electric bill increase.
Unable to solve the funding problem on my own, I turned to my resident creative genius department @thetinnishflash and explained the issue. After some discussion, we decided to try and build this system with donations from friends, family and others that wanted to be involved in the fight against cancer.
We turned to the fundraising site Indiegogo and setup a project campaign to raise funds to defer the costs of the components as well as the electricity costs. After a couple of weeks working we were able to raise a significant sum of money, almost enough to cover the costs of the components themselves! Outstanding! I’m still so very appreciative to all those who donated and helped contribute to this project happening, without their donations it would have been a hardship to complete.
Getting the of support others, with friends and family coming together to help make something happen, was my favorite part of this project. It’s a great feeling being involved and getting to build something that others have contributed towards.
Computer Planning
Once the fundraising was completed I began gathering up components for the build. I dubbed this project “Cancer Supercomputer” and I had fully intended on outfitting it with the components needed to be a GPU processing powerhouse. After hours of research I settled on a list of components.
CPU- Ivy Bridge 3770K
GPU- Radeon 7970 (Sapphire Dual-X cards)
RAM- Corsair Vengence 8GB 2133Mhz
SSD- Mushkin Callisto 40GB
PSU- Rosewill Fortress 650W Platinum
Motherboard- Gigabyte Sniper M3
CPU Cooler- Phanteks 140mm
My plan was to configure the computer and then overclock the hell of it. With this in mind, I started wondering what route I wanted to go as far as cooling. I debated going with water cooling, but decided instead to see how far I could push air cooling.
Case Design
During the design phase of the Lego Folding Farm, I decided that the best method of cooling many hot components in a tight space was a very short path for airflow. Conventional computer cases generally intake air from the front which then travels through the case and rises upwards. Depending on the configuration there are numerous paths for the hot air to exit. There is almost always a rear exhaust fan, and in some cases a top mounted exhaust fan, as well. Additionally, some air will exit through the power supply fan. The problem I see with this method of air cooling is that the path that the airflow must take is long and winding.
To work around this, I built the Lego Folding Farm with a very short path from intake to exhaust. The intake fans sit directly in front of the components and blow air across the CPU cooler, the GPU cooler, the motherboards on both top and bottom, the heatsinks, the power regulation circuitry, the power supply. These are directly cooled by unobstructed airflow. The exhaust side is a mirror of the intake path, where air is directly exhausted out of the case. This method allowed for a much shorter path to get fresh, cool air in and blowing directly on the components.
However, with the Cancer Supercomputer I knew the graphics cards were very long and had very big coolers on them, so I needed to change my approach. I also knew from testing that under full load the GPUs could output a lot of heat, especially with multiple GPUs in a tight space. I needed a solution that allowed for more space, while also allowing me to move a lot of air.
Additionally, I wanted to pay close attention to air pressure. A conventional computer case has a lot of large “dead-space” areas. These areas don’t direct or force air to flow towards the components that are being cooled. I wanted to avoid dead space. I wanted the case to closely mirror the shape or profile of the finished motherboard with components. This way all the air flow would be forced to travel across the components surfaces, as opposed to flowing past large empty areas of case.
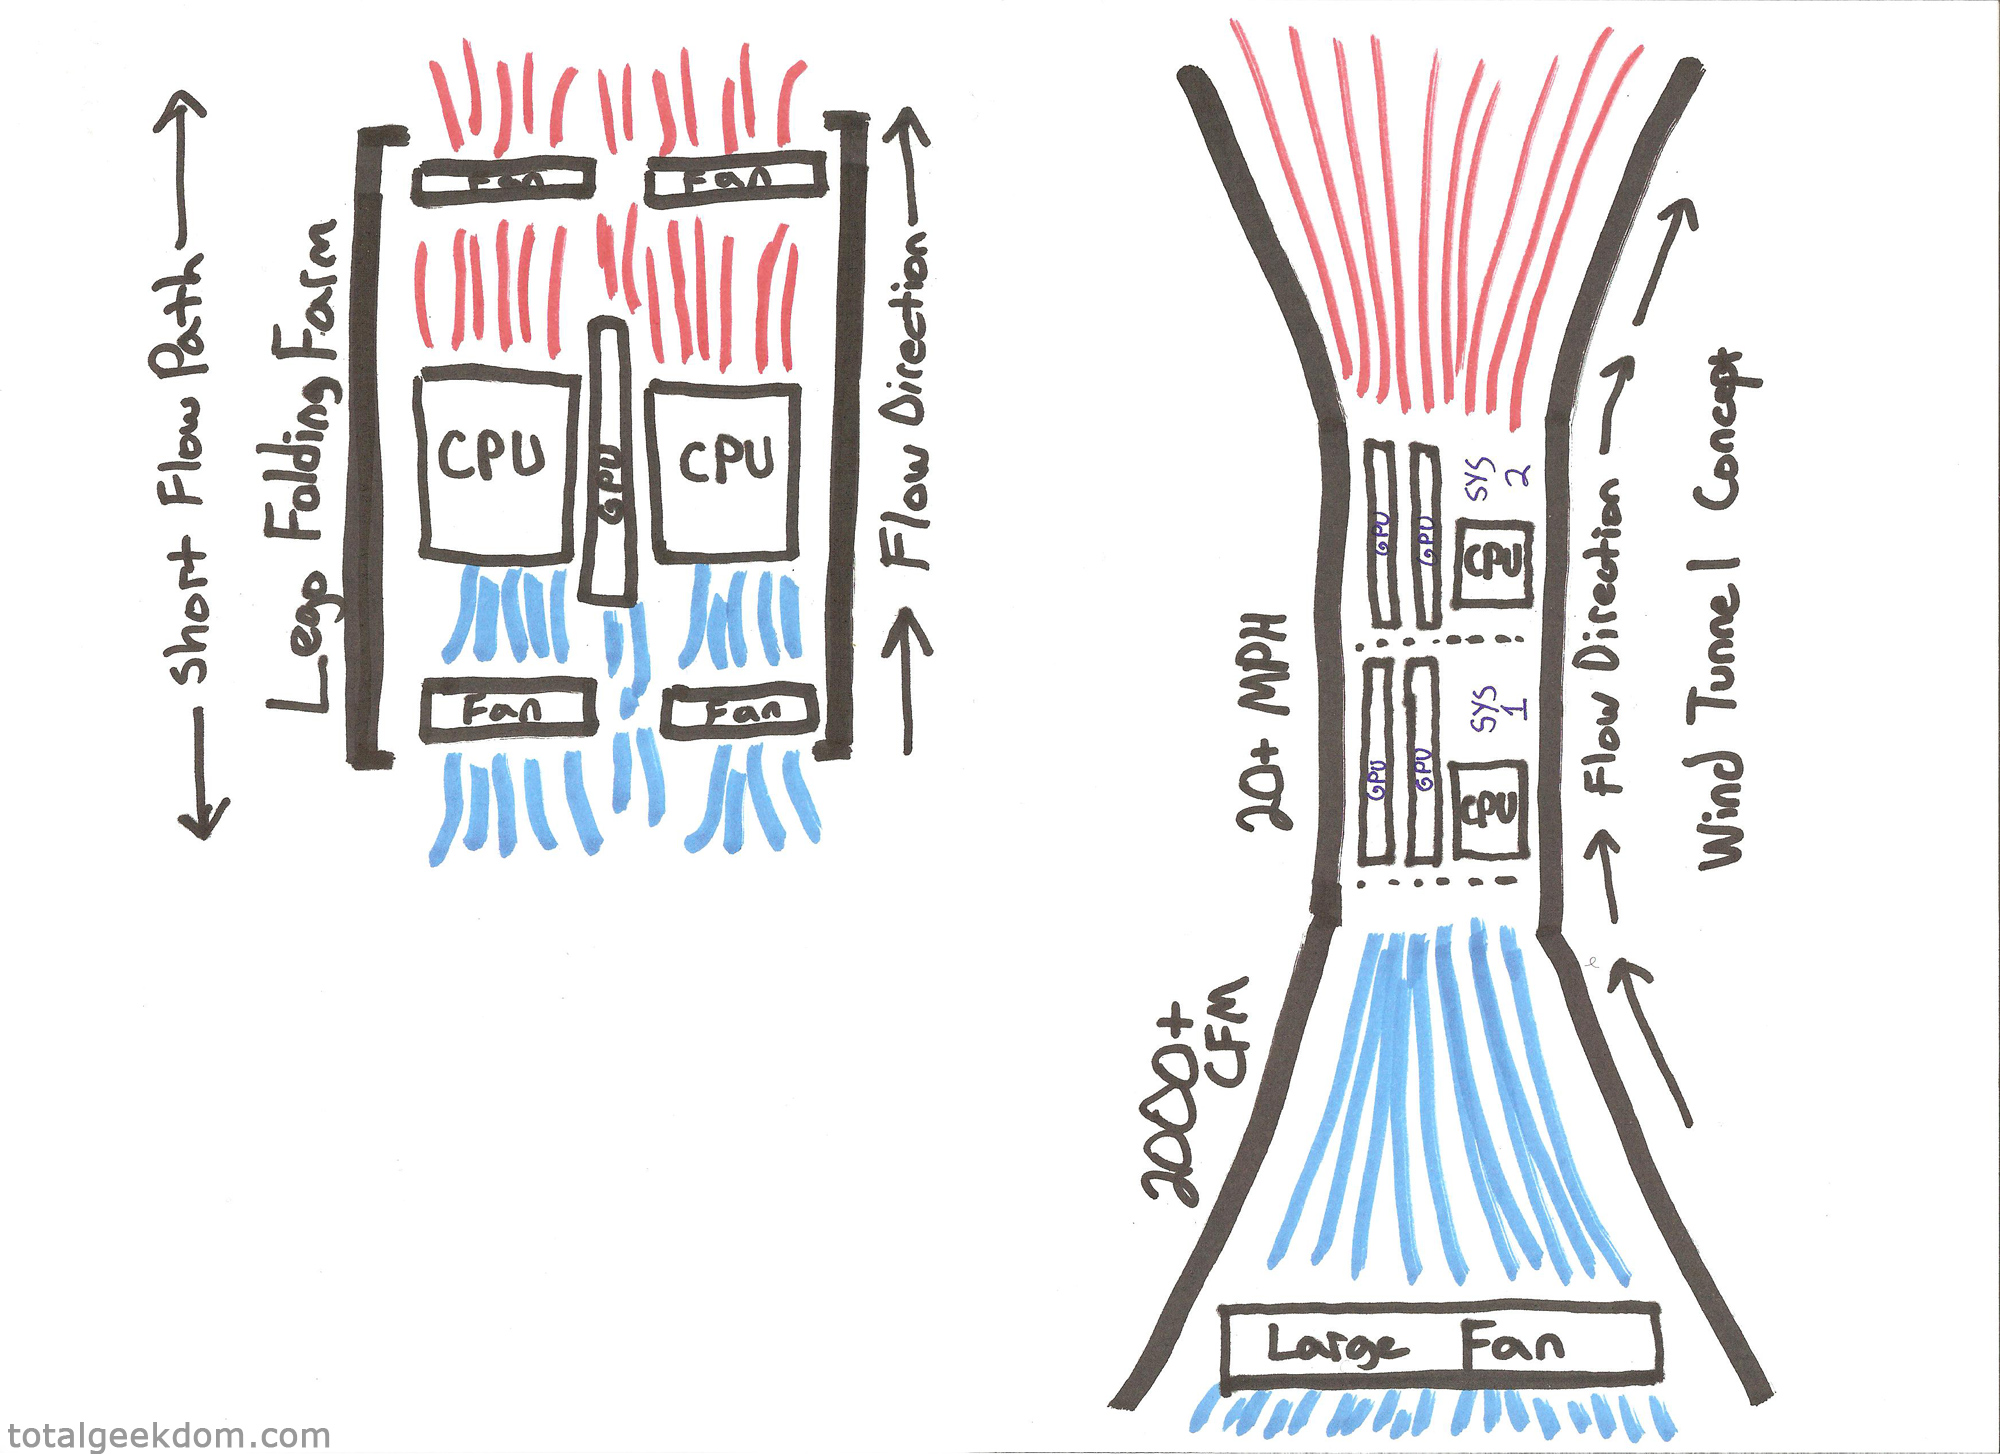
(My drawing skills are clearly unmatched)
Wind Tunnel Concept
Knowing I needed to maximize cooling, I explored a concept I’d tinkered with previously; a wind tunnel computer case. I had done research on wind tunnels back when I first investigated using a wind tunnel to cool components. There was a lot of information, much of it only helpful to those with a physics background. I’m not a physicist, but given enough time I can usually understand theories well enough to apply them in the real world and test them out, and that was the case here.
I used an anemometer (velocity/airspeed meter) for testing, as well as different fans and basic shapes made out of cardboard. I was able to conclude that I could increase air velocity through a scale wind tunnel.
There are two types of wind tunnels; the one I’ve built is a subsonic wind tunnel. This type of design involves a contraction section which is used to increase velocity (airspeed) through the test section. This increase in airspeed was what I looking for, a way to increase airspeed over the computer components.
There are numerous factors to consider when it comes to wind tunnel design and testing, things like Reynolds numbers, turbulence, boundary layer air, and heat from surface friction. I did extensive testing with various designs, materials and configurations until I settled on a final design.
In a perfect world I would have been able to build a larger wind tunnel. There were many constraints on this project to make it workable. The biggest of these was space. I’ve slowly converted my basement to a lab with toys, computers, Lego, robots and all kinds of various geekery. Therefore, I only had one area with enough space to construct a wind tunnel. The space itself was about 72″ long by about 26″ wide, and whatever I was going to build had to fit within those confines.
Next, I needed to fit computer components in the test section of the wind tunnel. I needed the test/contraction section to be big enough to accommodate the motherboard/CPU cooler/GPUs and also fit the power supply and a SSD. After tinkering with several designs I settled on a shape and size that allowed room for further growth. The contraction section of this wind tunnel has enough space for two full mATX motherboards plus the PSU. This allows for the possibility of adding another system in the future and cooling two systems inside one wind tunnel.
Next I had to contend with fan noise, as I would with any other air cooled pc. I debated using various sized PC fans and configuring them in a grid pattern at the inlet. Using fans around 220mm would’ve allowed for multiple fans at the inlet without too much noise. But when testing those fans I found that the airflow and CFM (cubic feet minute) produced weren’t adequate. At that point I changed direction and decided that I would use a single large fan with multiple speeds. This would produce a much higher airspeed as well much more CFM. I tested a couple of different fans and settled in on a box fan. It only consumed 96 mA and allowed for peak flow in the 2200CFM range with air speeds of 14-15MPH.
Wind Tunnel Construction
I looked at a couple of different options for building materials. I debated using sheet metal, and then looked at plastics. At one point I was going to make everything out of carbon fiber as I had some spare fabric, but the fact that carbon fiber is conductive dissuaded me, as the computer components are relatively sensitive to static discharge. In the end I choose wood, specifically 1/2” MDF board composite. It offered a nice surface to finish and paint and was strong enough to build the entire tunnel structure.
I had a fair amount of MDF board in my garage and that made for an excellent basis to start. I cut out the basic shapes for the inlet and outlet as well as the back panel of the contraction section. I also cut an entire piece that would serve as the base.
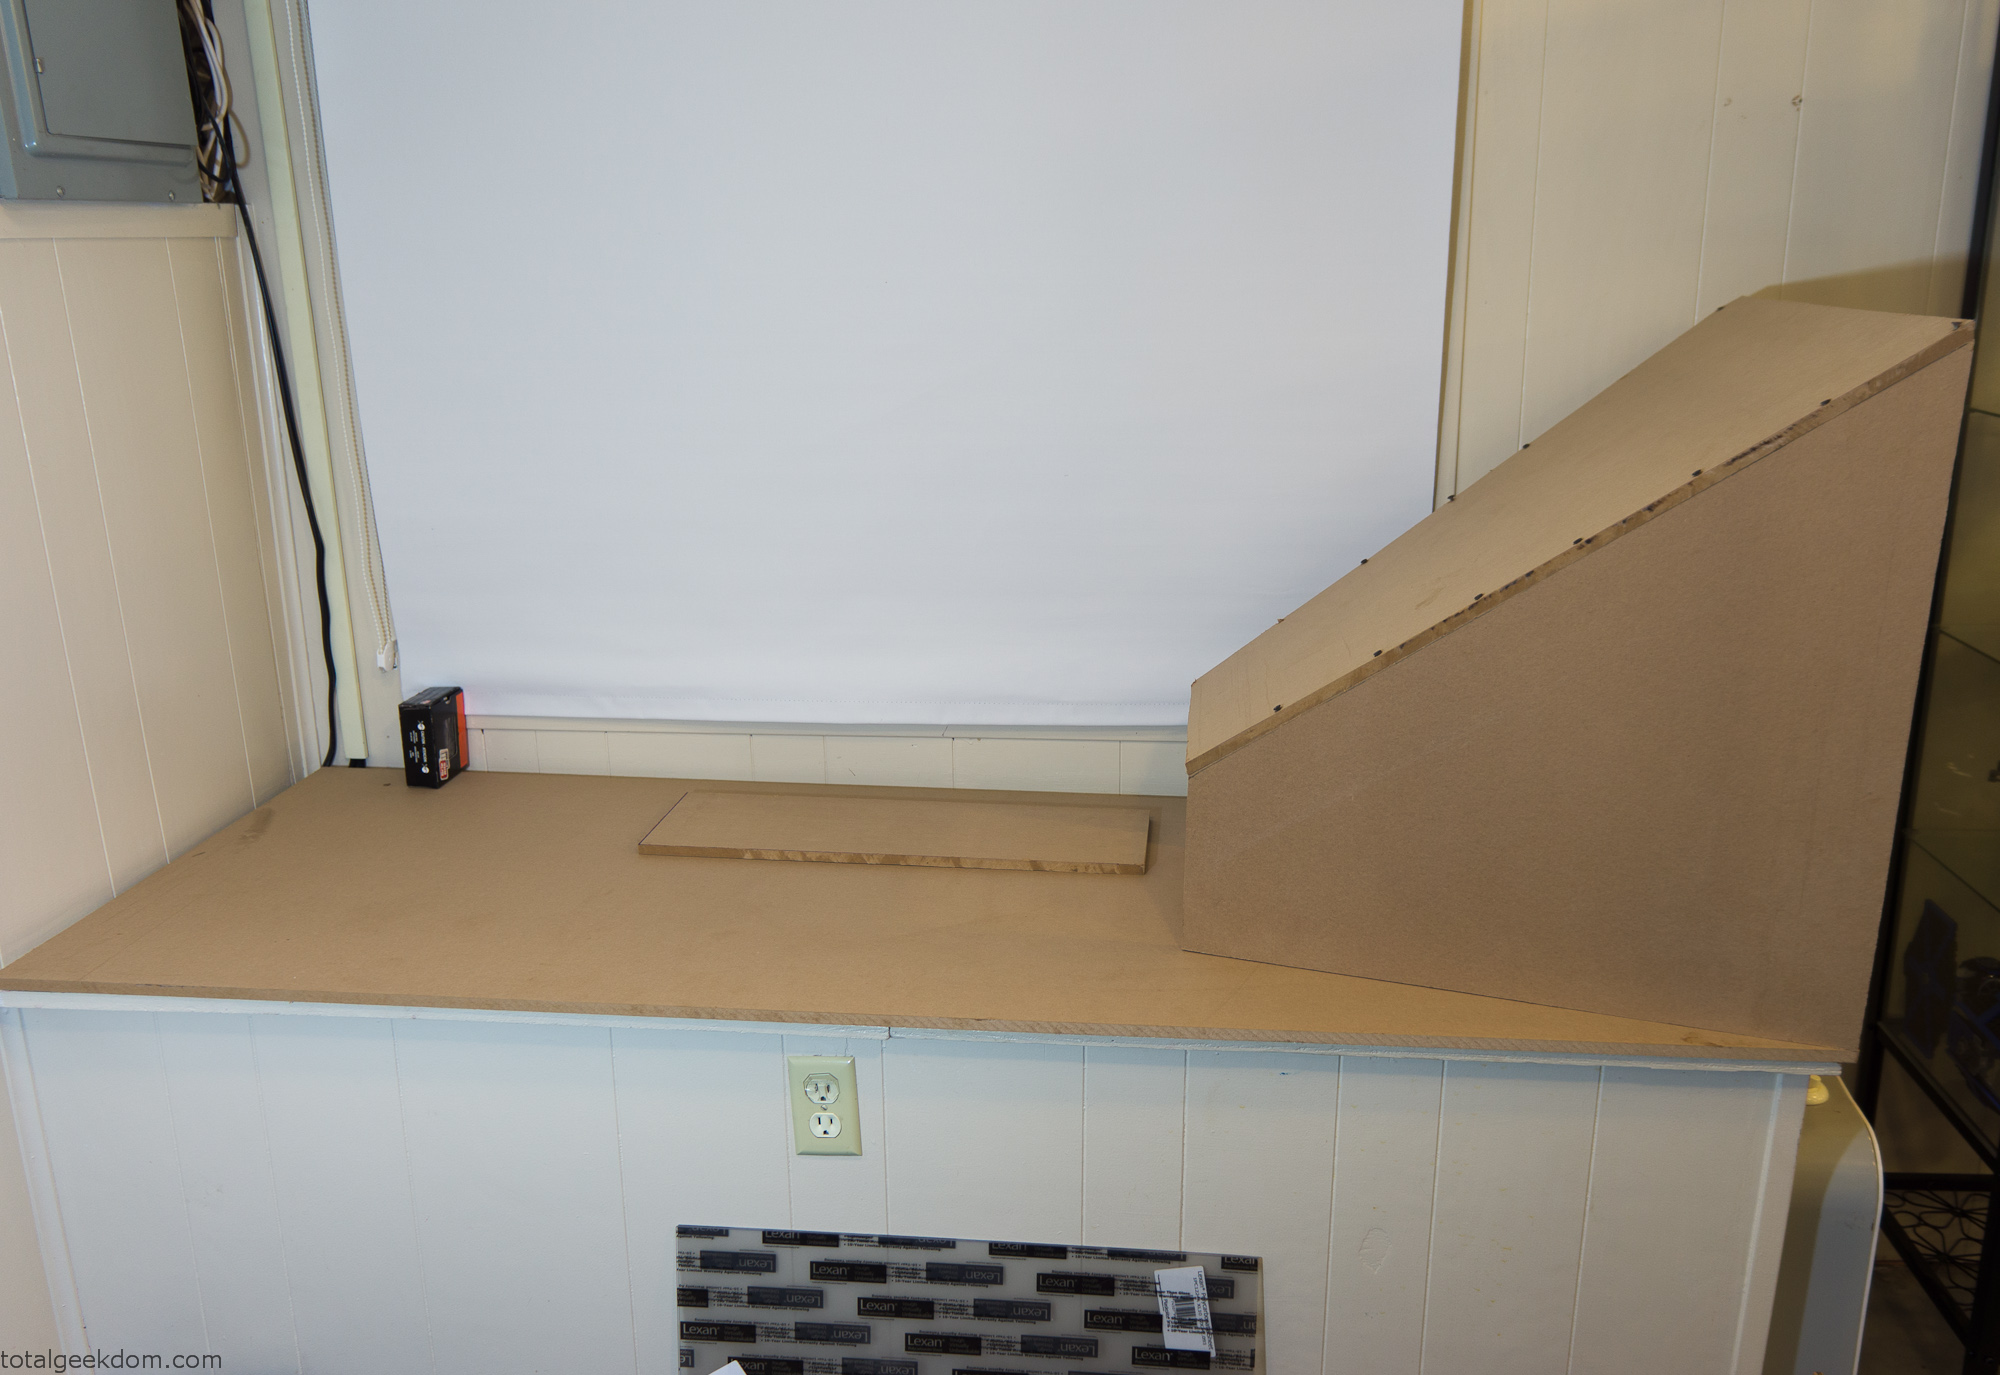
Wind Tunnel Inlet Mockup
After gathering the pieces I screwed everything together to form the basic shapes needed to mock everything up.
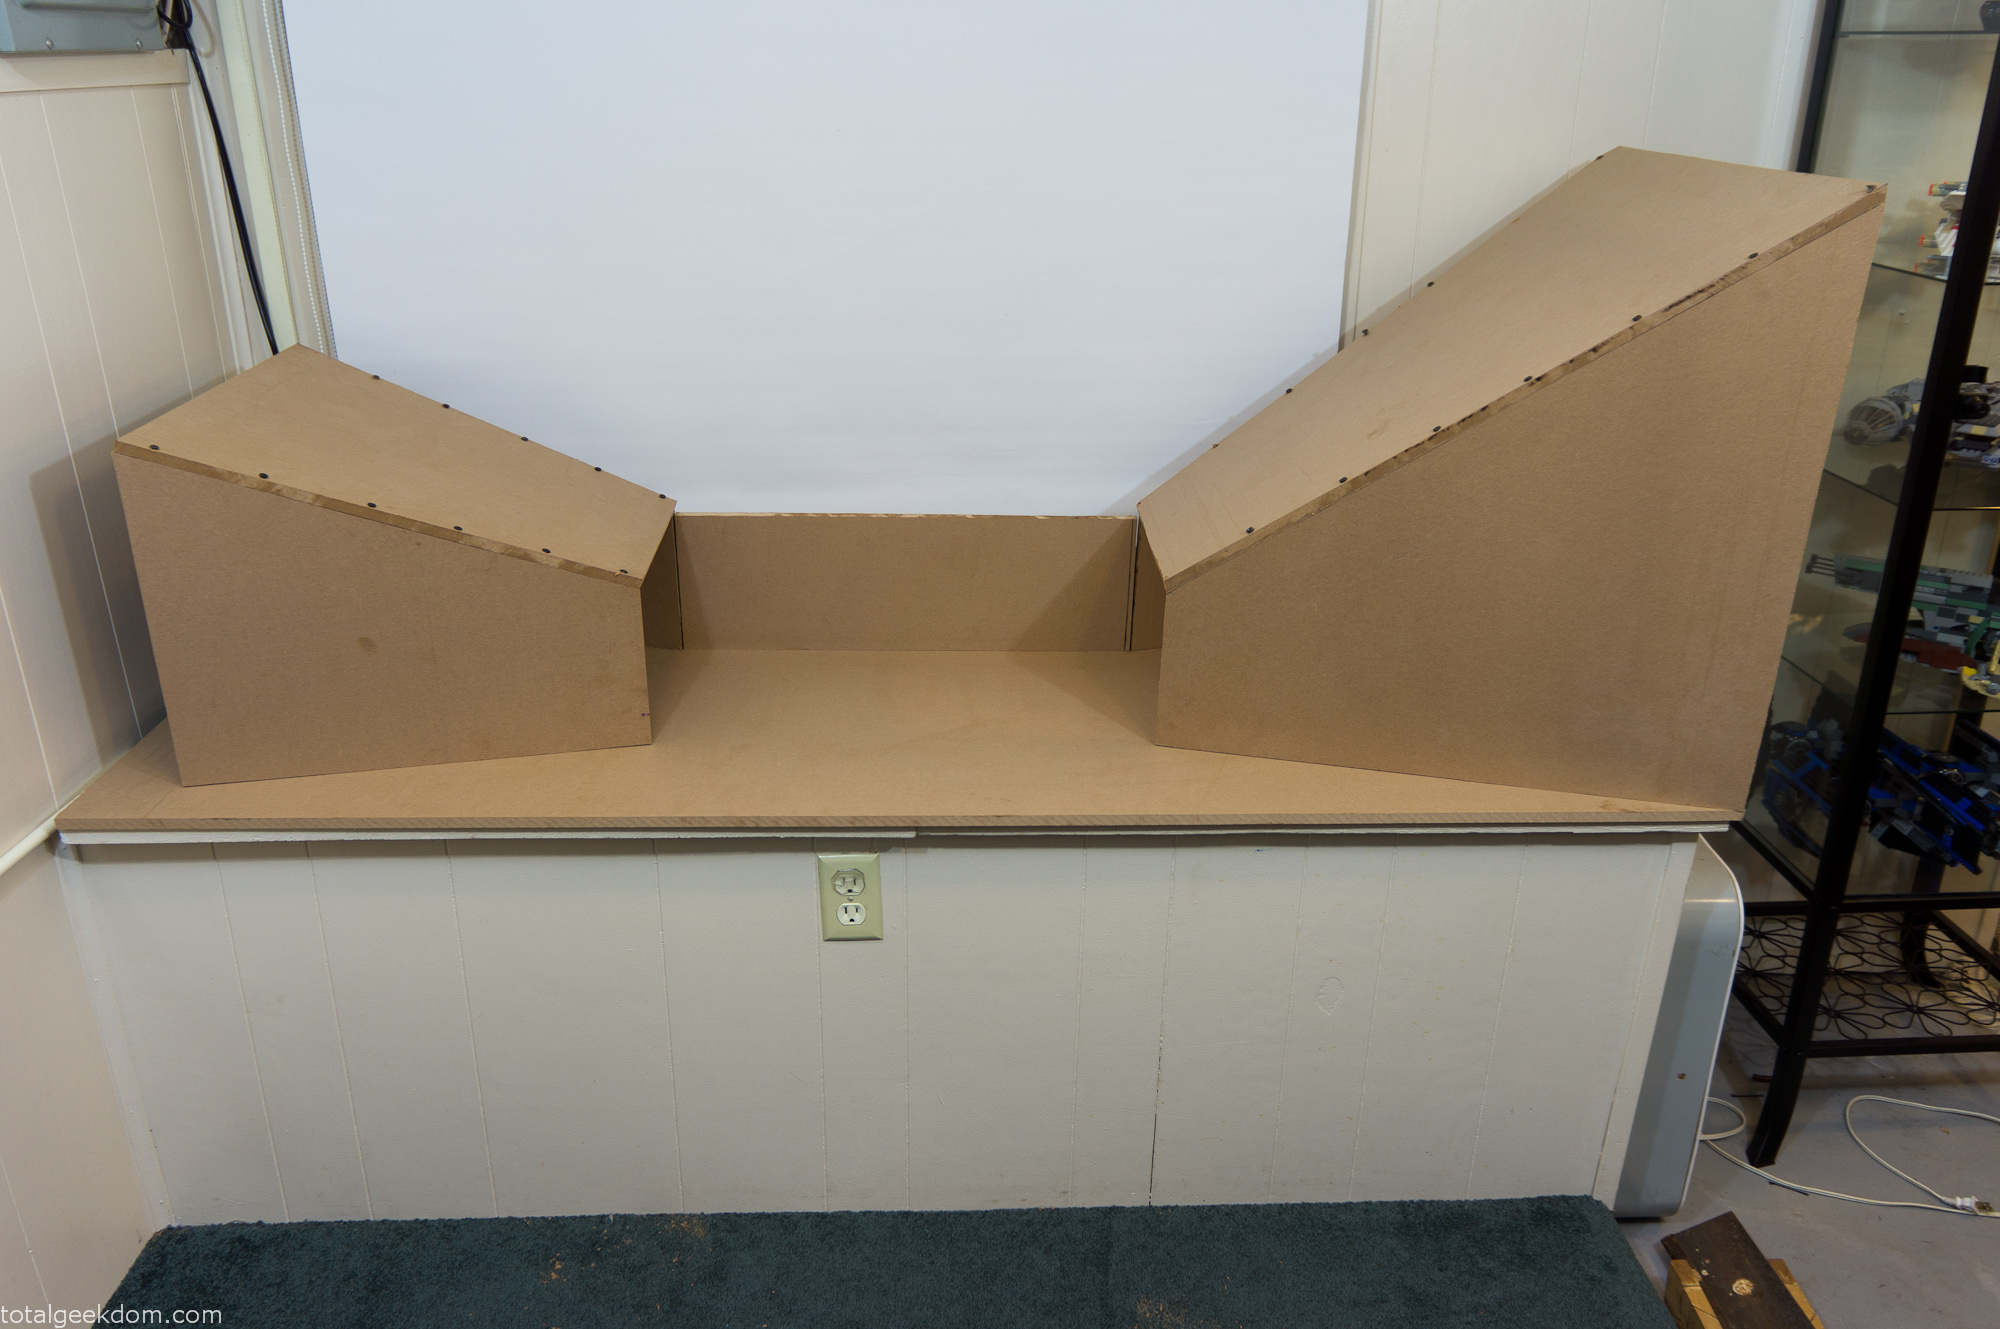
Wind Tunnel Layout
Once I had the basic shape configured I went about tweaking and adjusting the layout of the pieces. Next, I moved on testing the inlet section with the fan to verify.
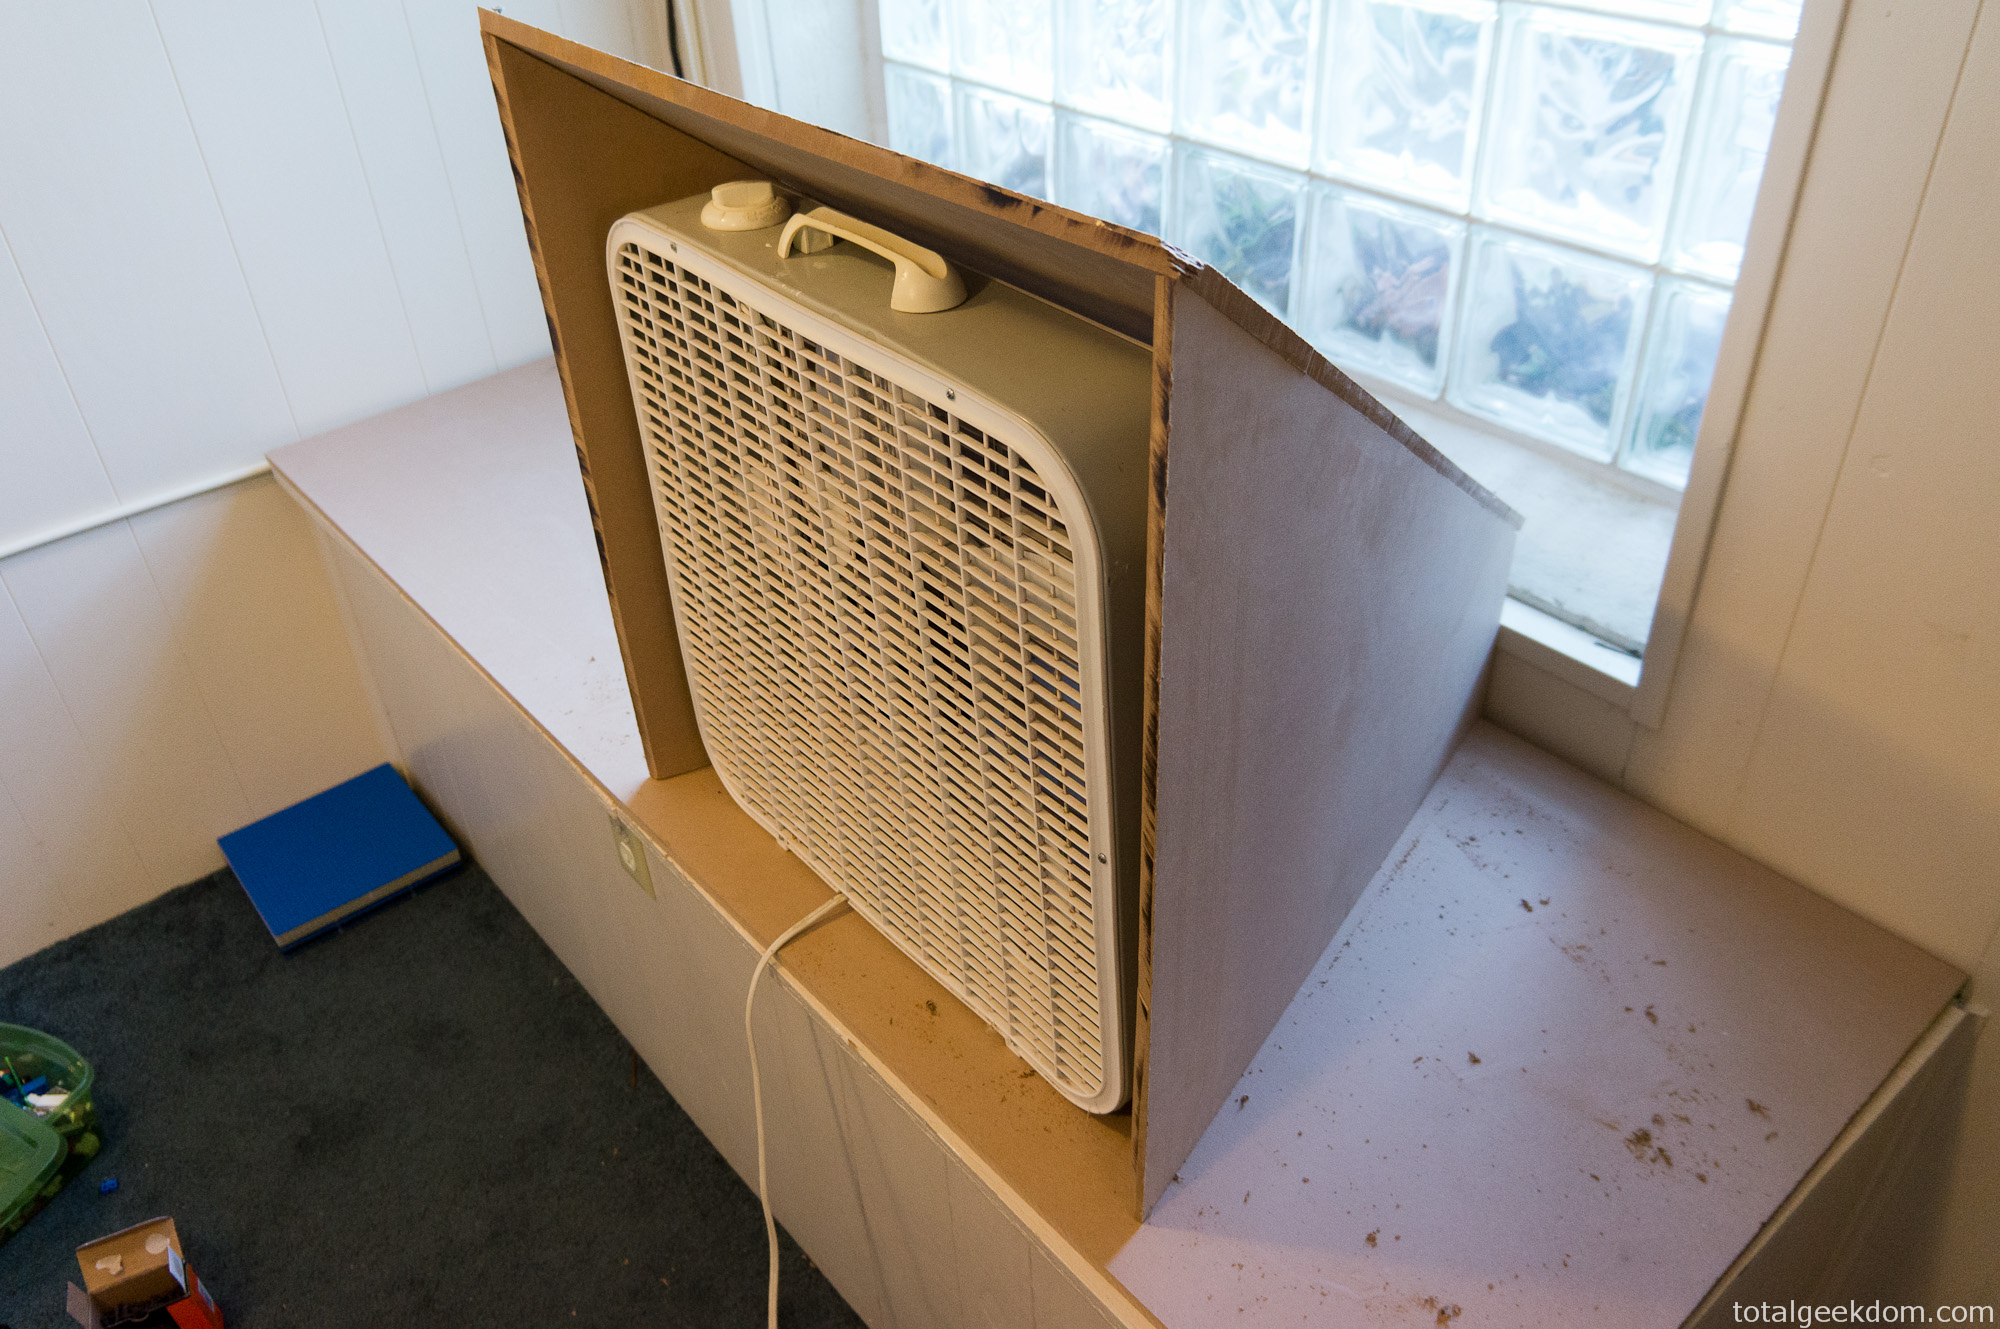
Wind Tunnel Fan Test
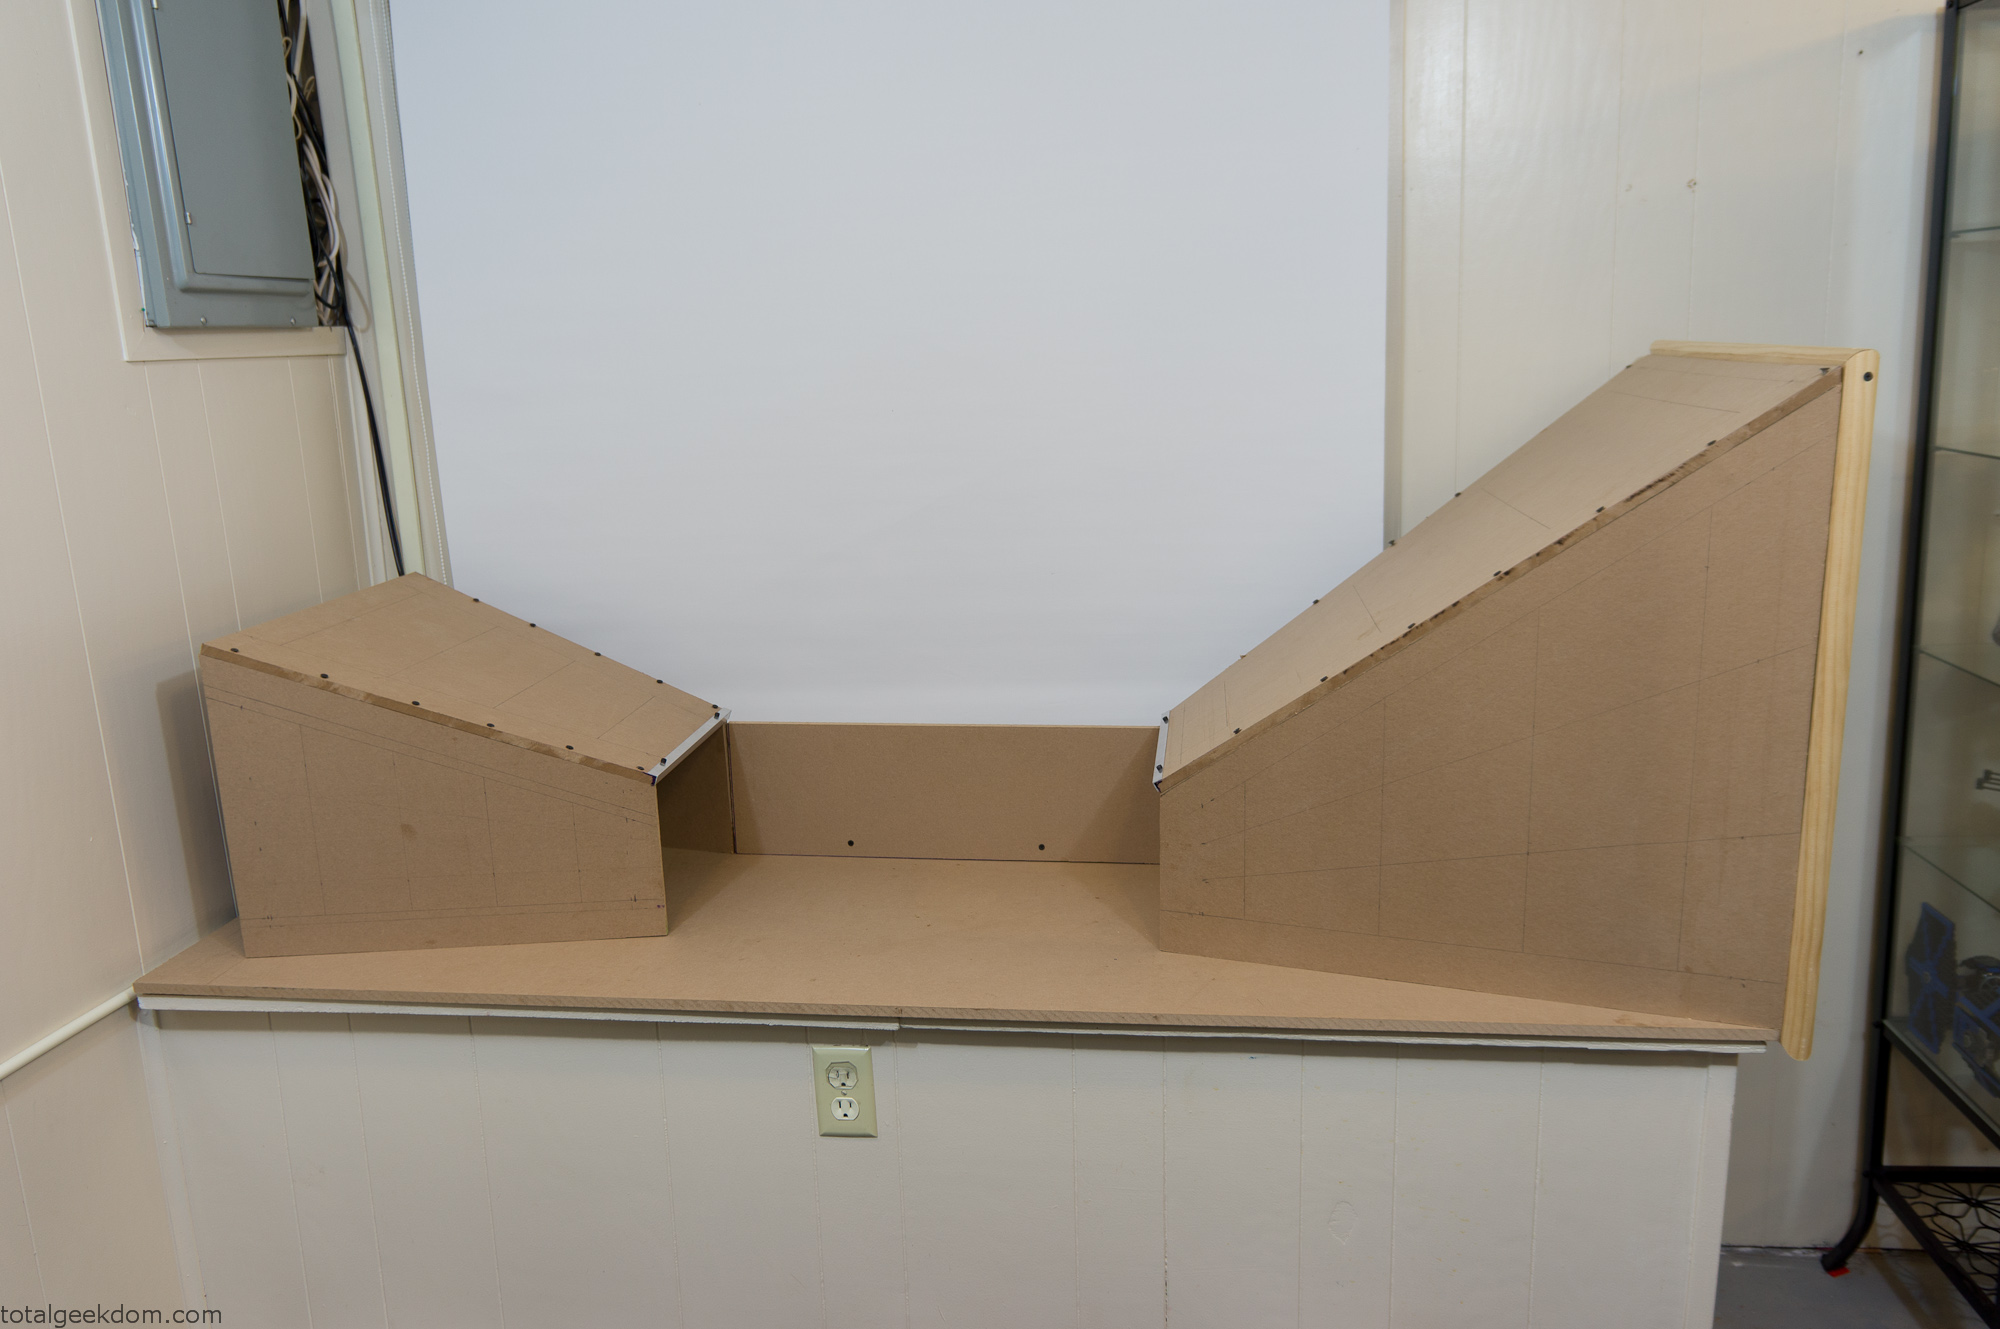
Tunnel Layout Mockup
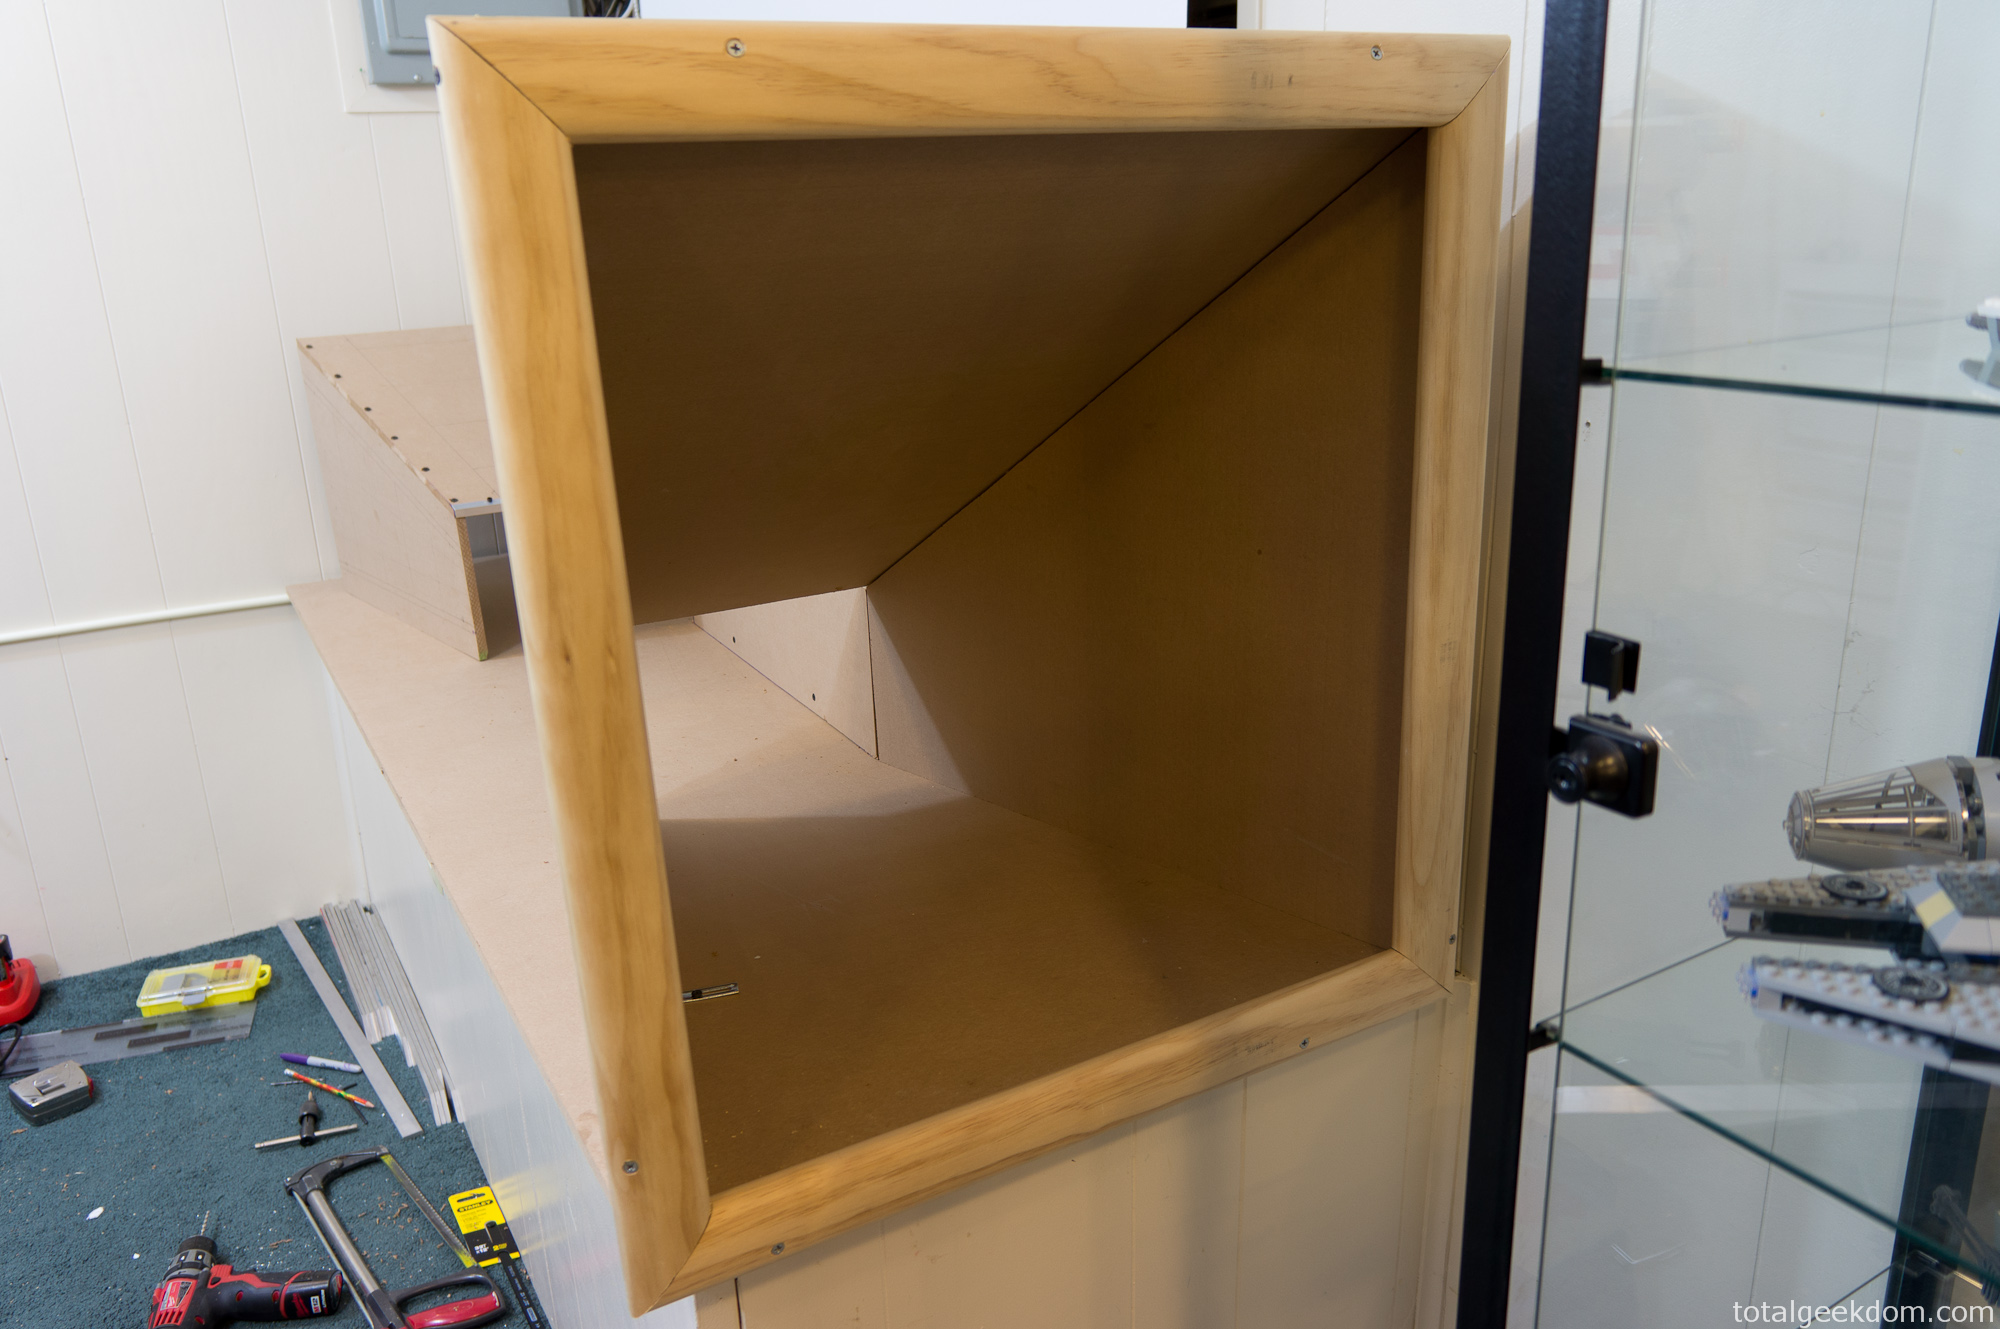
Wind Tunnel Inlet Mockup
Then I moved over to working on all the finishing and edge pieces. I bought some cheap pieces of angle aluminum from the hardware store and cut and fit them at all the edges. I wanted a transparent section for the contraction/test section where the computer was going to reside. I used a couple of pieces of Lexan, cut to size to form a transparent window and top section.
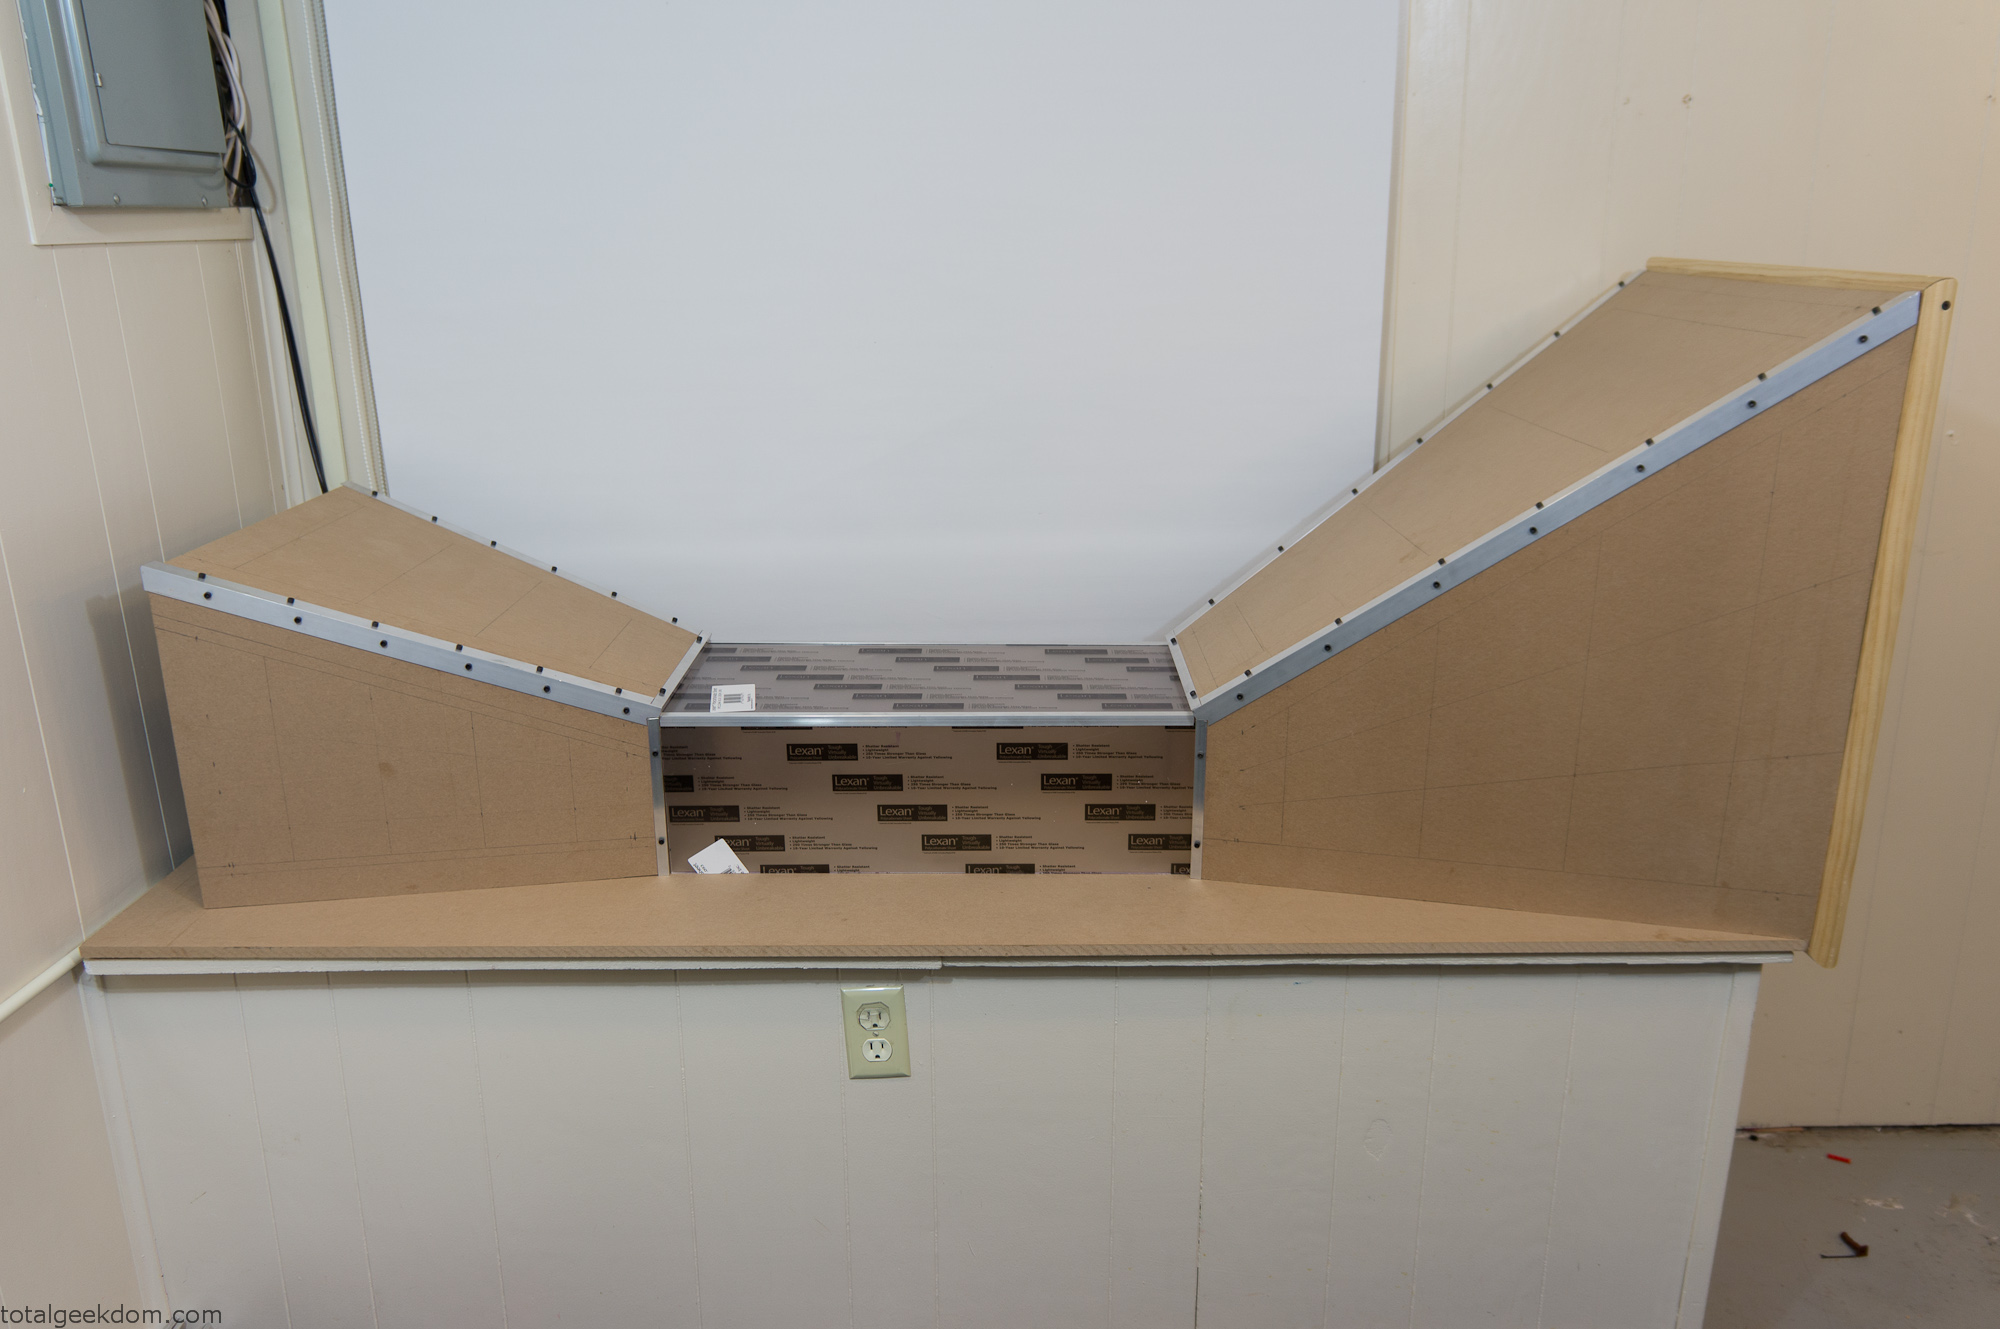
Wind Tunnel Center Mockup
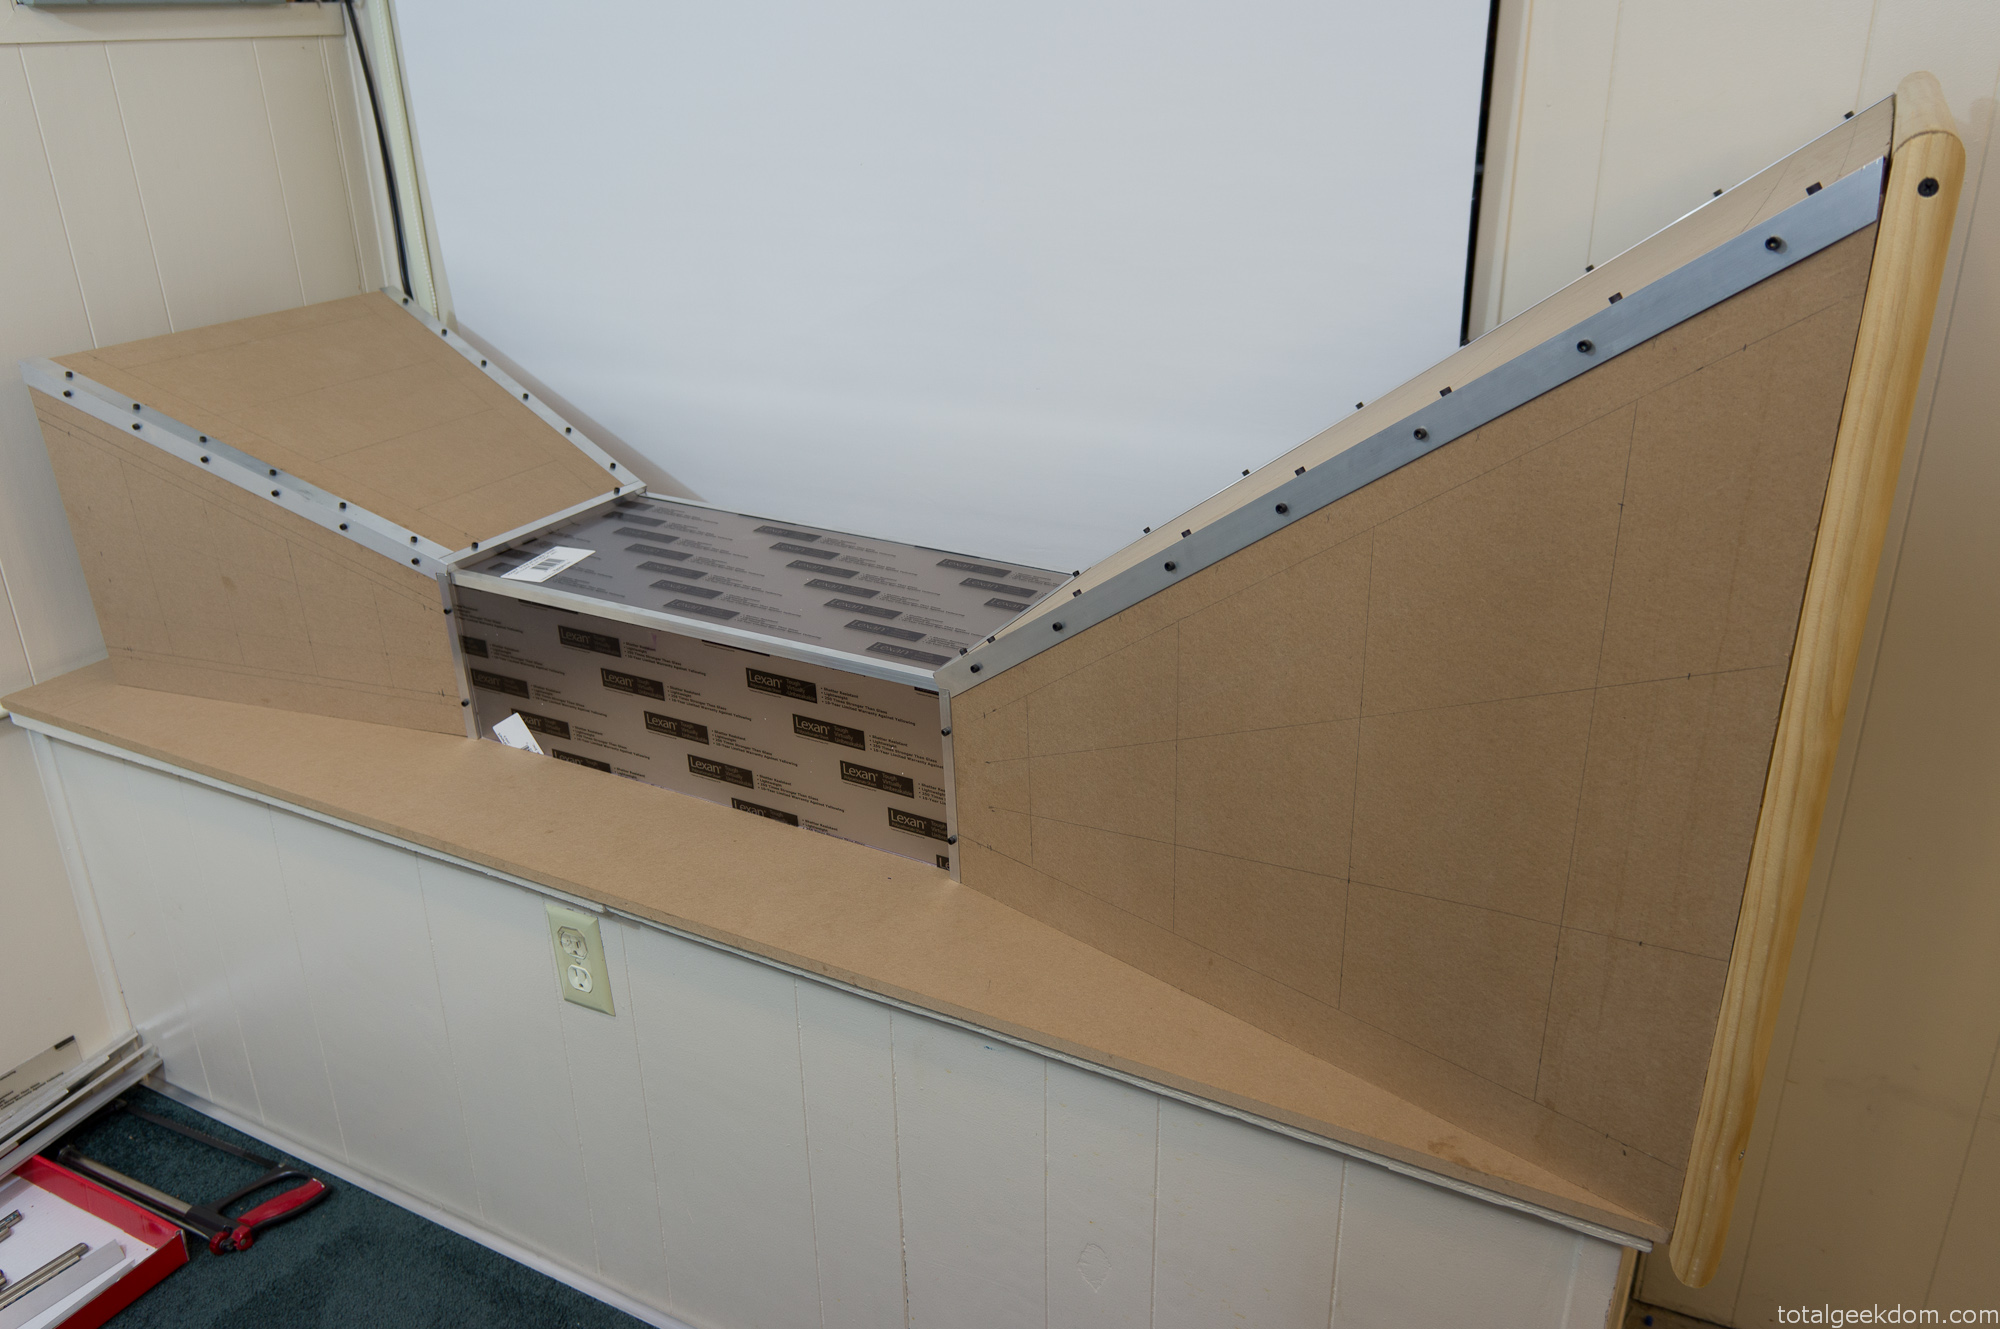
Wind Tunnel Test Section Mockup
Next, I moved onto prepping and painting all the pieces. I prepped the MDF for paint by using a sealer. From there I sanded the surface smooth before painting. I went for a darker metal color called anodized bronze. After some initial mockup with the painted pieces I later sanded them to achieve a smoother finish.
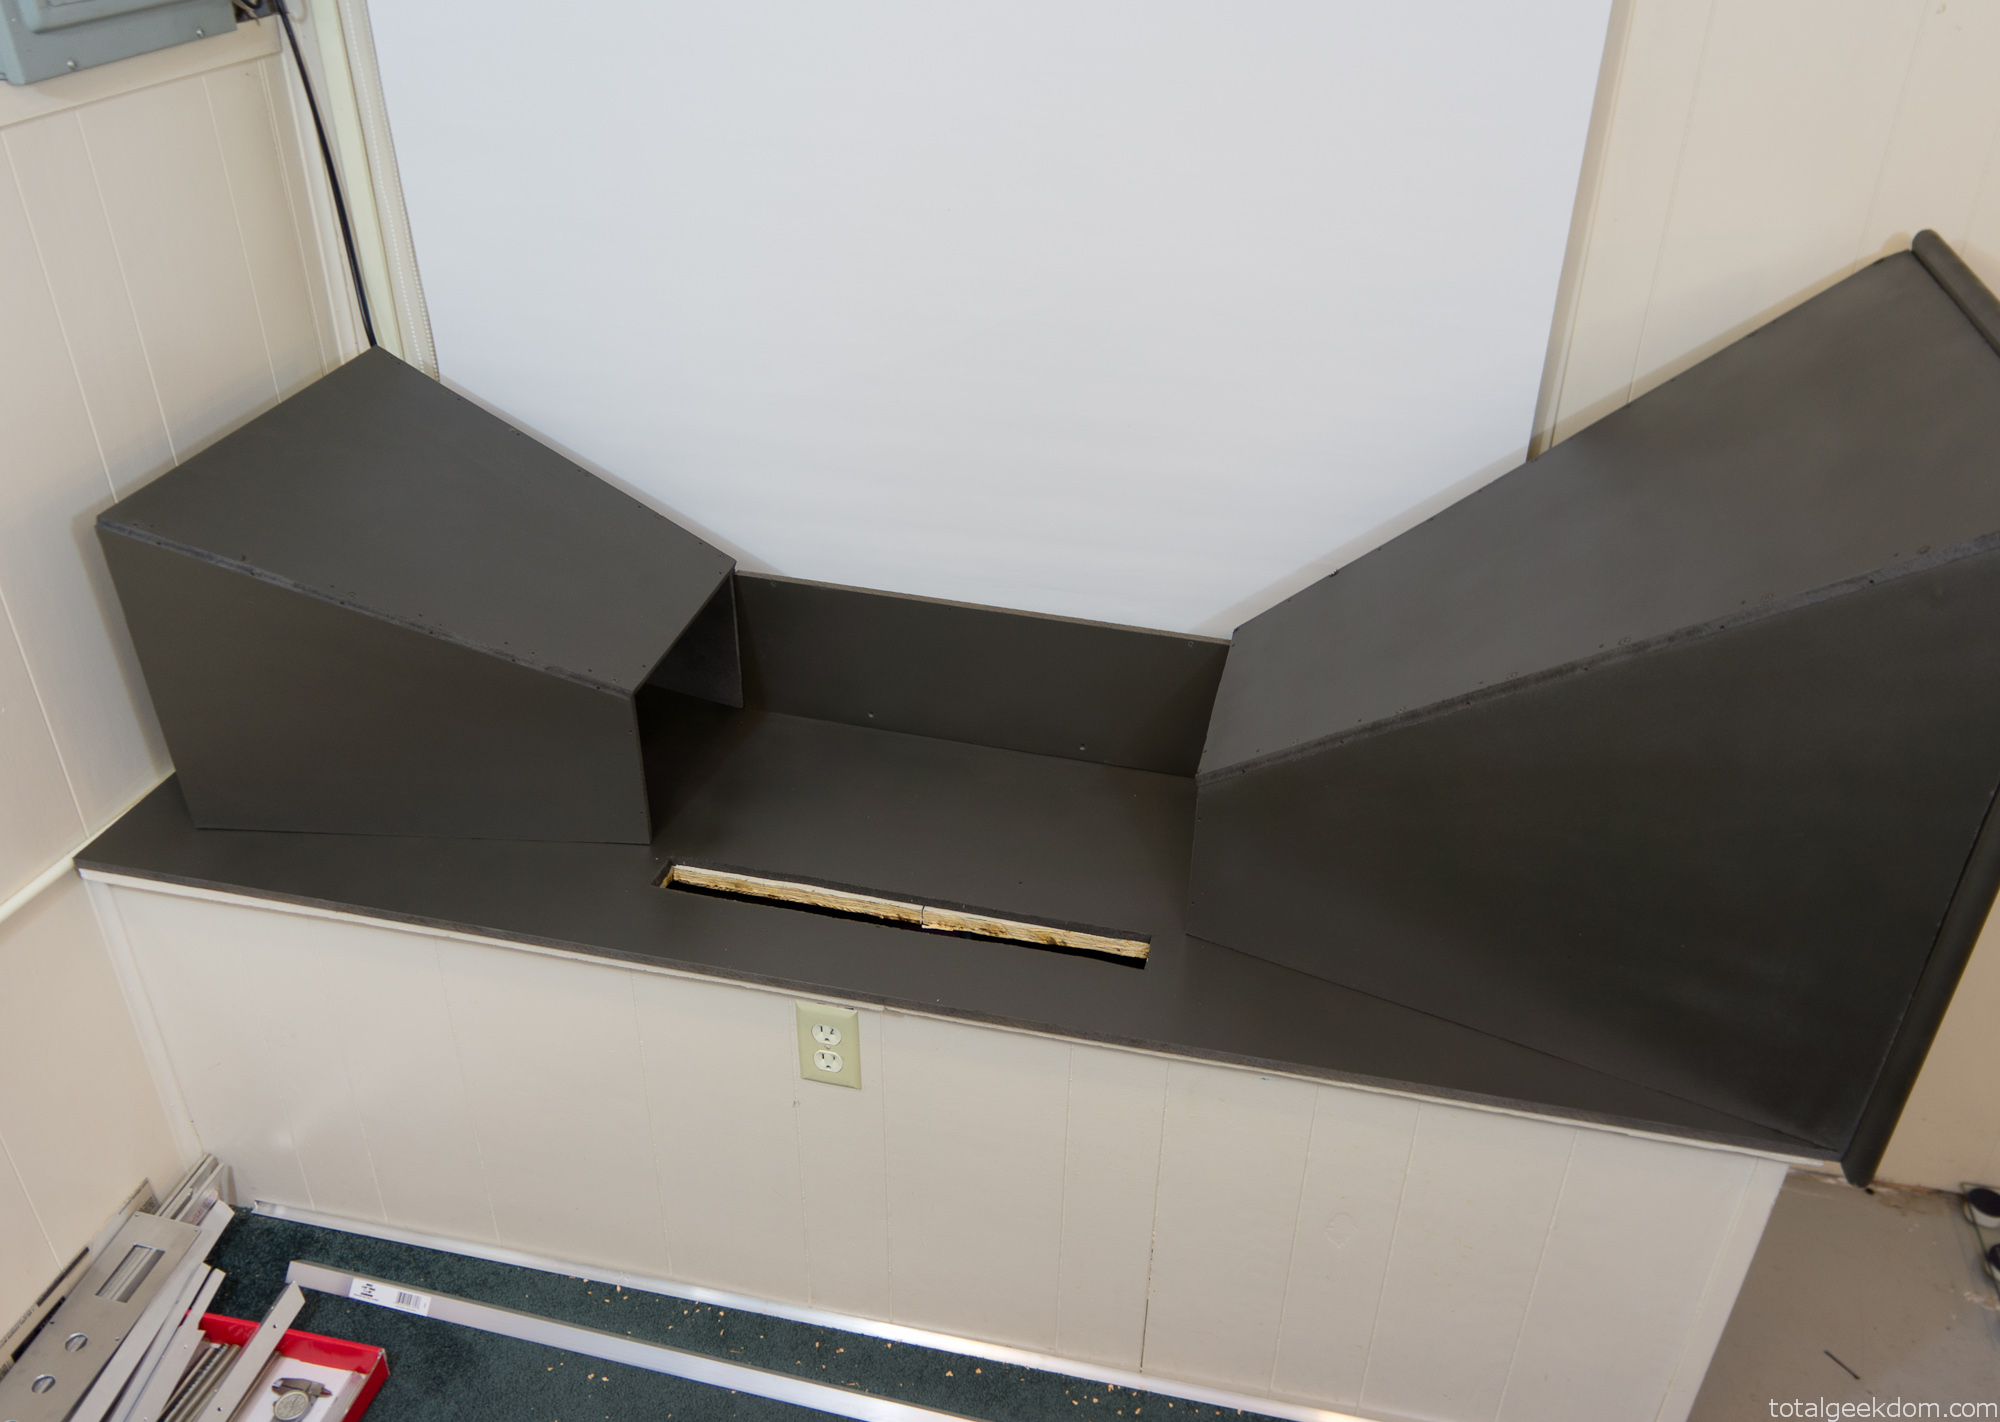
Painted Wind Tunnel Mockup
Switch/Gauge Panel
Once all the pieces were in place and the basic mockup was done I moved onto the wiring and gauge/switch assembly. I wanted a series of switches I could use to control the various functions of the wind tunnel and computer. I also wanted switches in place for future expansion so I could add a second computer.
I found some nice quality switches online, for cheap. There are 6 total switches. The first two switches with big red buttons are momentary switches that turn on the computers. (Only one used now, the second for a future computer)
The lever switches control both the fan and the power to the LED temperature gauges
The key switches are wired to the computer power switches and also to the fan switches. The key switches prevent anyone from turning anything off, but most importantly of all, I always wanted two key switches so that I could pretend I had a nuclear submarine that required two keys in order to launch. I always use my Sean Connery accent when using the key switches in order to maintain authenticity.
I also added some nice LED temperature gauges that I found online for cheap. They have remote probes and only require a 12v power source. I placed them on the ends of the panel so that I could easily monitor the inlet and exhaust temperatures of the wind tunnel. For power I used an old Dell 12v speaker power adapter and rewired it to the switch to provide power to the temp gauges.
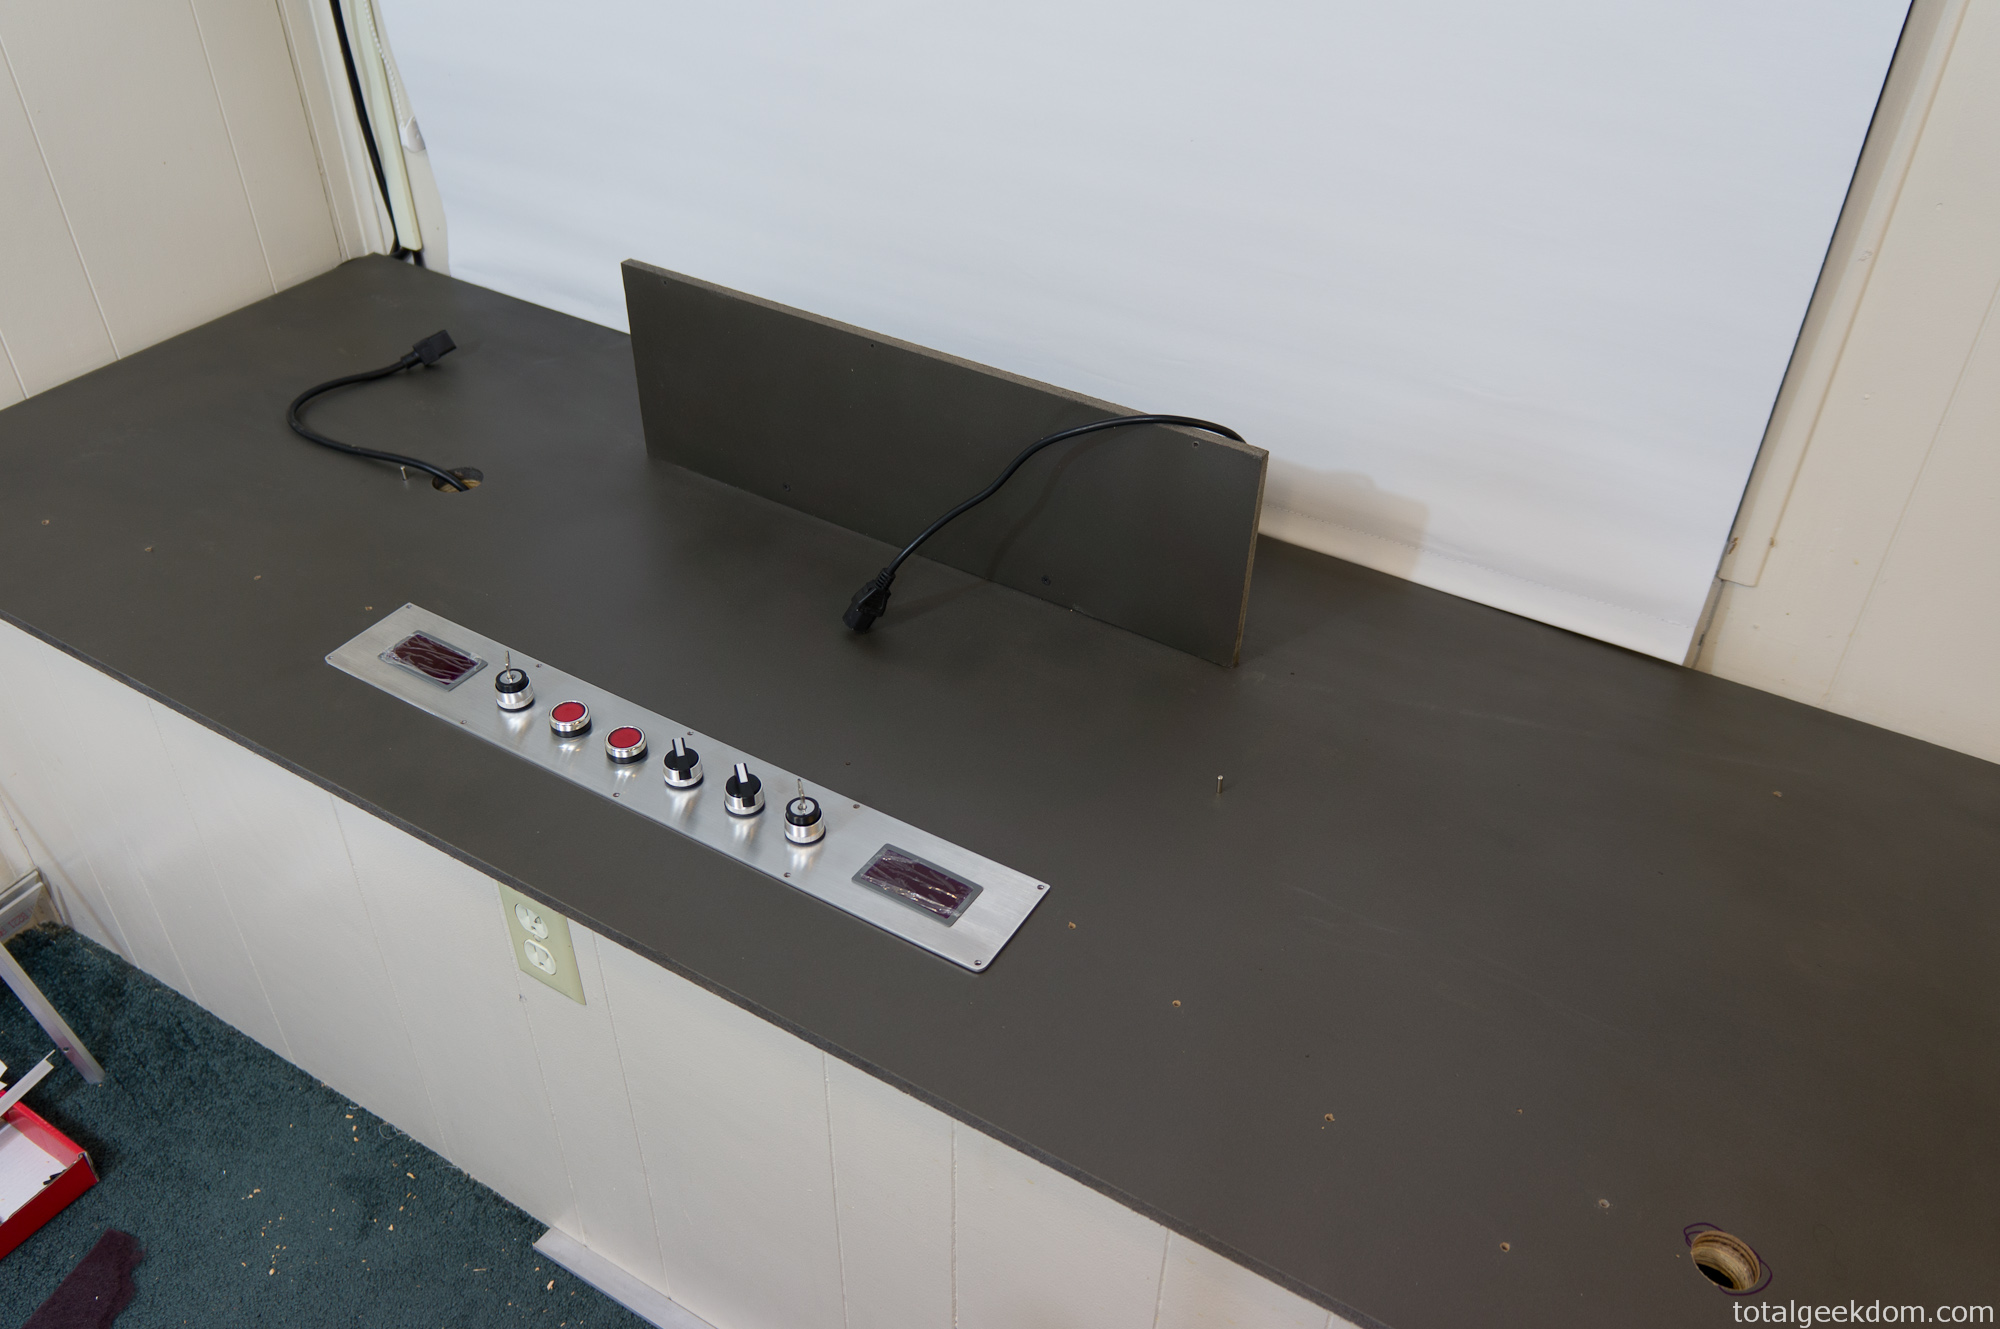
Wind Tunnel Gauges Mockup
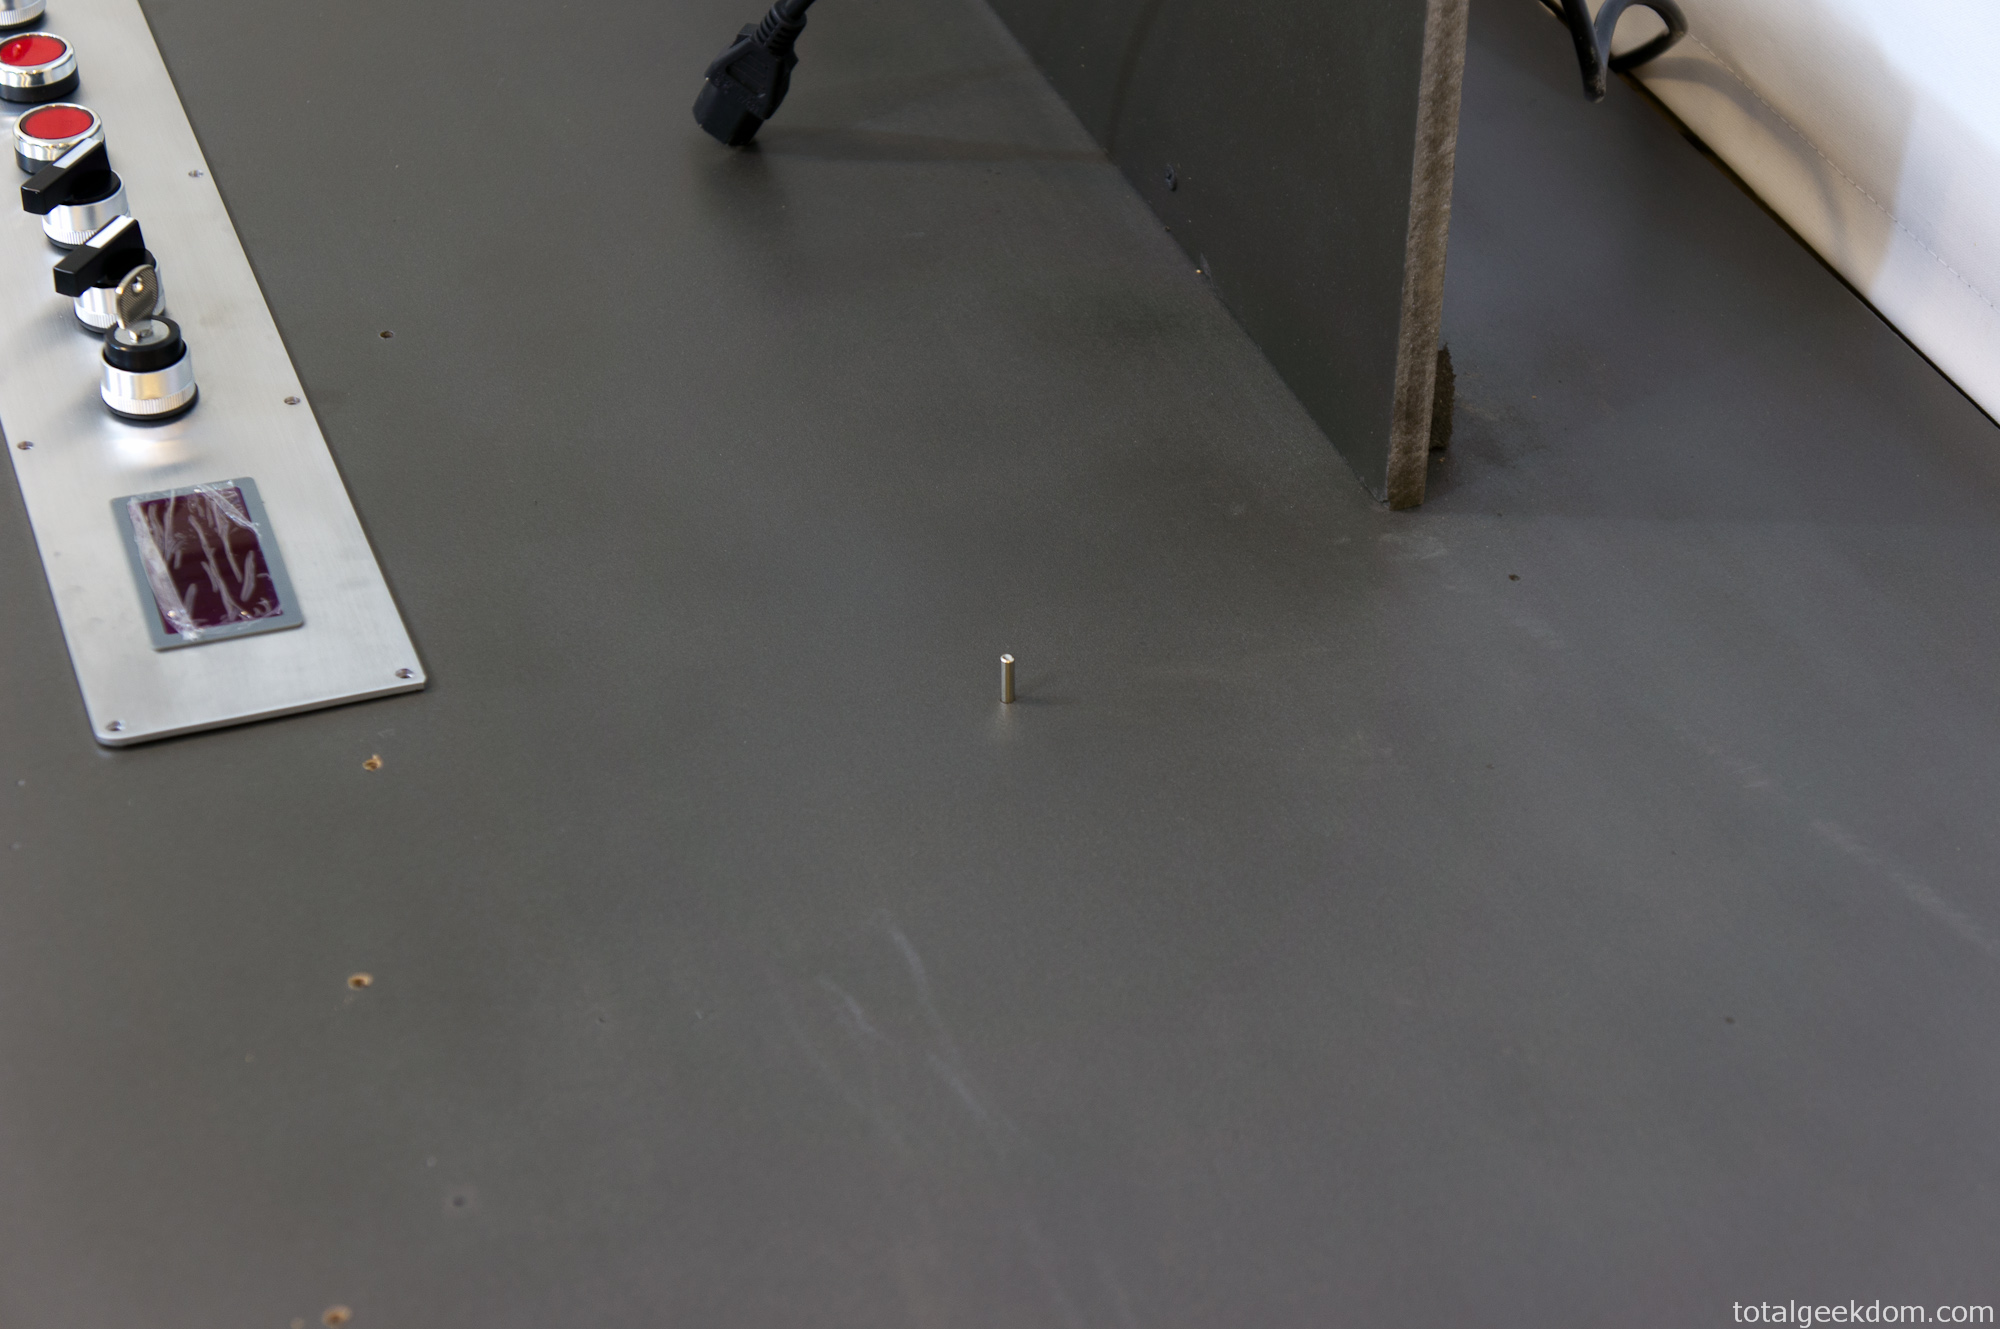
Wind Tunnel Temperature Probe
The panel is a piece of aluminum that I cut holes in, to which I mounted all the gauges and switches. I’m pretty happy with how it all turned out. All the power, plug-ins and connections are beneath the switch/gauge panel.
Trimwork/Aluminum Edging
All the angled aluminum is secured by 10-24 screws which I drilled and tapped into the MDF. It’s surprisingly a very strong combo. I would recommend using a step down on the drill size when you tap into MDF as it’s not as robust as actual wood. After what felt like days upon days of drilling and tapping I finally finished installing all the trim and screws.
The aluminum edging itself was polished with varying grits of sandpaper to achieve a brushed look. The edging at the bottom of the inlet and exhaust sections firmly holds both sections in place.
The aluminum braces with steel tubes that are on the top of the intake and exhaust sections are decorative. I picked up some extra scrap stuff from the metal yard for another $5 dollars. The stainless tubes contrast nicely with the brushed aluminum.
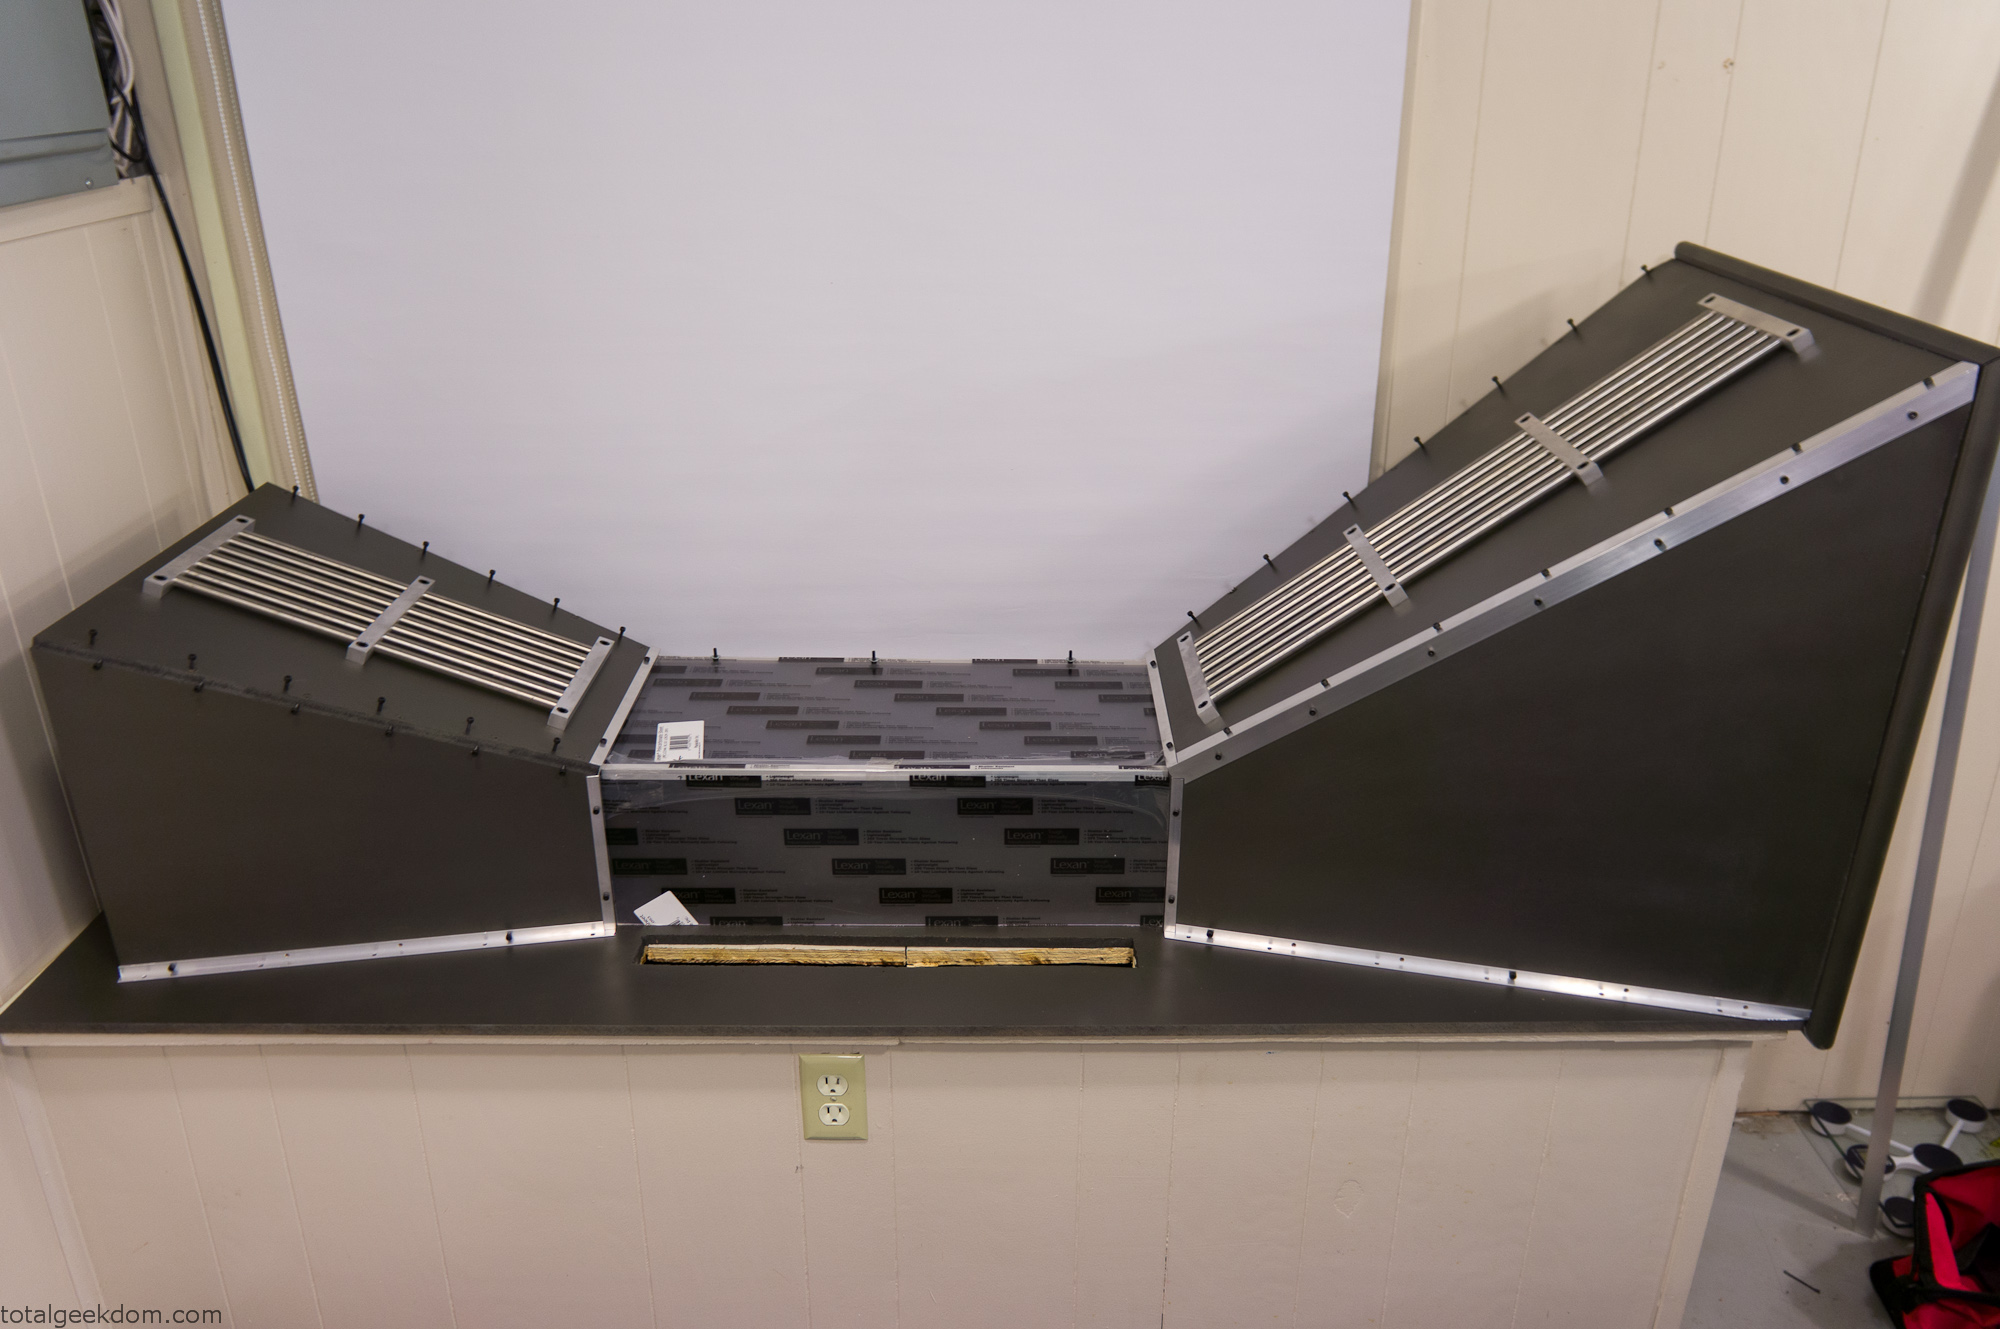
Wind Tunnel Trim Mockup
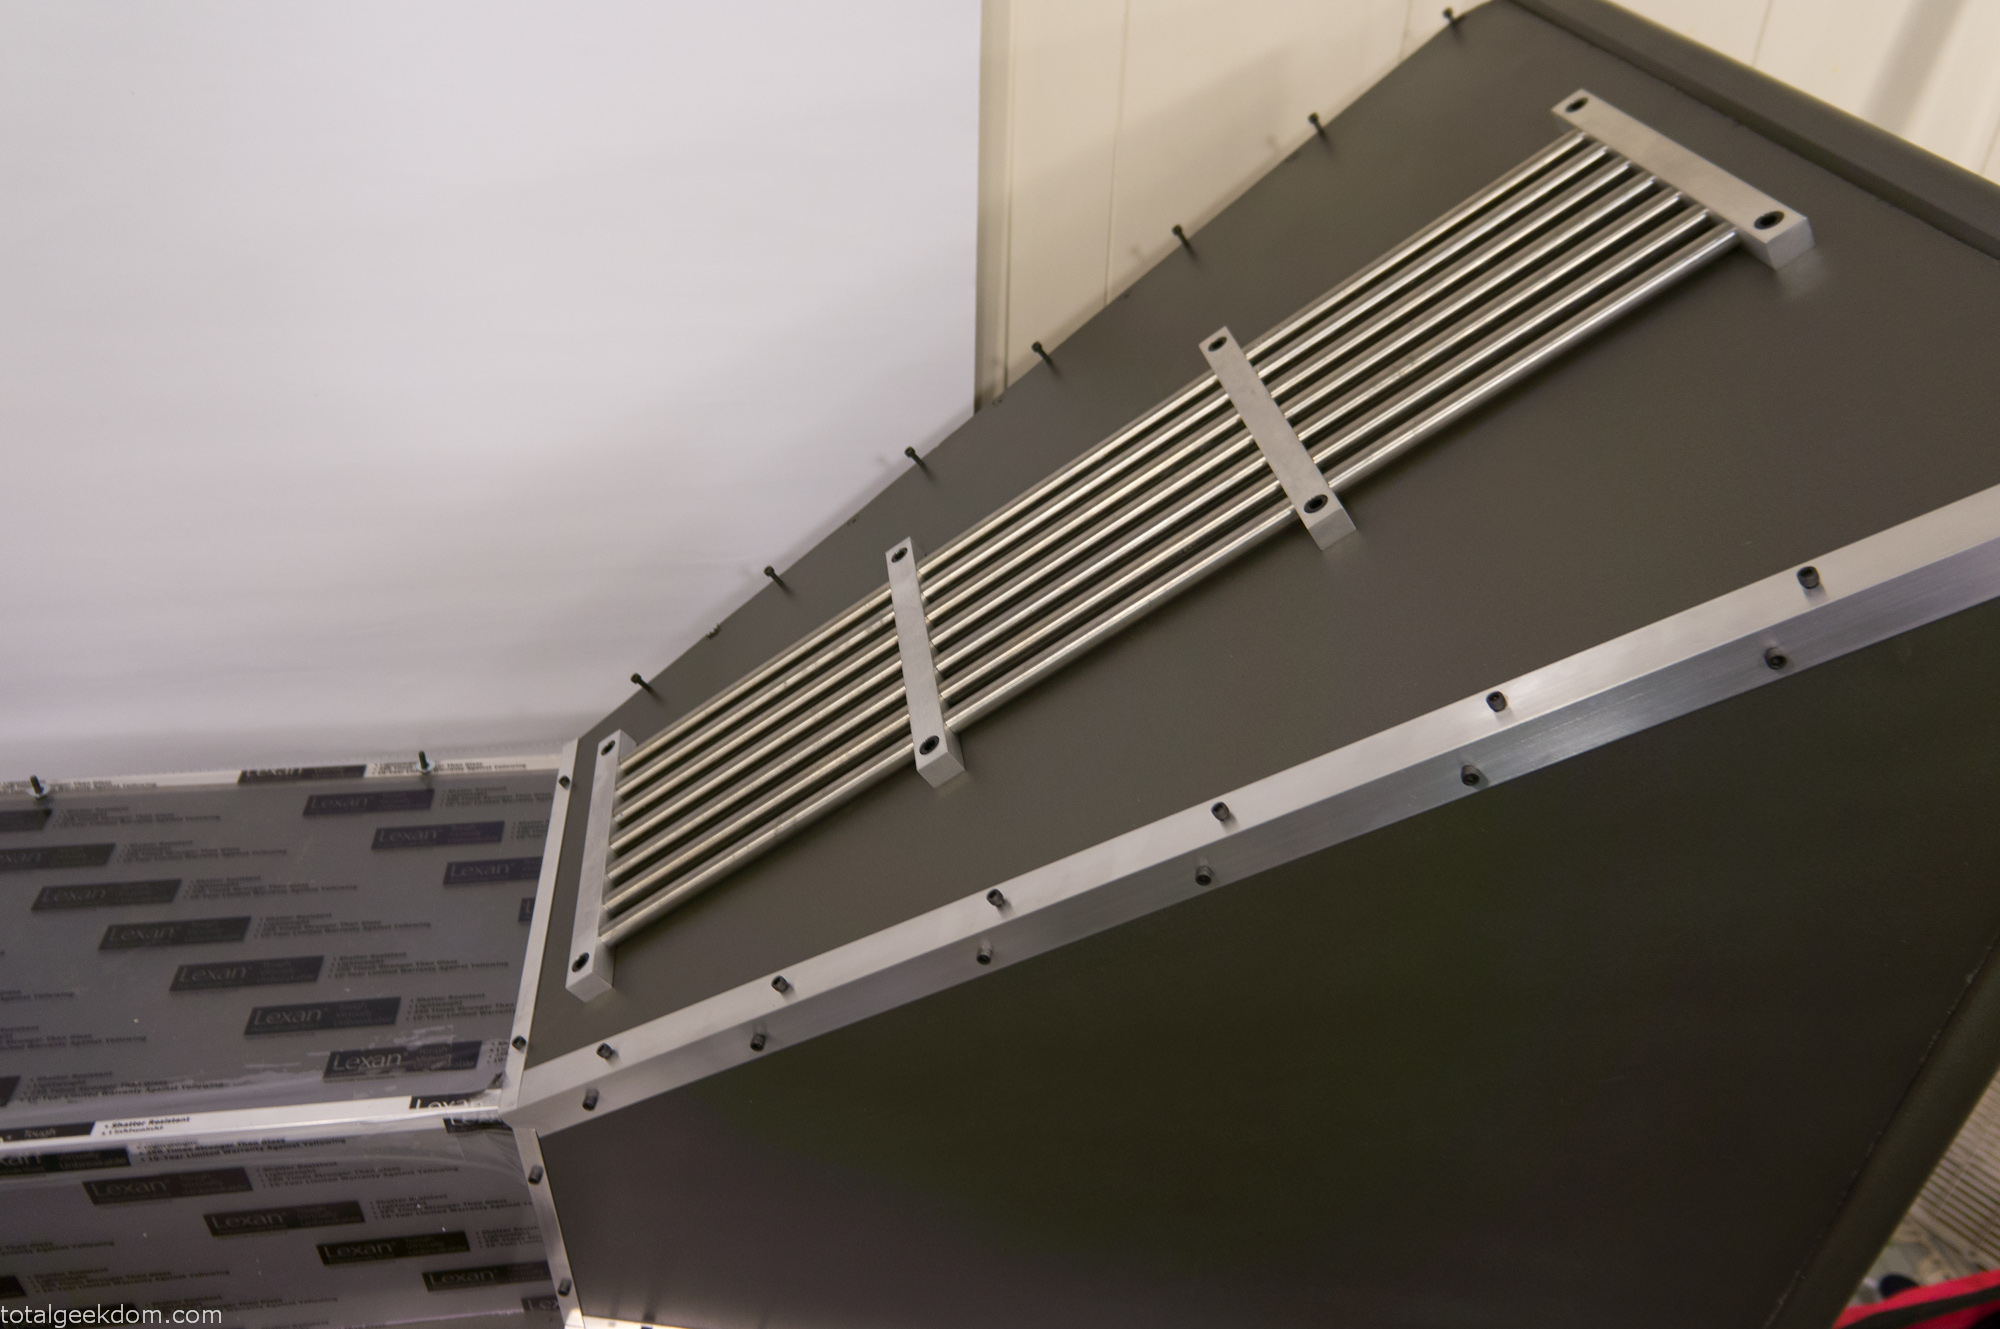
Wind Tunnel Inlet Trim
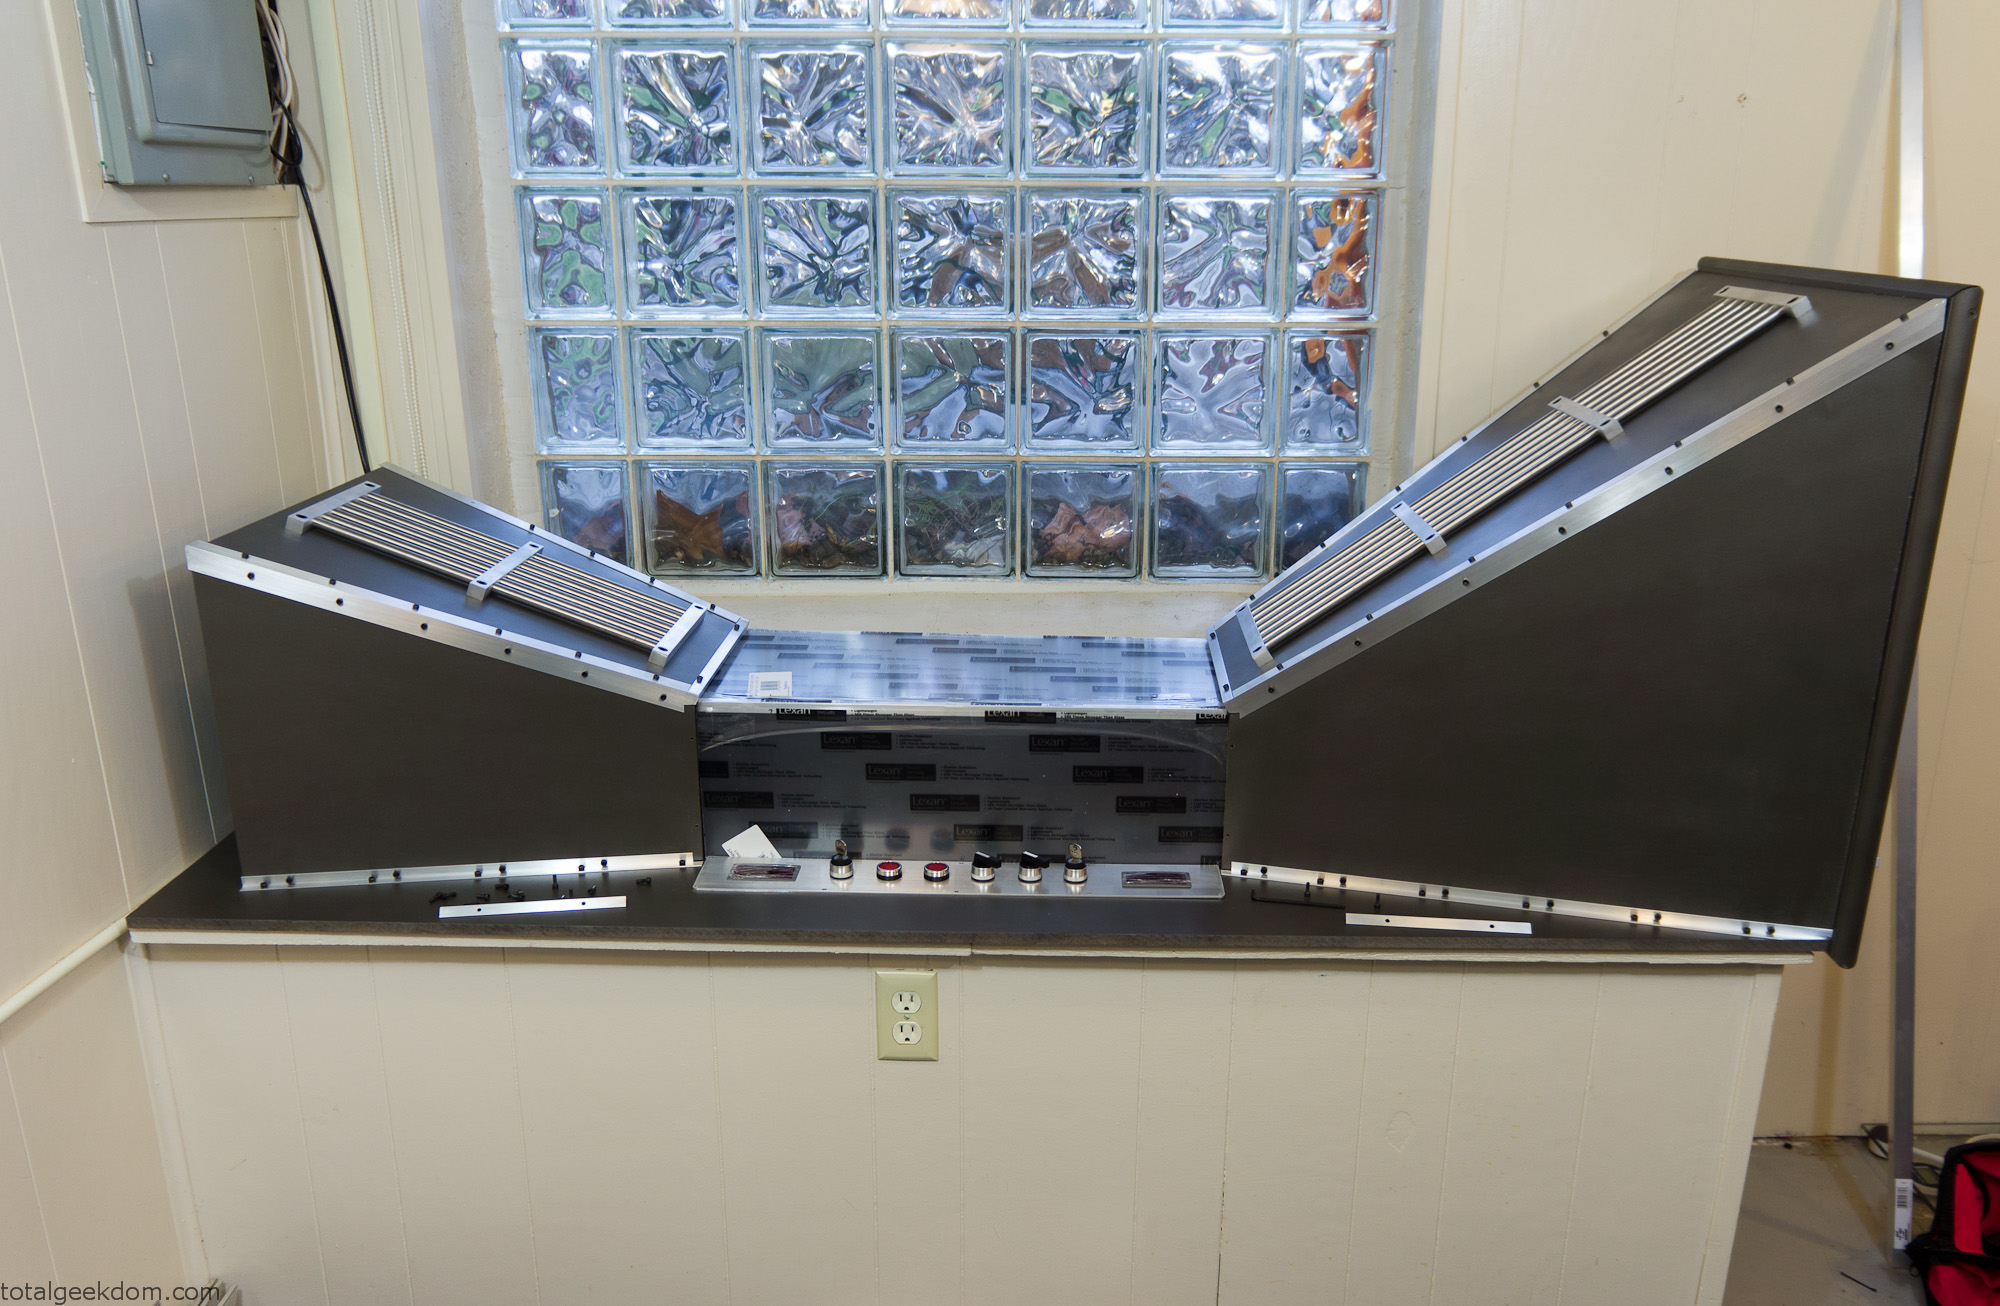
Wind Tunnel Full Mockup
Monitor/Keyboard Stand
I debated buying a monitor stand, but since I was attempting to do this as cheaply as possible, I thought it might be a better idea to make my own. At the metal salvage yard I had purchased a junk, cutoff piece of aluminum for $5. Using that piece, I machined a stand to mount the monitor to, and then attached a tray I made for the keyboard.
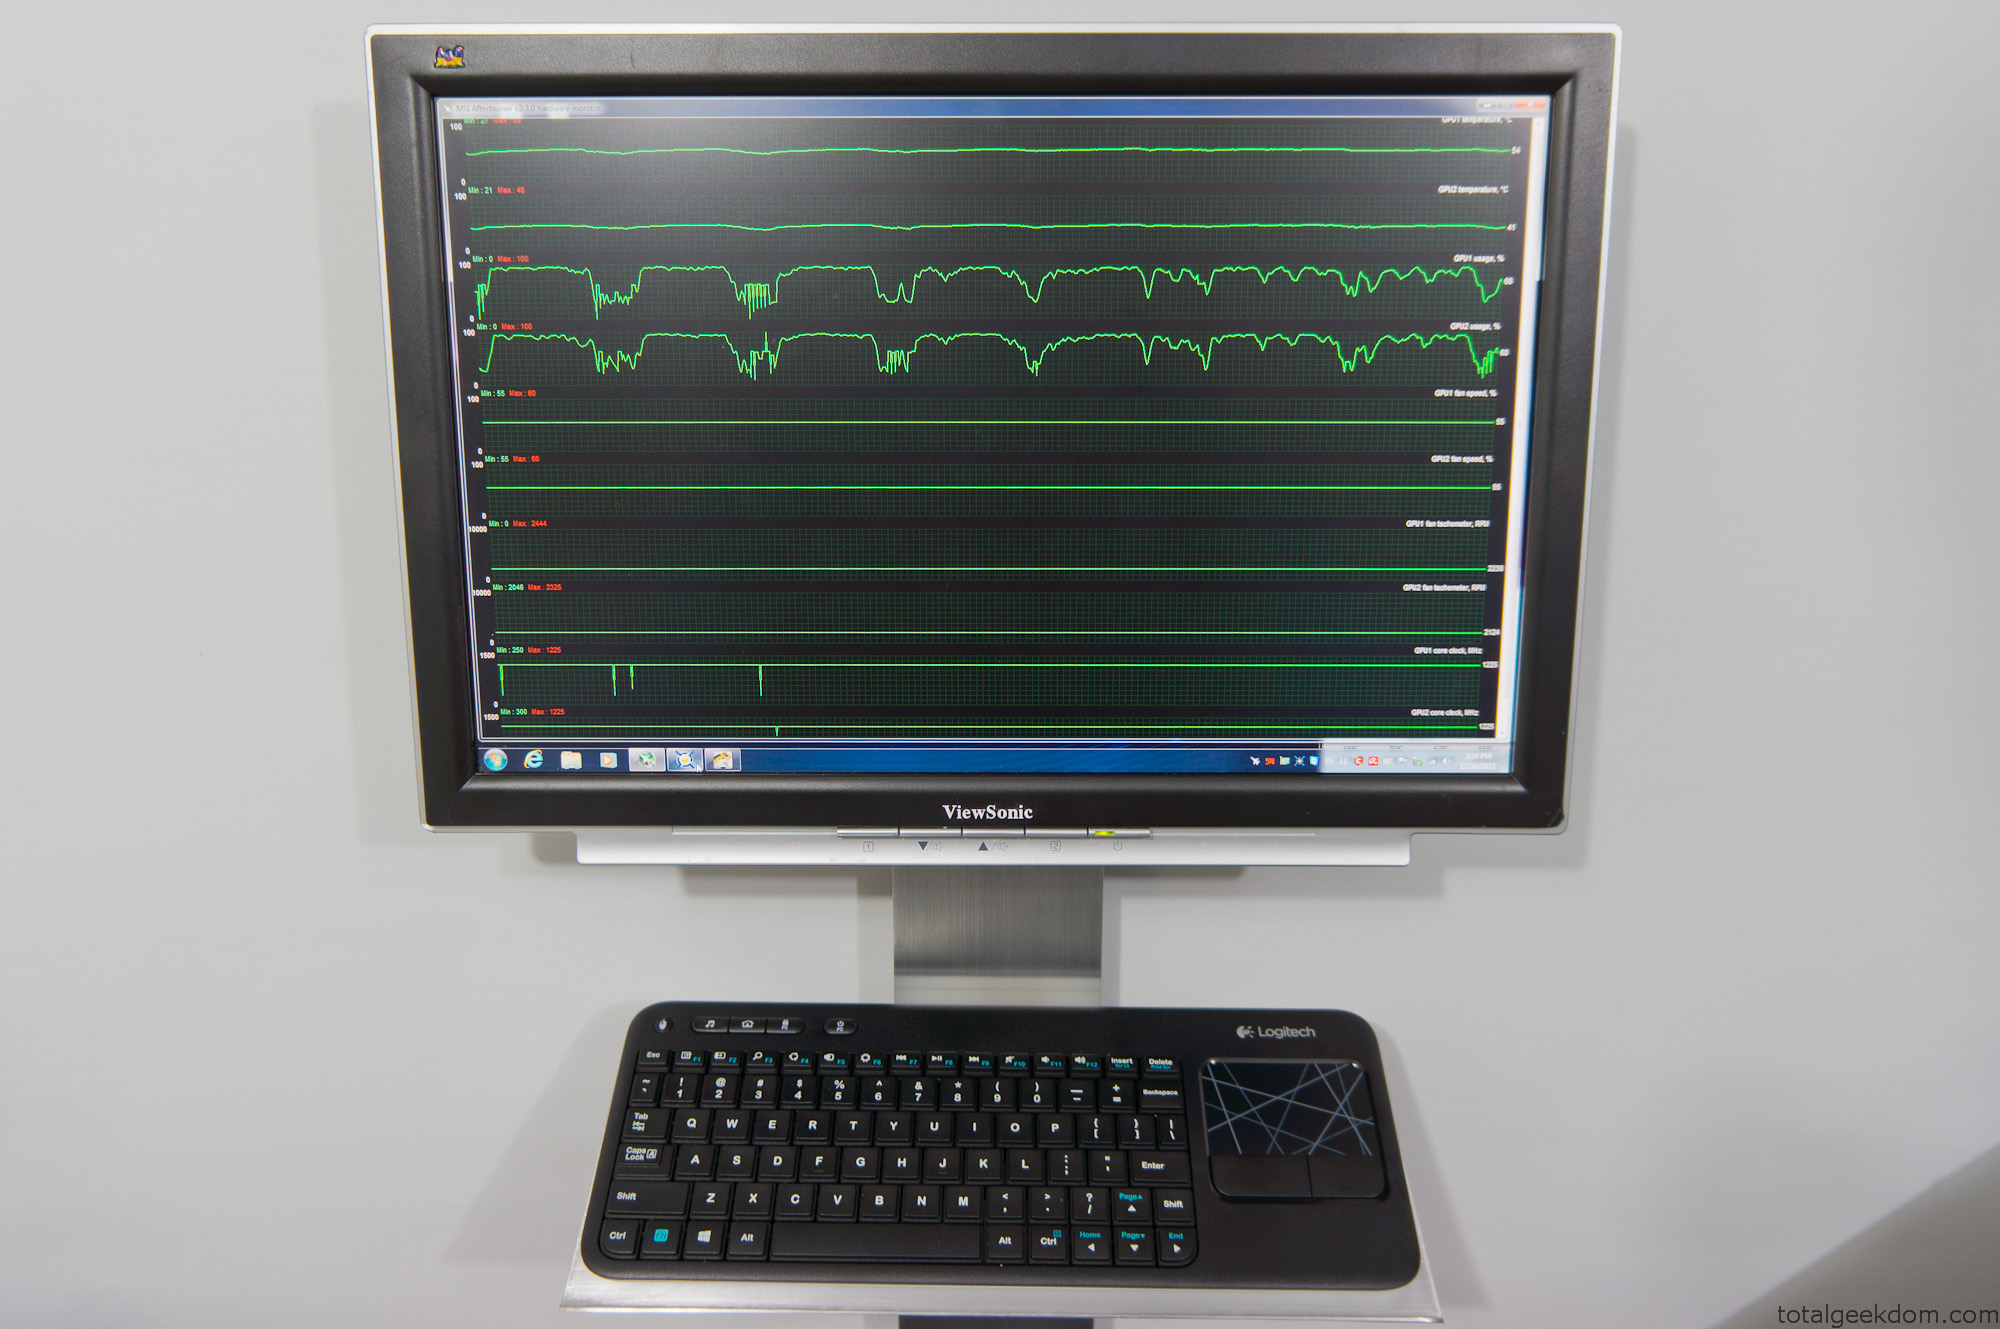
Wind Tunnel Monitor – Keyboard Stand
The monitor itself was purchased on eBay and only cost $15 because it was broken. After adding a couple new capacitors it worked just fine. It’s a 20″ viewsonic.
Wind Tunnel Air Intake
I designed the air intake section to try and minimize fan noise. It seemed moving the fan deeper inside the intake section would cancel out a little bit of the blade noise. Additionally, I added a couple of layers of open grating which helped to minimize fan noise. With a decibel meter I measure around 65-67 decibels, which is significantly quieter than the 75-77 decibels that the Lego folding farm measures.
The fan sits about 4 inches inboard of the intake. I used some molding to form a radius at the inlet to smooth the airflow coming in around the inlet opening. I used some open “egg-crate” style plastic drop-ceiling panels, cut them into sections and placed them in front of the fan. For the intake opening I used more of the ½” angle aluminum, cut a bunch of pieces and placed them with the corner facing out. I spaced them very close together allowing a small 1/8” or so space between them.
This minimizes airflow restriction, because of the very large surface area of the intake inlet.
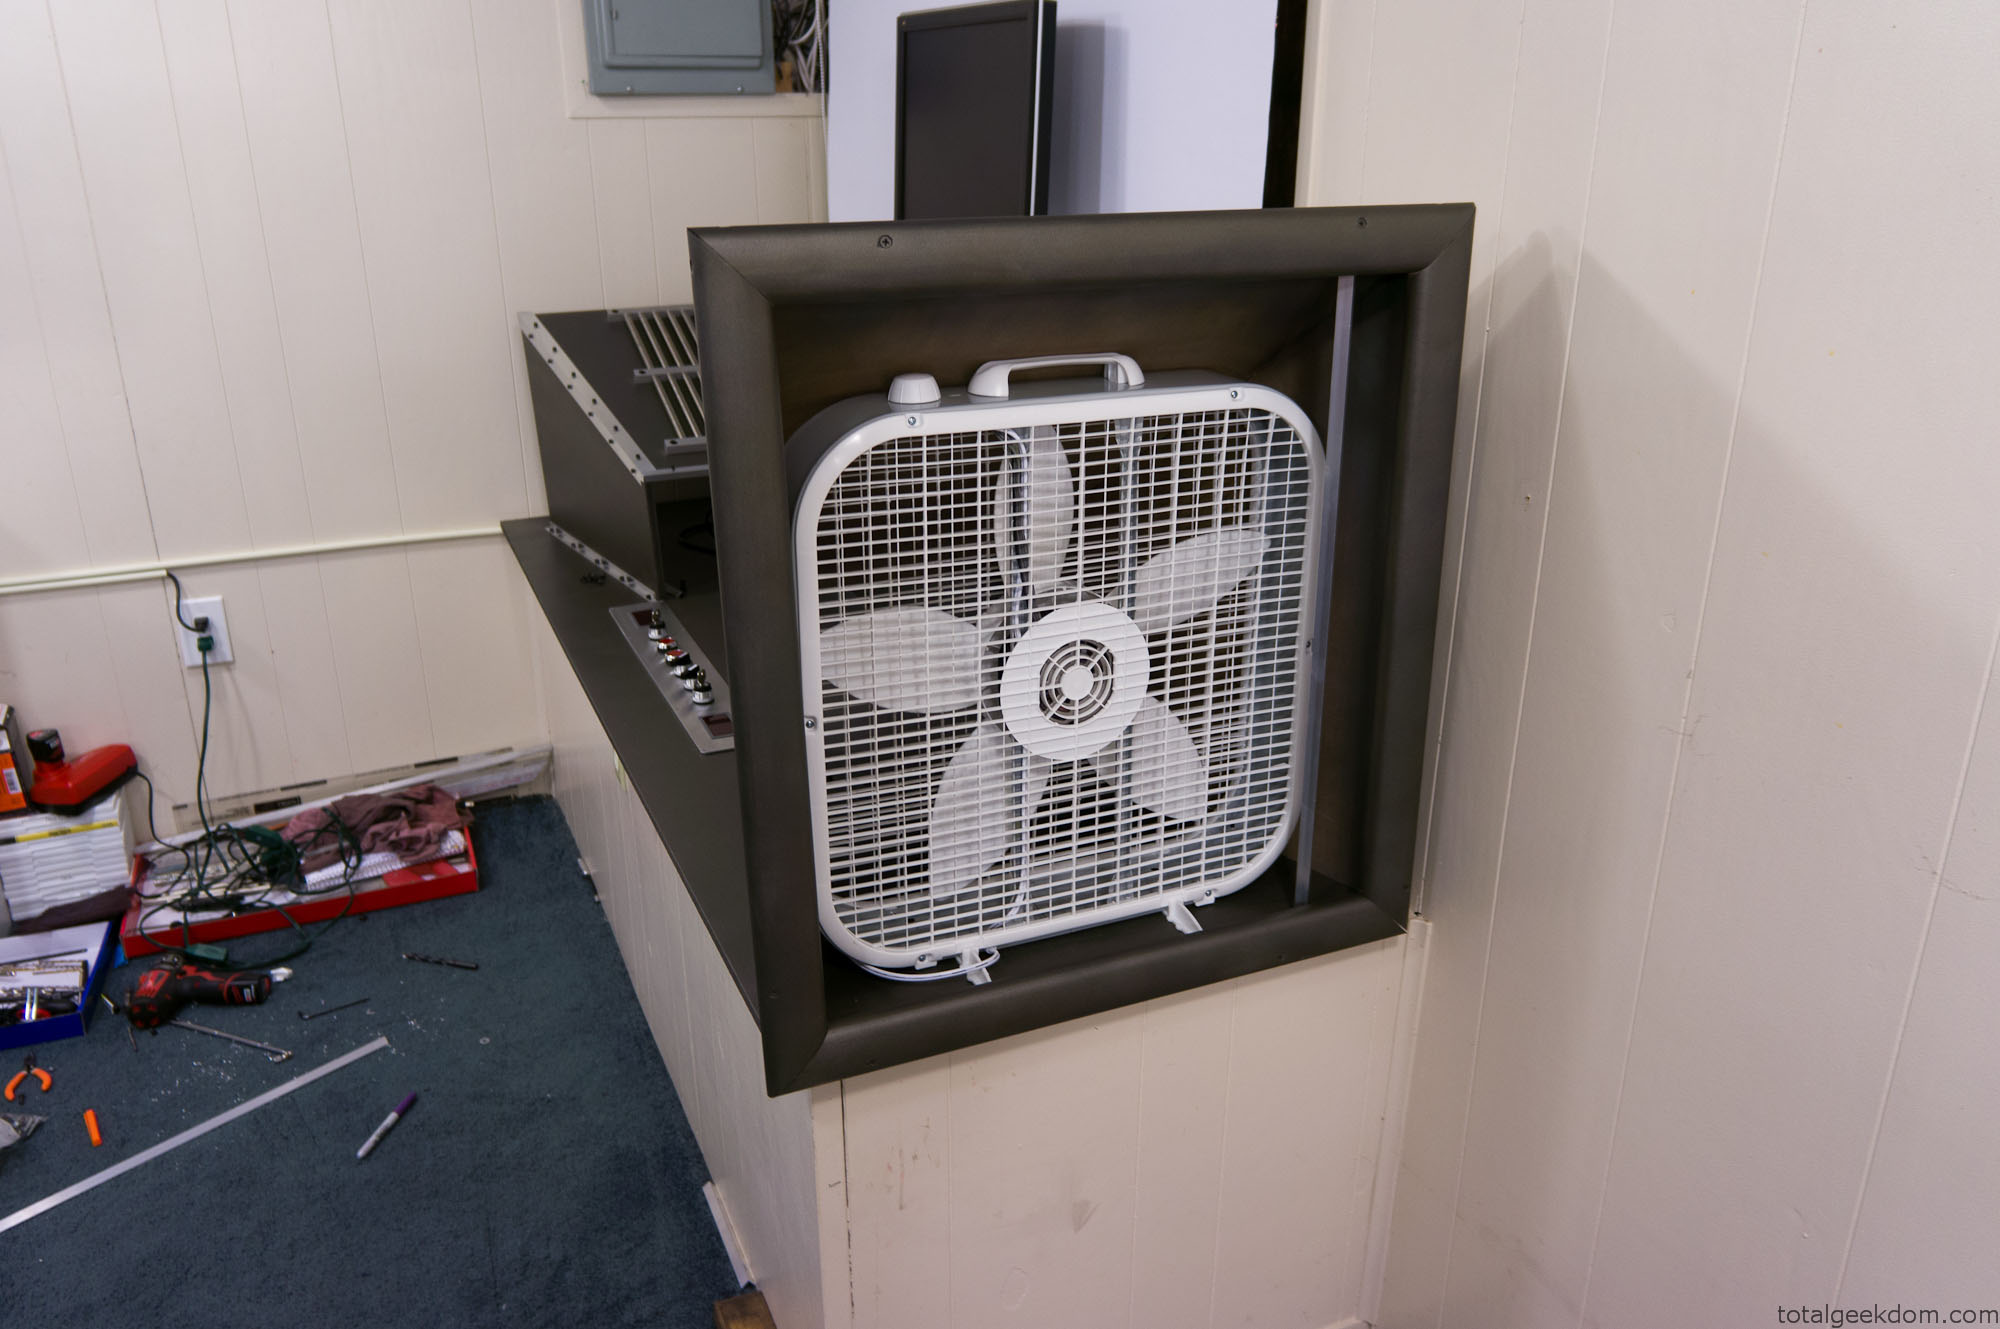
Wind Tunnel Fan Testing
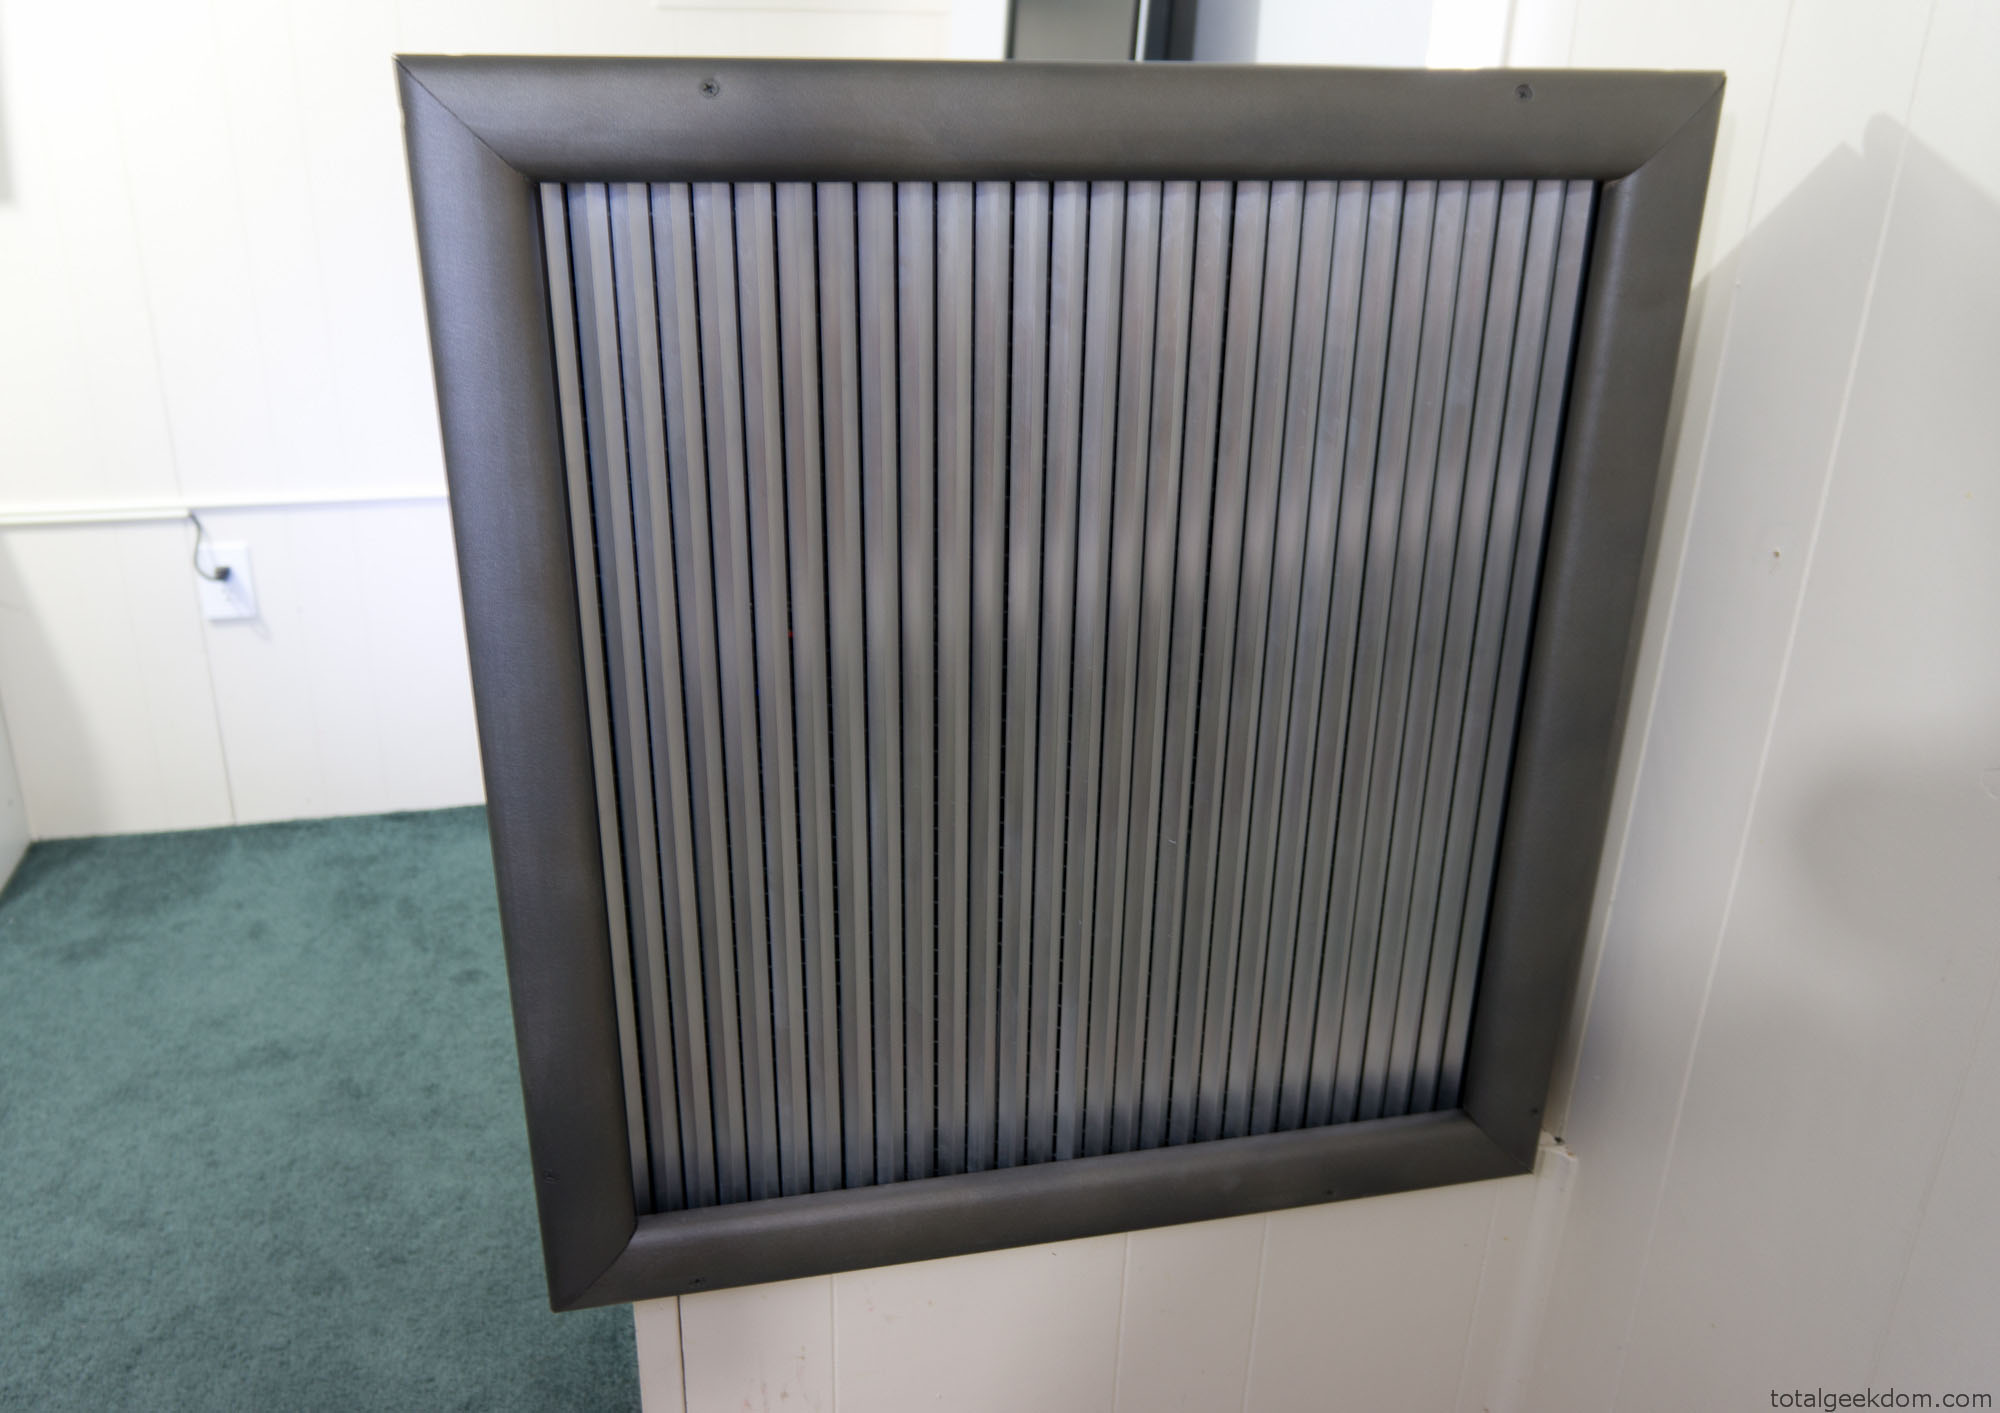
Wind Tunnel Computer Air Inlet
Airflow Testing
Using my anemometer (wind speed tester) I’ve been able to record airspeeds and velocities. The following numbers were measured with the fan set to its lowest setting
Inlet Air Speed- 0.6 MPH or .88 ft/s (Measured at inlet grill)
Exhaust Air Speed- 1.4 MPH or 2.05 ft/s (Measured at exhaust opening)
Fan Output Air Speed- 5.0 MPH or 7.33 ft/s (Measured free standing, no tunnel)
Contraction Section (Without Computer) Air Speed– 12 MPH or 17.6 ft/s (Unobstructed flow- Empty Test Section)
Contraction Section (With Computer) Air Speed- 9 MPH or 13.2 ft/s (Obstructed Airflow)
CFM (Cubic Feet Minute)- 1200 CFM
This data shows that the basic design of the wind tunnel (inlet, contraction and exhaust section) does an excellent job at increasing air velocity.
The gain in airspeed from the shape of the tunnel is around 240%. This is a very low speed example of the potential of a subsonic wind tunnel. I also tested the fan at its highest setting and recorded air speeds of around 26-30mph through the contraction/computer section of the tunnel. This is just with a cheap box fan. Adding a higher speed fan would possibly allow for greater velocities, though the cooling benefits on the computer components would need to be tested at such high speeds.
The goal is removing as much heat as possible from the computer components. There is an ideal point where airflow would be moving just fast enough for heat transfer to be most efficient.
Airflow & Fan Electricity Efficiencies
Another interesting point is the efficiency of one large fan as opposed to numerous smaller fans. Comparing the wattage, costs, and flow reveals the following:
Single Box Fan
1200 CFM = 96 Watts
Purchase Cost- $20
To replicate 1200 CFM, I would need roughly 15 smaller 120mm (Based on Scythe Gentle Typhoon 120)
Scythe Gentle Typhoon (Single Fan)
80 CFM = 12 Watts
Purchase Cost– $20
Scythe Gentle Typhoon (15 Fans)
1200 CFM = 180 Watts
Purchase Cost= $300
Stepping up to an 200mm fan would require roughly 10 fans (Antec Big Boy)
Antec Big Boy (Single Fan)
120 CFM = 36 Watts
Purchase Cost– $15
Antec Big Boy (10 Fans)
1200 CFM = 360 Watts
Purchase Cost= $150
Using a single larger fan cuts costs considerably. The box fan is roughly half the wattage of the 120mm fan arrangement and uses roughly one quarter the power of the 200mm fan arrangement. The initial investment cost of the box fan is also considerably cheaper than buying numerous smaller fans.
While its not possible to use a box fan with most computer builds, in this application where large airflow volumes are required it’s clearly a superior arrangement. The numbers listed above are with the box fan on the lowest setting, the smaller computer fan numbers are all listed at their max setting. Turning the box fan up to the highest setting allows for over 2000 CFM of airflow.
(CFM and Wattage Data on Scythe and Antec fans pulled from – Xbitlabs & Bit-Tech)
Smoke Testing
Additionally, I wanted to test flow patterns and turbulence around the computer components. In order to do this I needed a way to visualize the path of the air. Just like in a full scale wind tunnel this can be accomplished by adding smoke to the air. I purchased some smoke sticks (I used smoke testing sticks for HVAC systems, as they are non-toxic and leave no residue) that release smoke at a controlled rate. This allowed me to add smoke into the flow path and watch the air path as it moved around and through the components.
My plan was to test the system in standard configuration with the fans in place on the CPU and GPU coolers. This was accomplished with smoke tracing and produced some interesting results. I thought at lower speeds that the smaller fans on the coolers would restrict airflow. However, testing showed that at lower tunnel speeds (5-10MPH) very little turbulence was created. At higher tunnel speeds (15+ MPH) there were small vortices that would appear around the coolers, and as speeds increased the vortices became unpredictable during testing.
My next step is to test the system with passive cooling of the GPU and CPU. I’m curious if the airflow will pass through the CPU/GPU coolers, or if the airflow will move around it instead. More testing is needed.
Computer System
The motherboard is mounted to standoffs which sit on top of the surface of the tunnel floor; however, only two of these are actually secured. This allows me to move the motherboard around if I need to, without having to drill a bunch of holes. The GPUs are mounted in the motherboard and sit vertically which is better as there is less weight on the PCIe slots. I made a small angle aluminum bracket which mounts to the wind tunnel floor and holds the graphics cards securely in place.
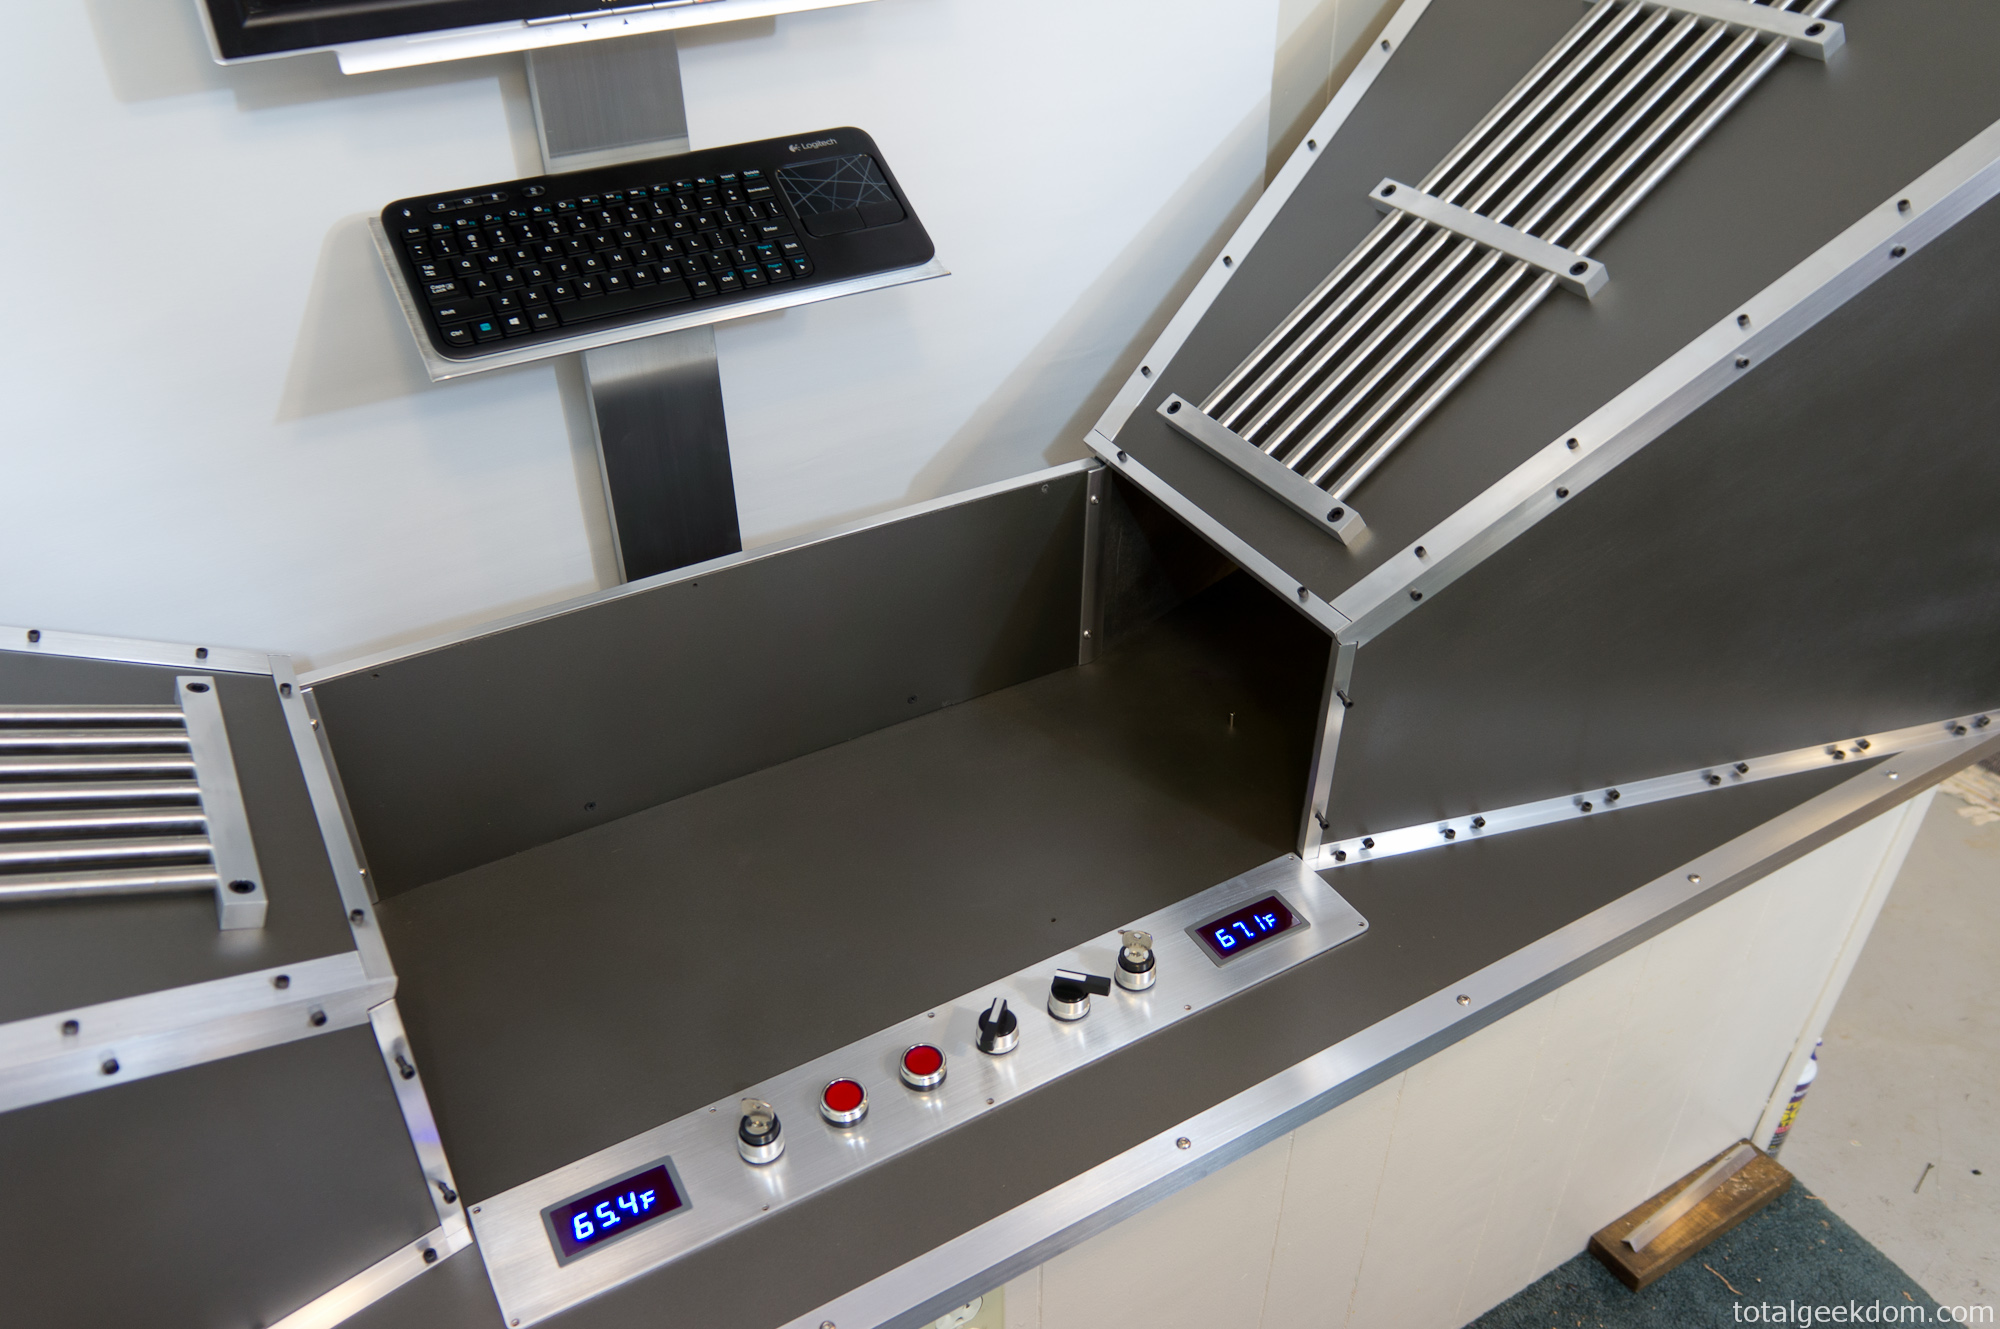
Wind Tunnel Computer Section
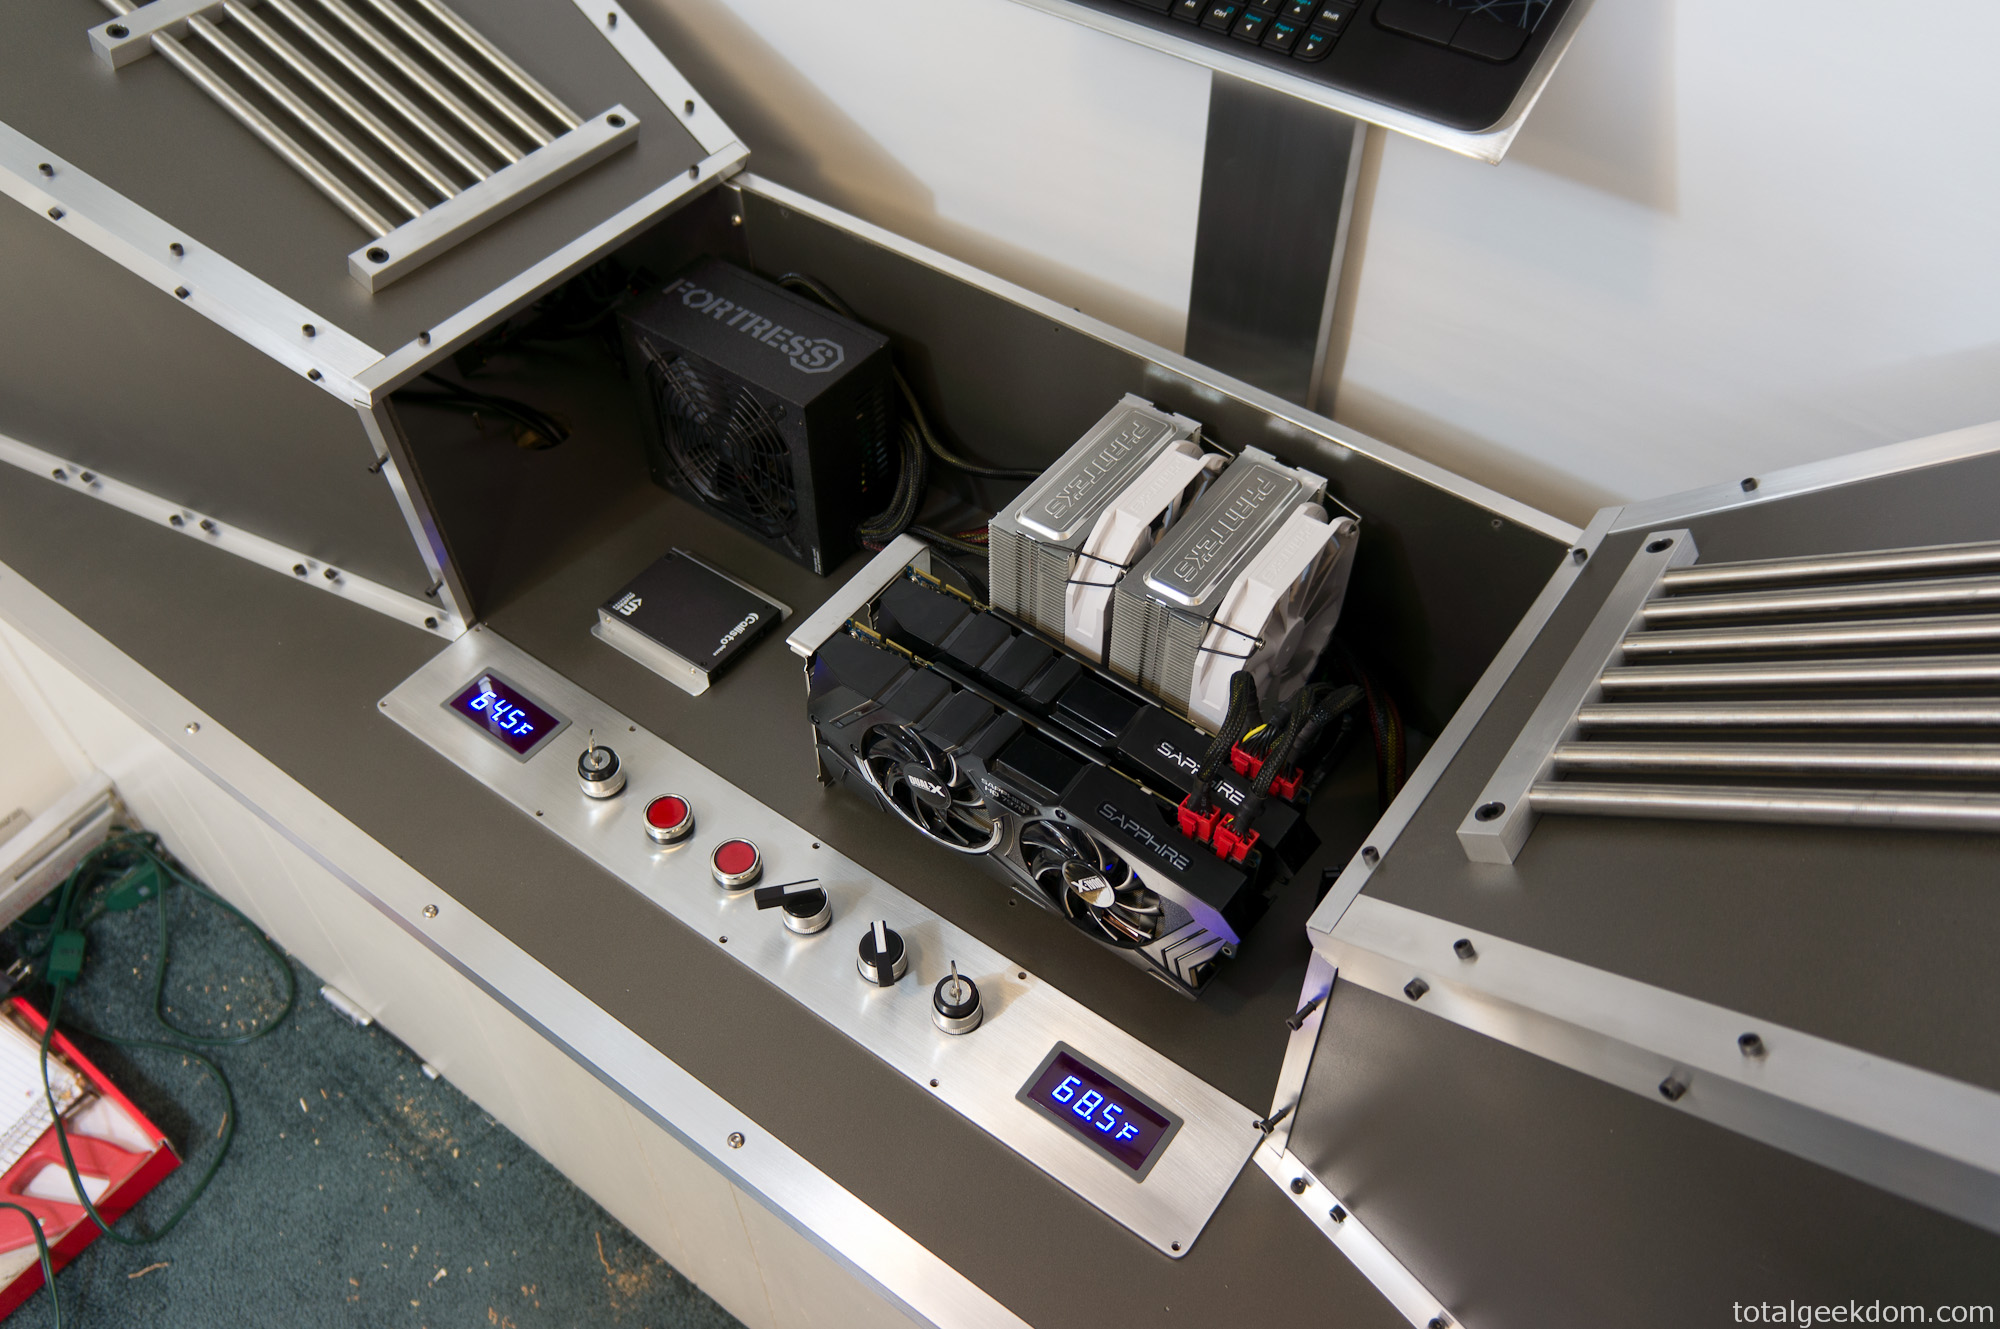
Wind Tunnel Computer Components
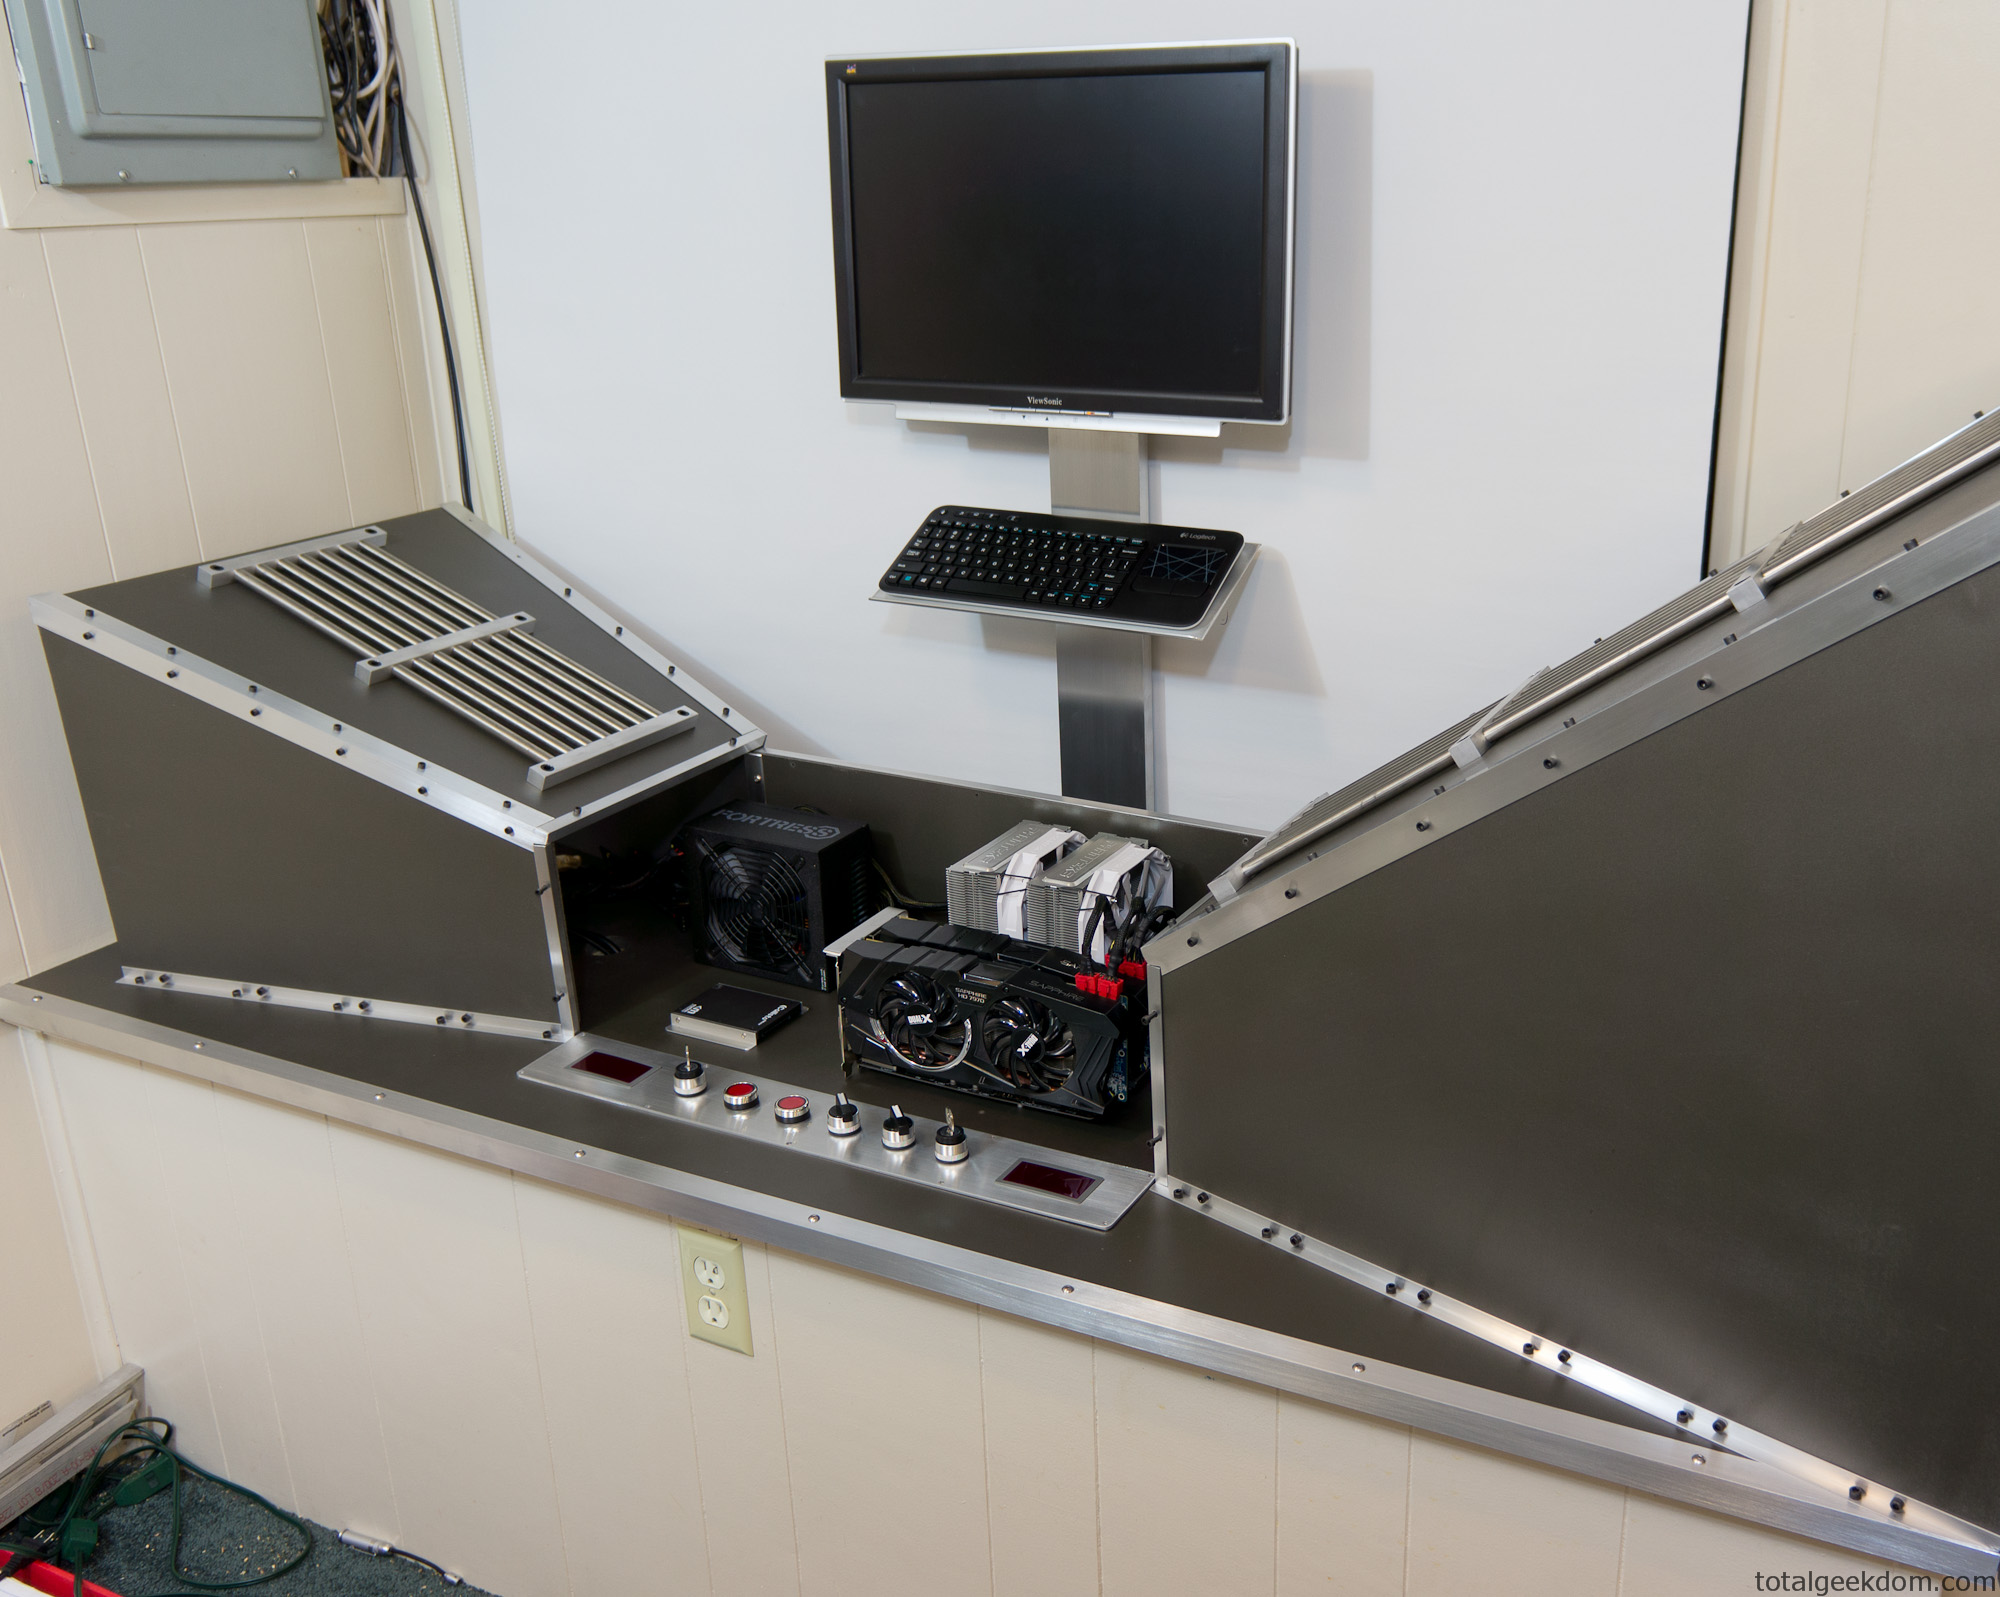
Wind Tunnel Computer Components Test
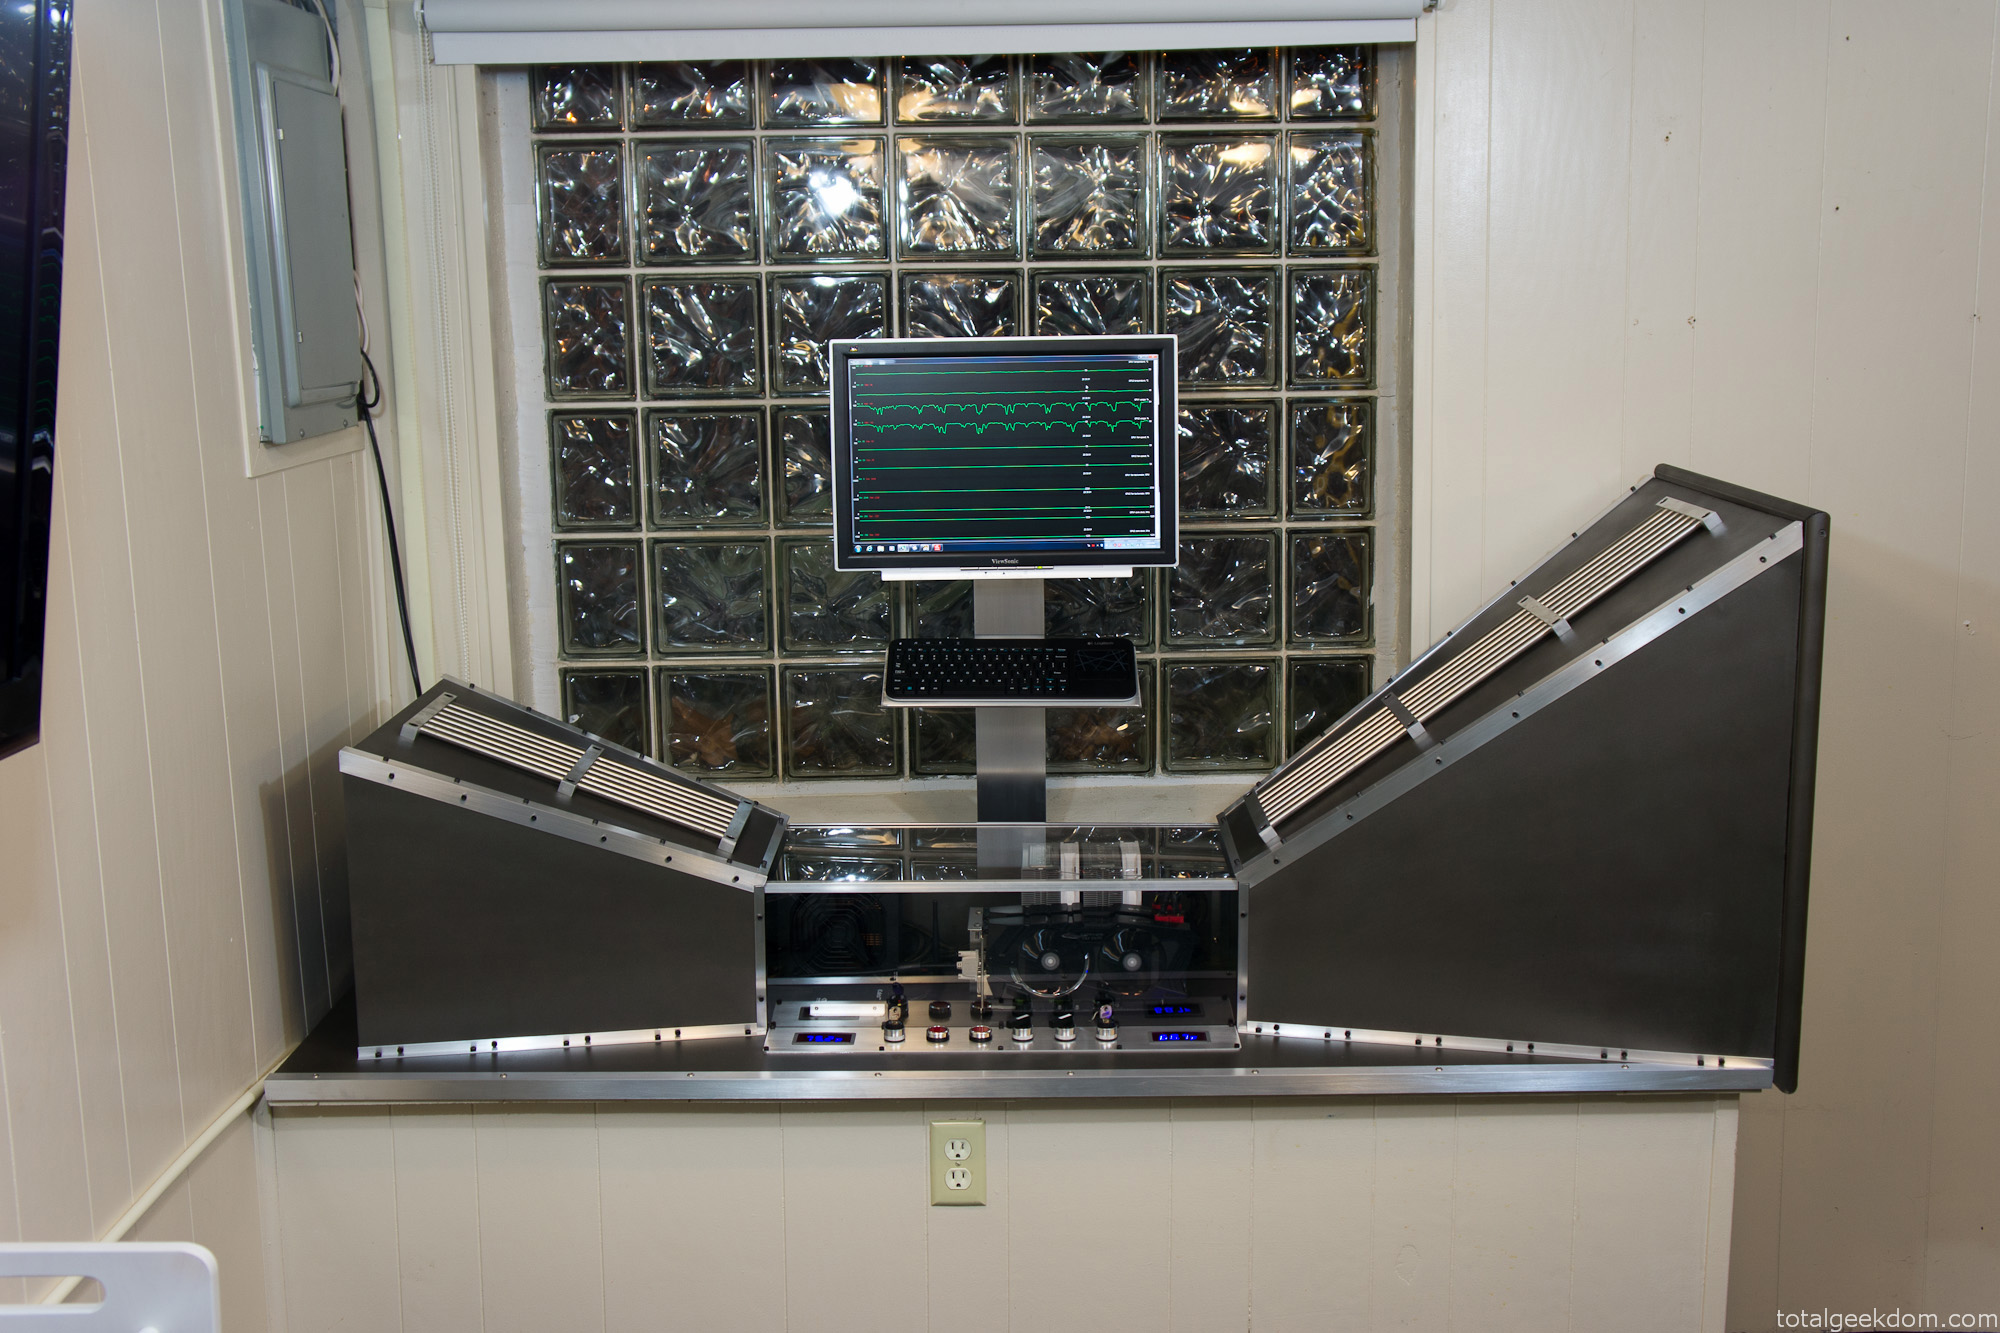
Completed Wind Tunnel Computer
Overclocking
The GPUs are overclocked using a combination of software utilities which allows for voltage, power, temperature, frequency and fan control. At a stock voltage of 1174 mV I was able to push the core clock to 1125Mhz with ease. The temps stayed in the 48-50 °C range on GPU 1 and in the 40-42 °C range on GPU 2. Pushing further, I increased the voltage to 1220 mV and achieved a core clock of 1225 MHz with temps increasing 4-6 °C degrees. Given the temperature and voltage headroom still left on the cards, I plan to push both further and see what kind of clocks I can get too.
(For this application the GPU memory is actually downclocked as it has no effect on the processing of research tasks)
GPU Test Numbers
First Overclock Settings
GPU 1
Core Clock- 1125 MHz
Core Voltage- 1174 mV
Core Temp- 41 ˚C
VRM Temps- 41-43 ˚C
GPU2
Core Clock- 1125 MHz
Core Voltage- 1174 mV
Core Temp- 49 ˚C
VRM Temps- 45-47 ˚C
Second Overclock Settings
GPU 1
Core Clock- 1225 MHz
Core Voltage- 1220 mV
Core Temp- 46 ˚C
VRM Temps- 46-47 ˚C
GPU2
Core Clock- 1225 MHz
Core Voltage- 1220 mV
Core Temp- 56 ˚C
VRM Temps- 52-53 ˚C
I was hoping to get to 1275-1300 on the core clock and keep the voltage under 1300 mV. That’s my goal for the next test session; I think with the temperature headroom I have I might just be able to get there.
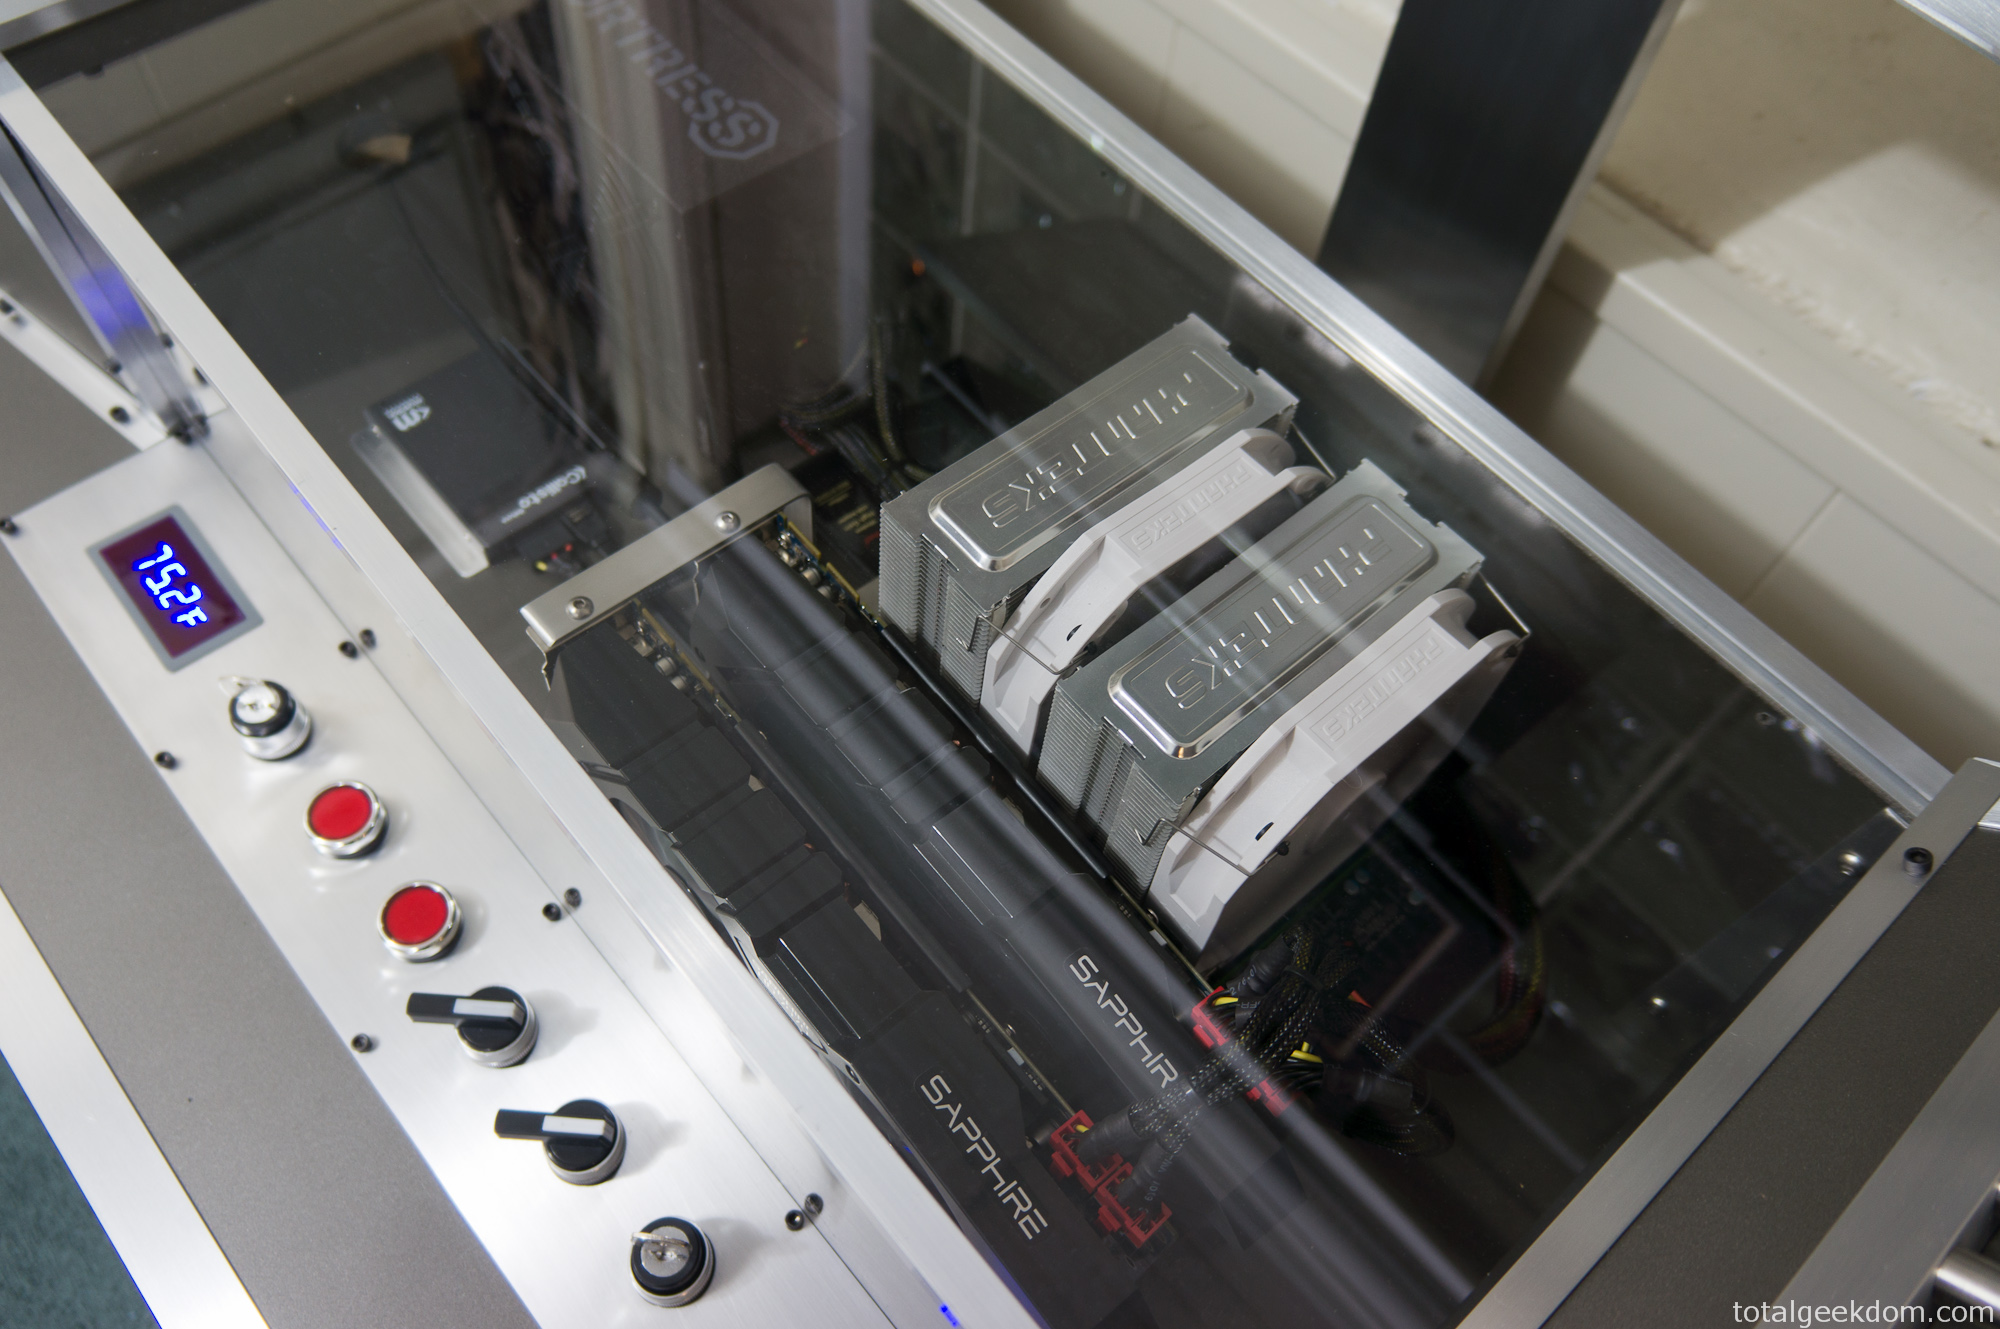
Wind Tunnel CPU – GPU
CPU Overclocking
Overclocking on the Intel Ivy Bridge 3770k platform has been a learning experience. Unlike the Sandy Bridge 2600k CPUs I worked with previously, there is a much harder voltage wall with Ivy Bridge. Additionally, the thermal interface material (TIM) and attachment method of the Ivy Bridge heatspreader are different than the Sandy Bridge CPUs. Through testing it has been confirmed that large reductions in temps can be achieved by “delidding” an Ivy Bridge 3770k CPU.
This process involves carefully removing the factory applied heatspreader with a blade, and replacing the thermal compound that Intel used with something of superior quality. It appears that the real reason a large reduction in temperatures occur has to do with the reduction in the gap between the die of the CPU and the heatspreader itself. Temperature drops of 20-25 °C are not unheard of with “delidding” a 3770k.
With that knowledge I fully intend on delidding my 3770k CPU so that I can squeeze every last bit of processing power it has to offer. However, I’ve been focused on finalizing the wind tunnel portion of the project and getting everything up and running. So I’ll delid the CPU in the next couple of weeks, when time permits. Currently I’ve overclocked the CPU to 4.5GHz and left it there for now though I plan to push it further.
CPU Settings
Frequency- 4.5 GHz
Voltage- 1.26
Temperature- 63-65 ˚C (Depending on ambient)
Judging by the current temperatures and voltage used to achieve 4.5 GHz, I hope to be able to achieve 4.8 GHz, possibly even higher. I plan on pushing hard to see what I can get. I don’t think the temperatures will be an issue, it will be a matter of voltage required to achieve those clocks.
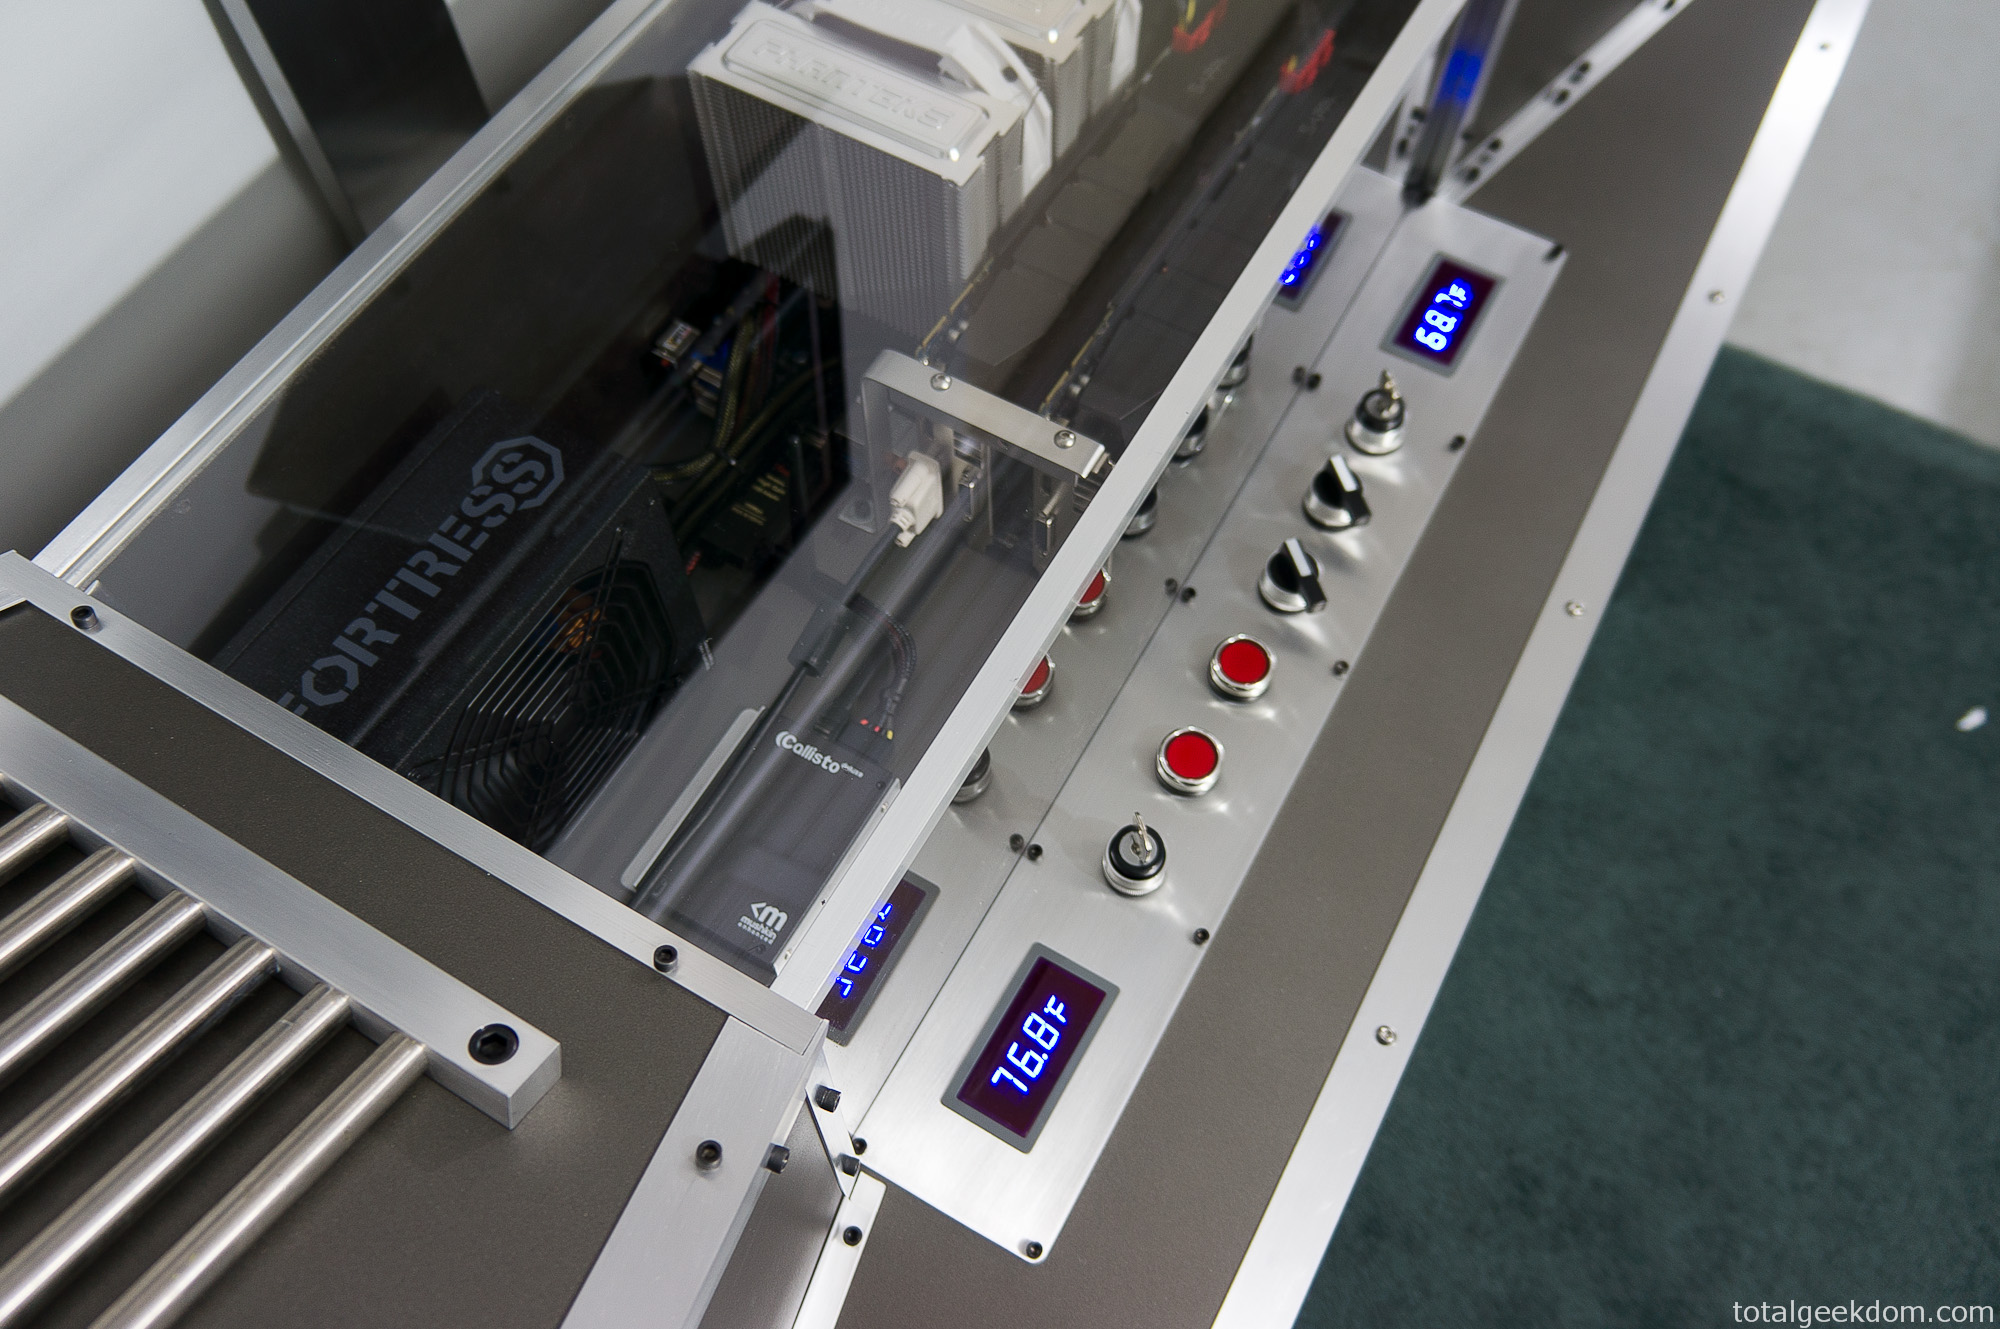
Wind Tunnel Gauge Pod
System Performance
Currently, the system has exceeded my initial estimates for output. The goal was to process as much cancer research as quickly as possible.
With the power of the GPUs, multiple tasks/workunits from the Help Conquer Cancer project are able to run concurrently. The average GPU can run 1, sometimes 2 workunits. A higher end GPU can run 2-4 workunits and sometimes 4-8. However, a balance must be struck with the number of units running and the total time it takes to run each unit.
Each GPU can run 8+ workunits; and currently I’m running 10 on each GPU for a total of 20. I’m still testing the number of workunits to run per card for maximum efficiency. At this pace I can process 40 workunits in the time it takes my other computers to process just one.
World Community Grid awards points as a way of keeping track of the work contributed and to help motivate others to join and donate time. The points are worth nothing, they just give you a way to compare what you’re donating in terms of processing power.
Each computer connected to World Community Grid is assigned a host number. There are over 1.6 million hosts registered and of those there are 220,000 active hosts. (Numbers pulled from BOINCstats data) Of those 220,000 active hosts this wind tunnel computer has been in the top 5 for a number of days and has been as high as 2nd position in most points returned for a single host in one day.
On top of this World Community Grid also awards hours of processing time donated. Each CPU thread is equivalent to one day’s worth of time donated. The more CPU cores/threads you have the more days of processing completed at once. For example, a 4 core processor would achieve around 4 days’ worth of processing time in a single day, an 8 core would achieve 8 days, and so on. This computer running 20 total tasks simultaneously achieves around 20 or so days of processing time in just one day.
From November 2012 to November 2013 this system was online and processing workunits for the Help Conquer Cancer project. In that year timeframe it returned over 600,000 workunits and processed over 11 years with of computational time.
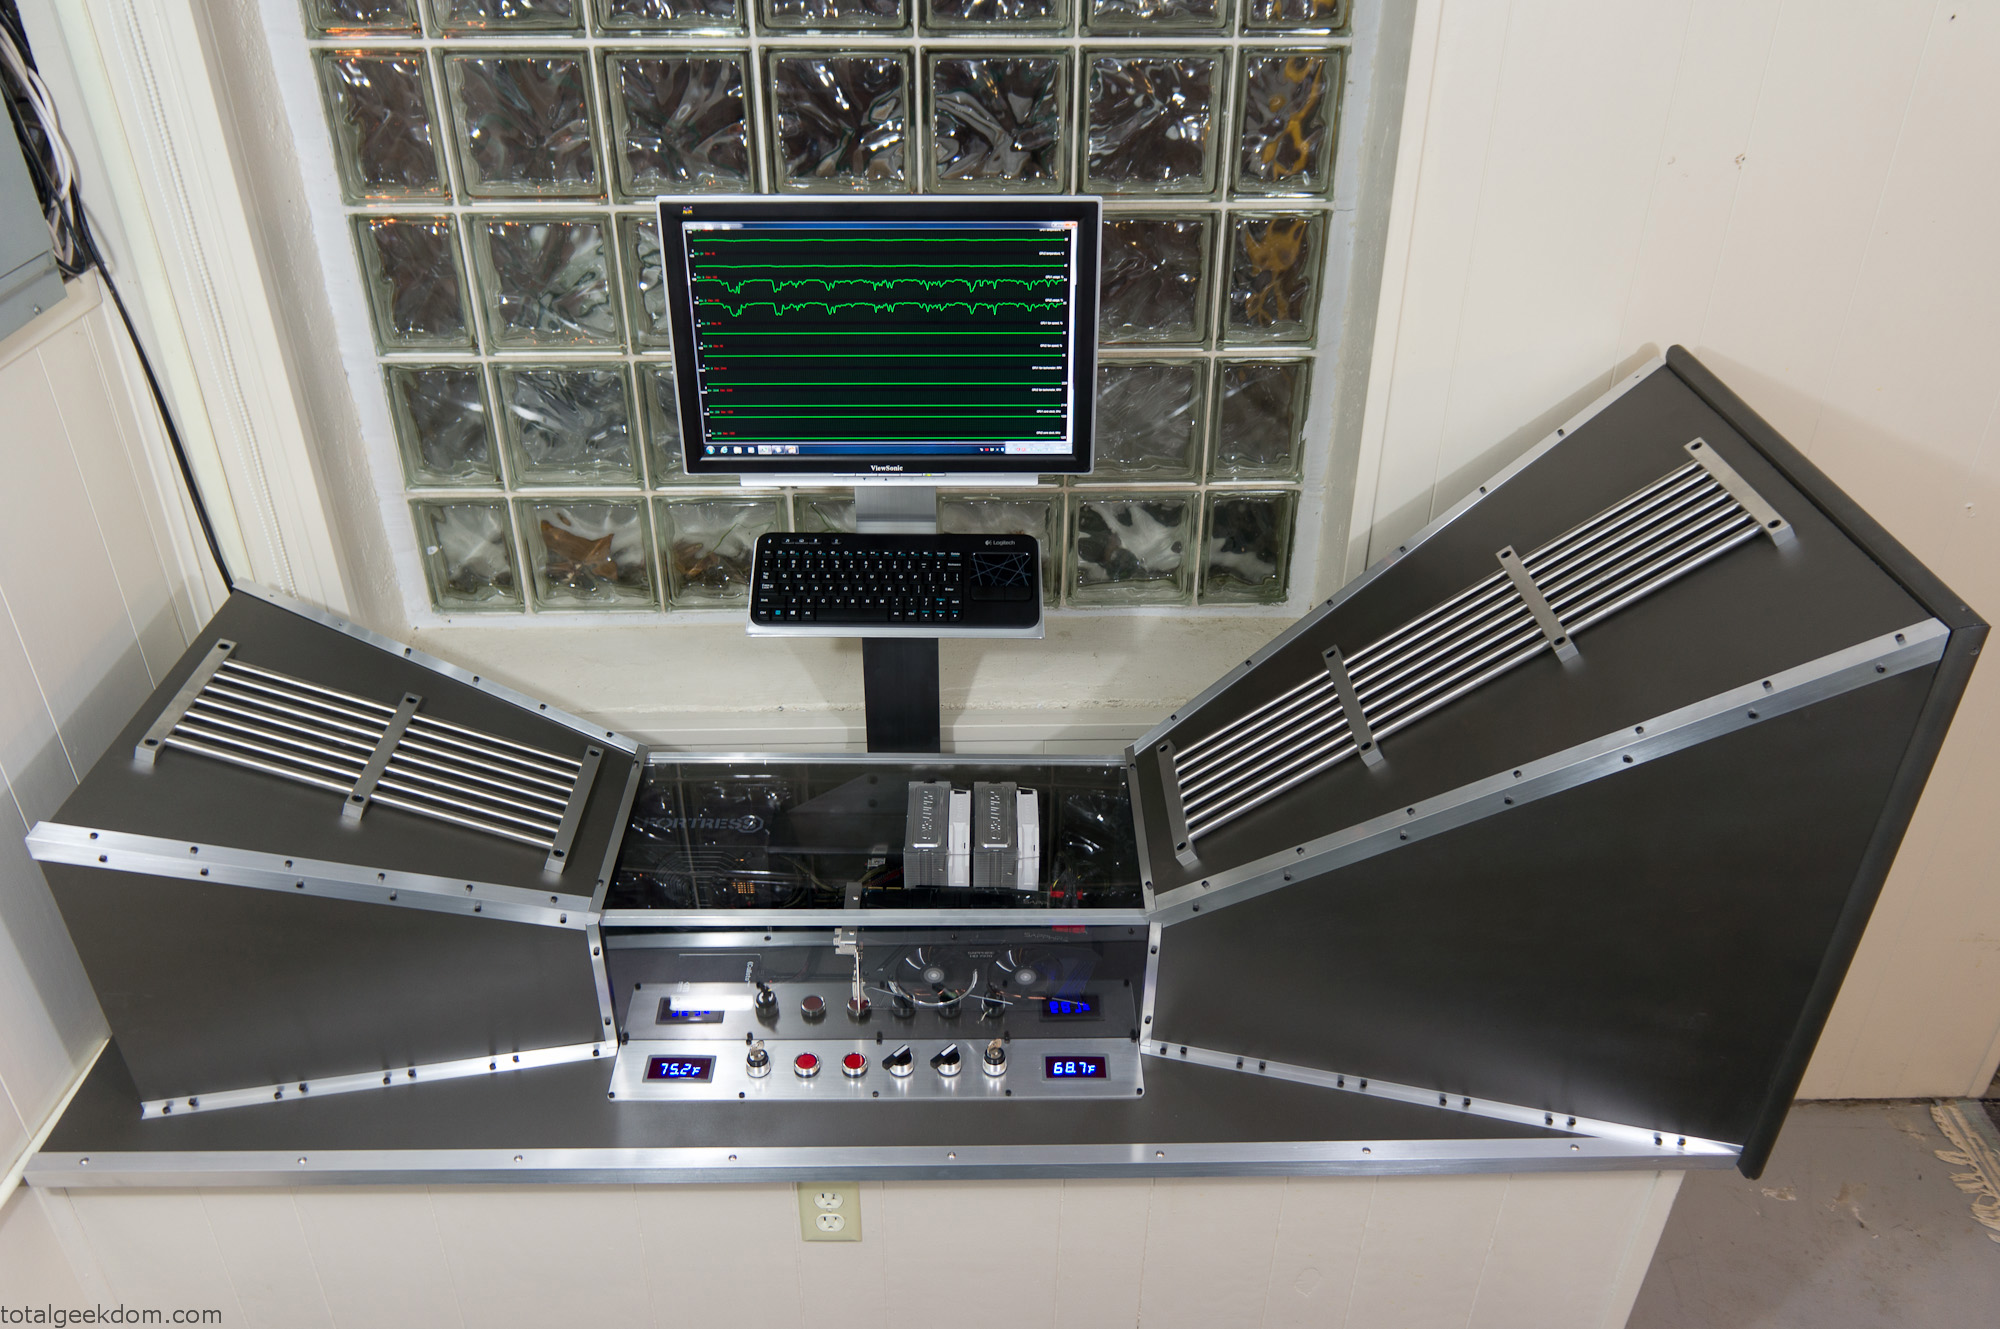
Wind Tunnel Computer Running
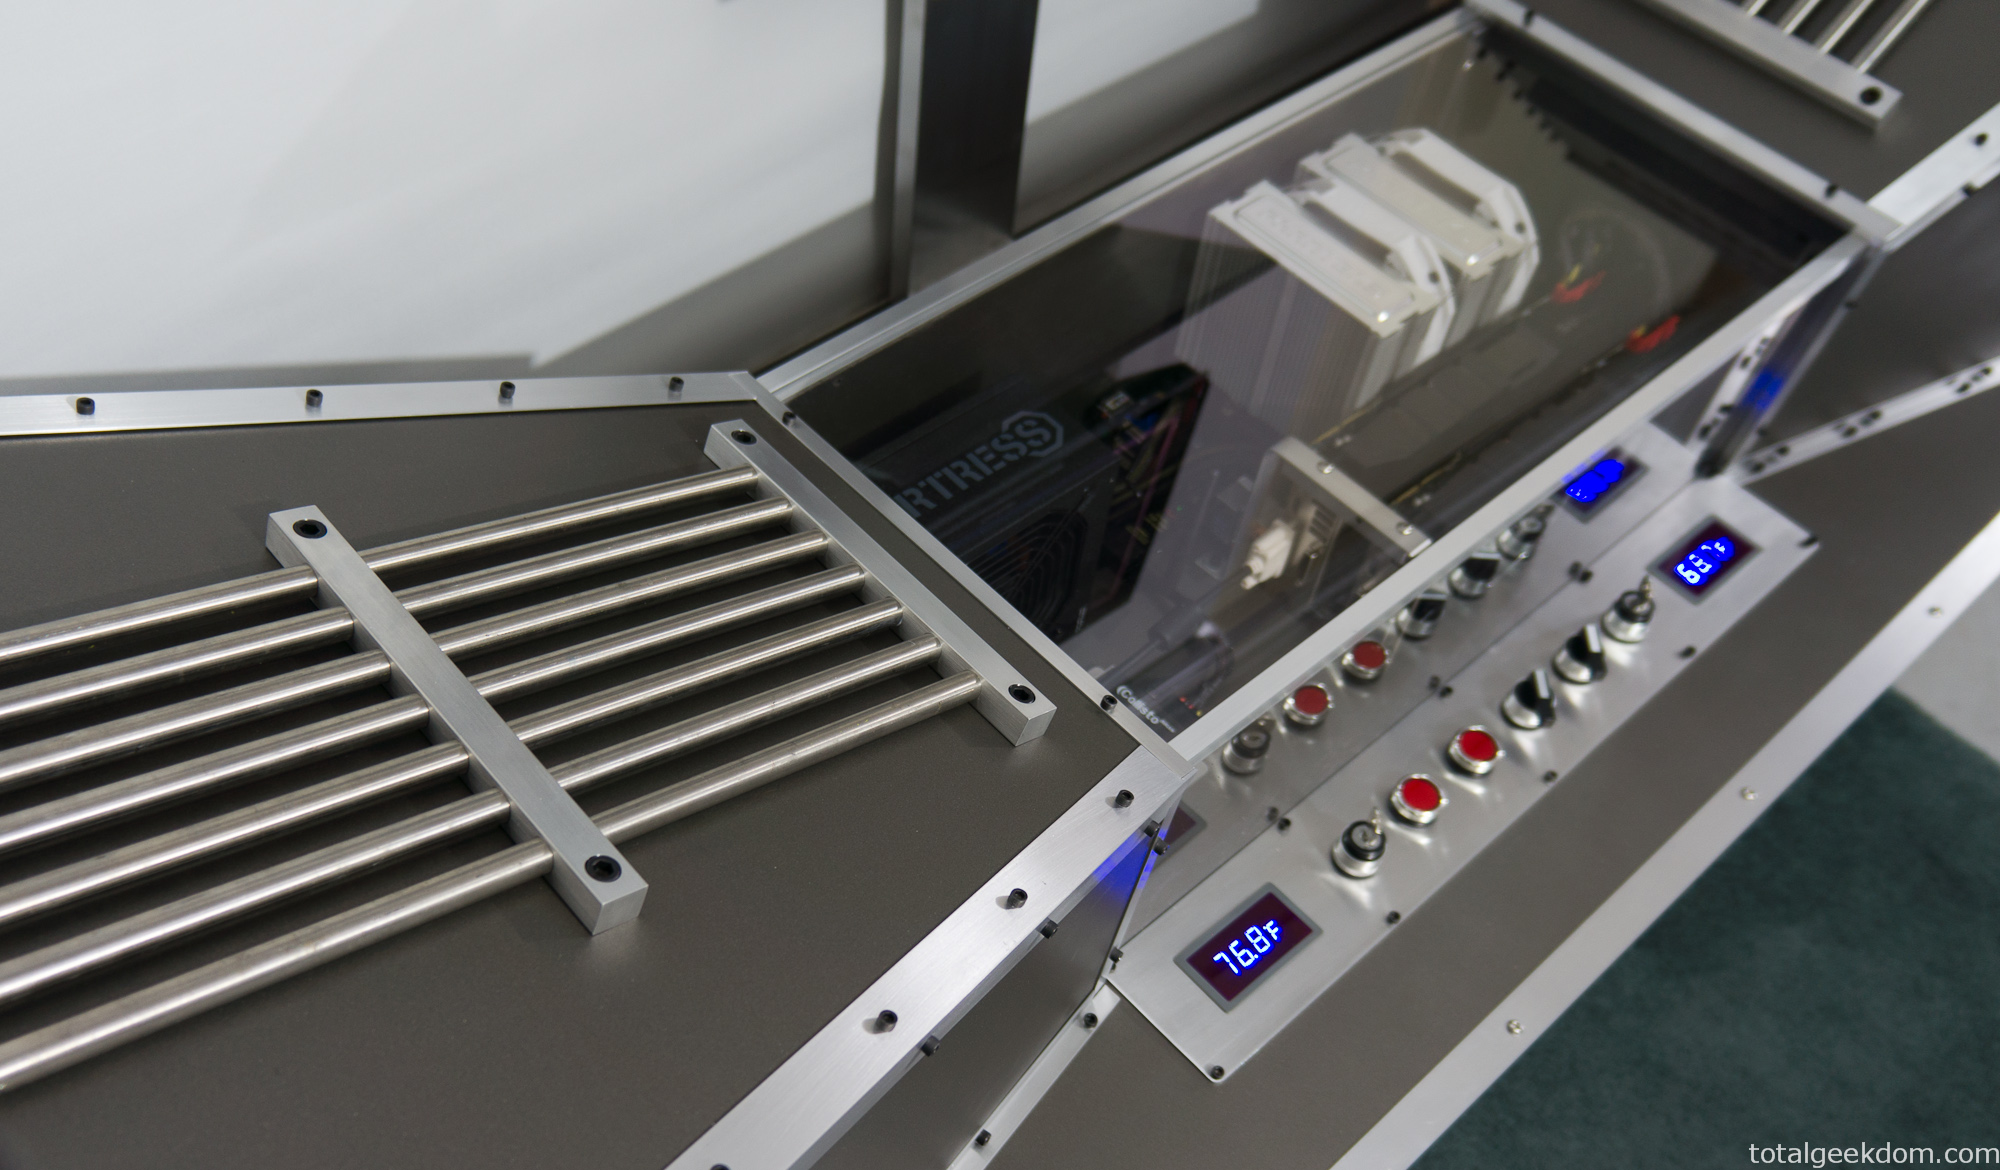
Wind Tunnel Computer Exhaust
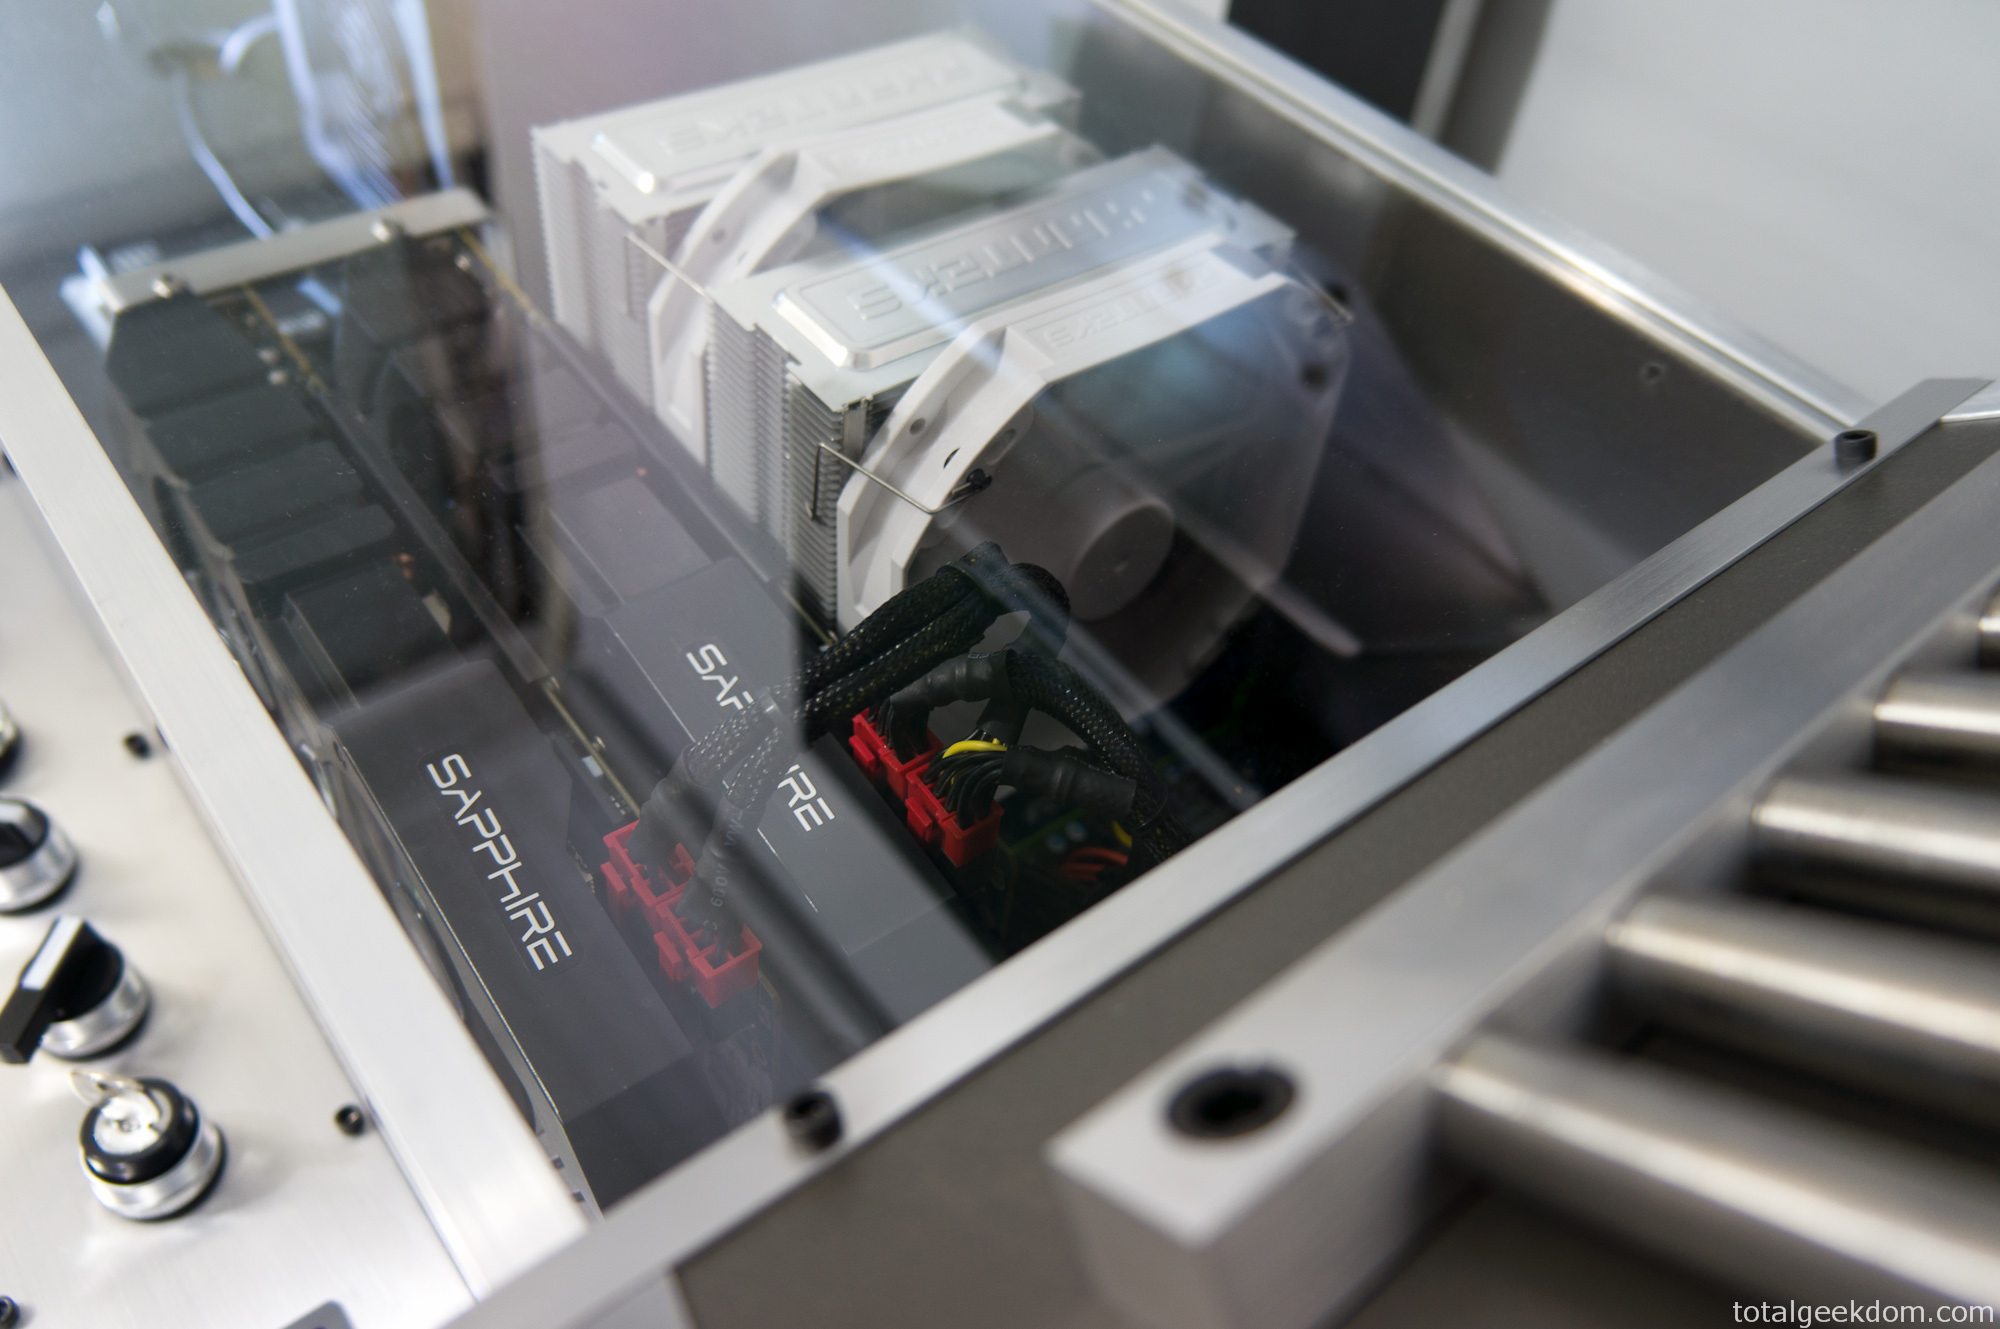
Wind Tunnel CPU Cooler
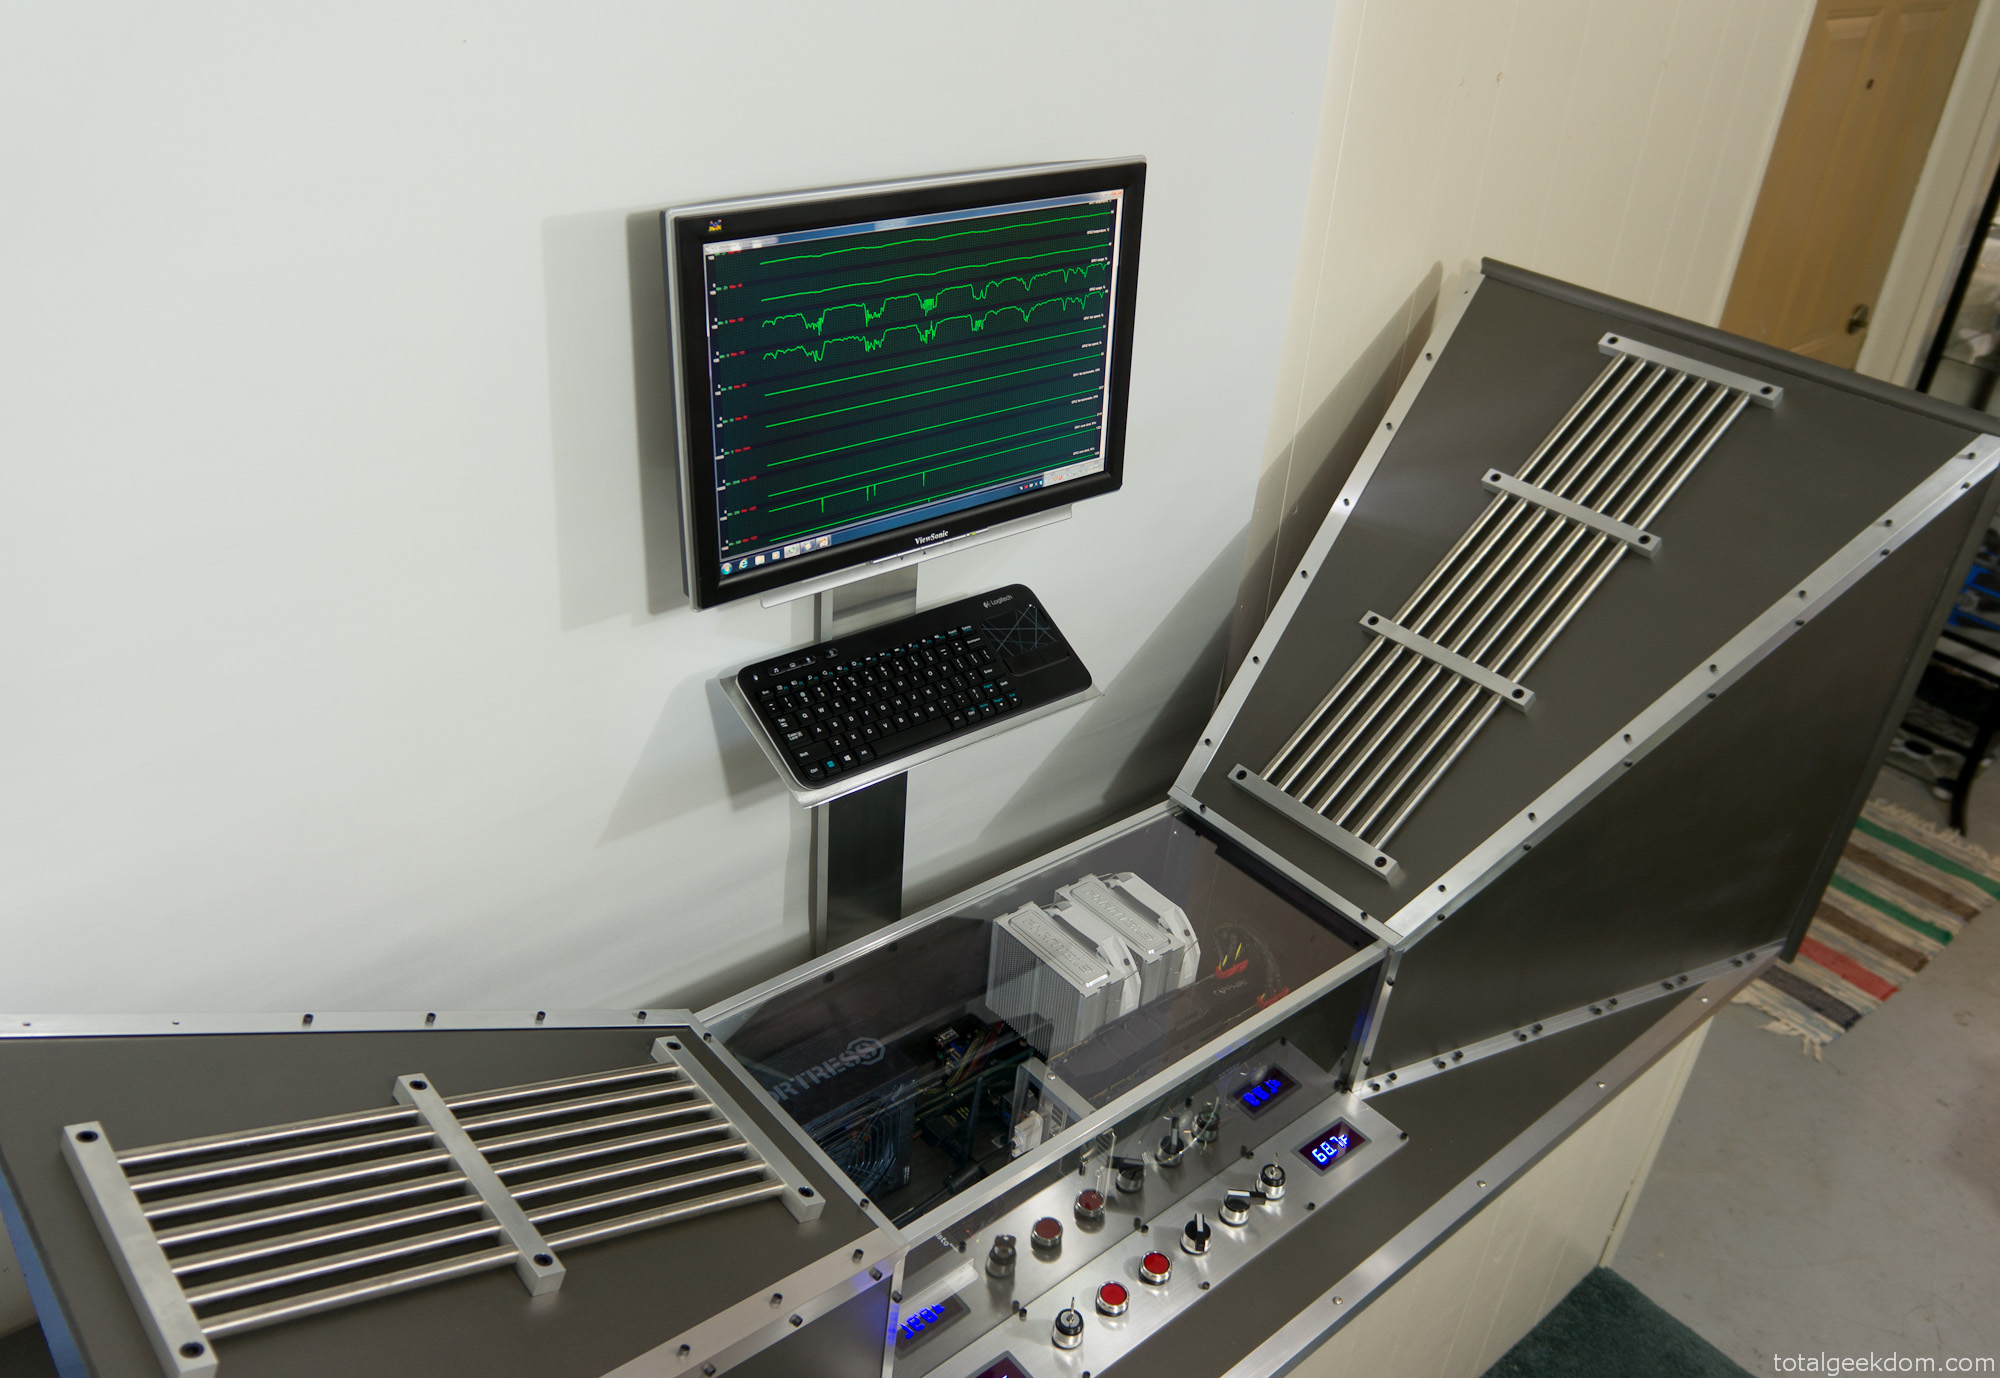
Wind Tunnel Computer Running
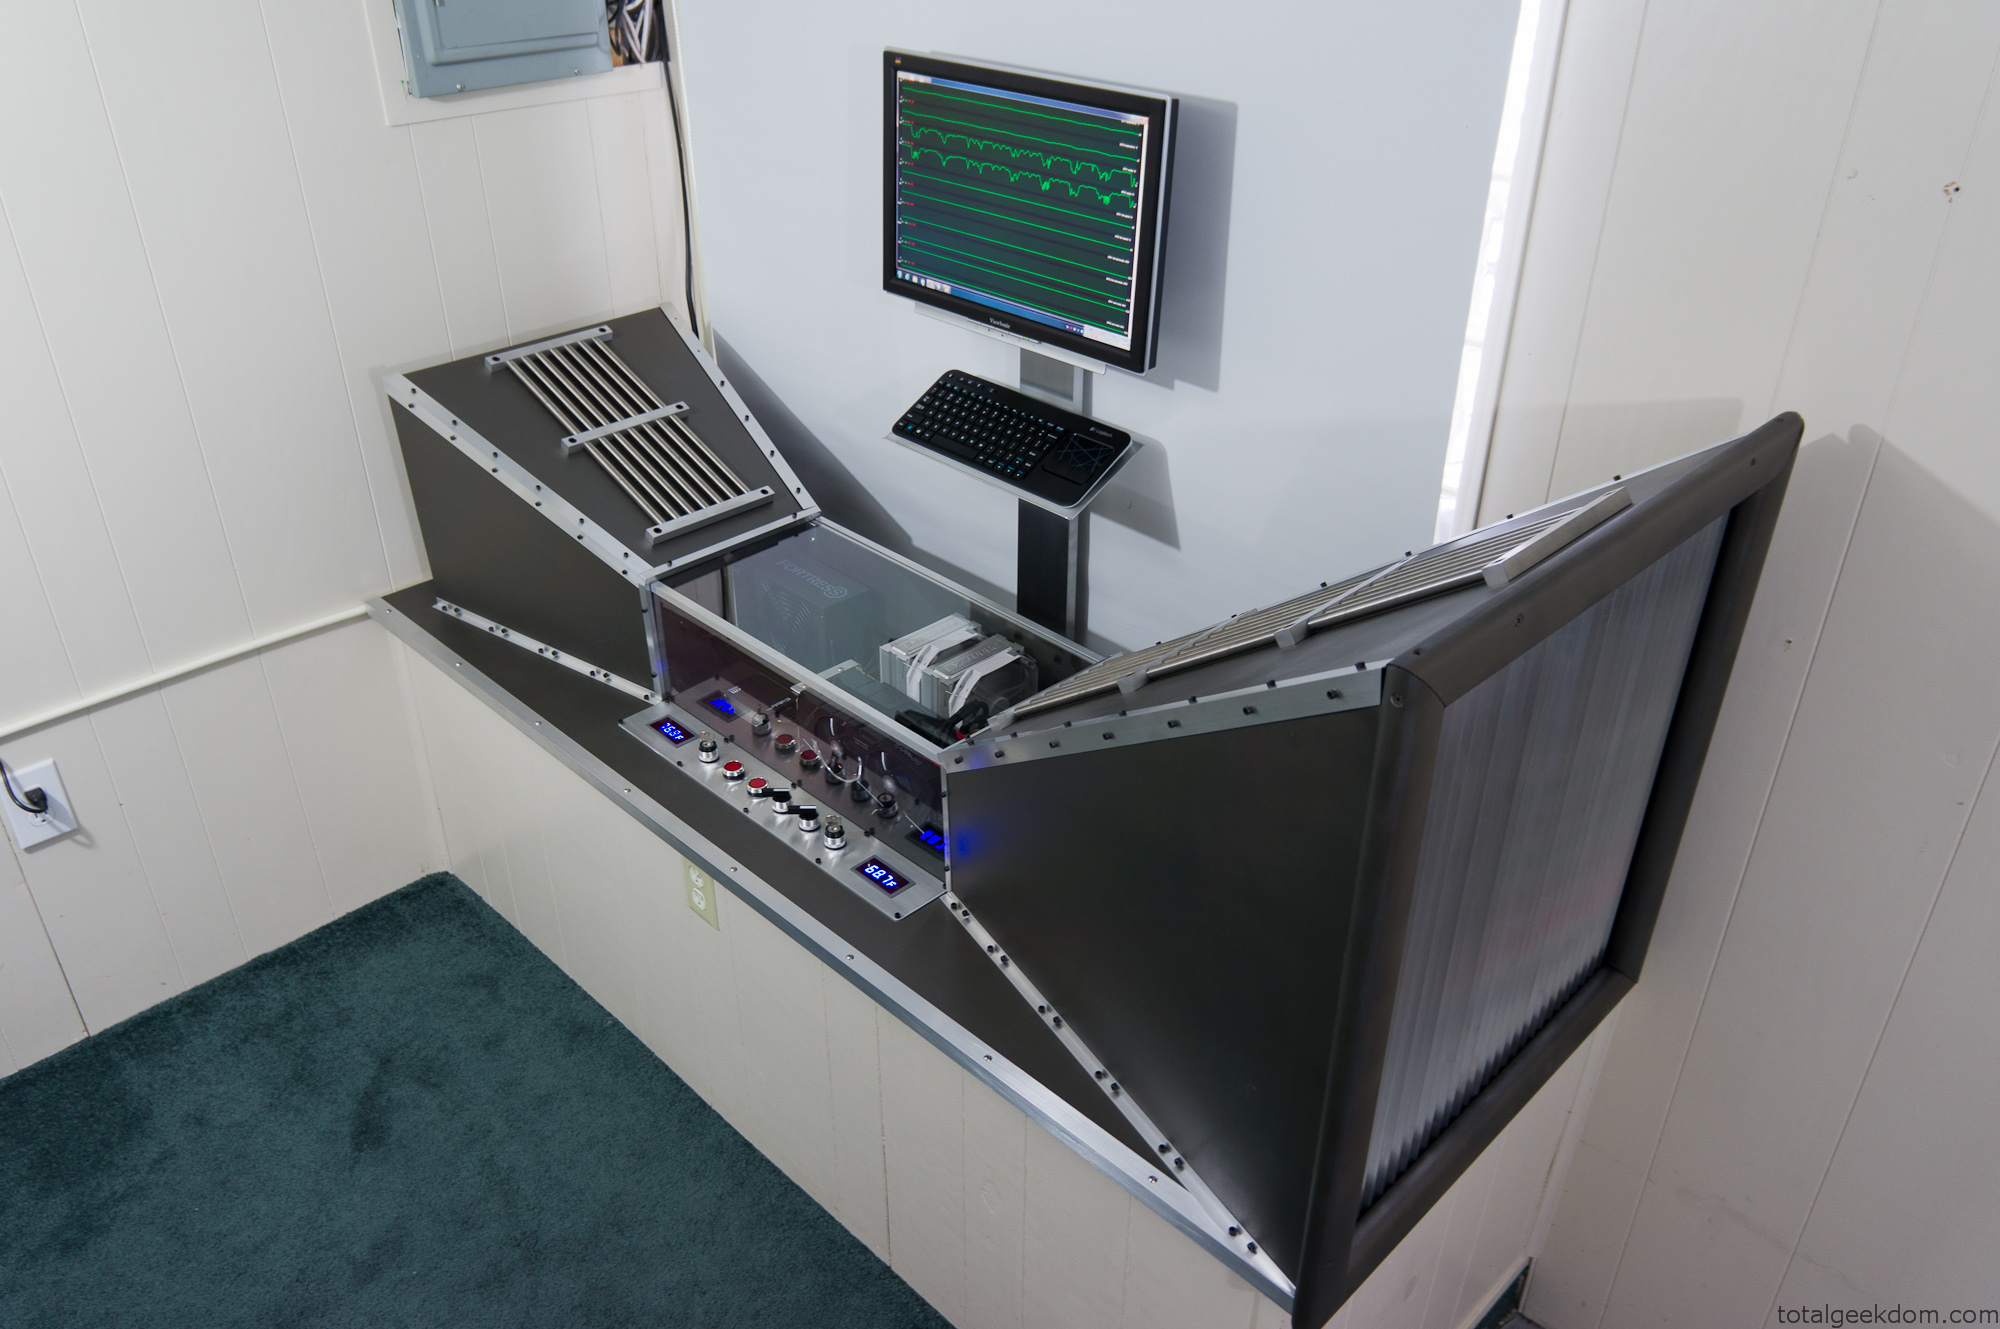
Wind Tunnel Computer Inlet
System Stats
Workunits Per Day- 4,000-4,200 double units (8,000-8,400 single workunits)
Run Time Per Day- 20 days (worth of processing)
Total Run Time Donated- 11 Years, 275 days
Total HCC (Help Conque Cancer) Results Returned- 600,000 (as of 10/1/14)
Future Plan
After a lot of further testing with the system, delidding the CPU and modifying flow paths, I was very happy with the overall result. The Help Conquer Cancer project finished well ahead of it’s projected finish date and I was very happy to have helped contribute. The system is still used for testing purposes and will be used for further testing in the future.
 29.2k
29.2k
 13.2k
13.2k 7.1k
7.1k

 2.1k
2.1k 813
813 2.6k
2.6k
Comments 3,278
If you wish for to get a good deal from this paragraph then you have
to apply these strategies to your won weblog.
I was suggested this web site by my cousin. I am not sure whether this post is written by him as
nobody else know such detailed about my problem.
You are incredible! Thanks!
whoah this weblog is fantastic i like reading your posts.
Keep up the good work! You know, a lot of individuals are searching round for this information, you can aid them greatly.
Excellent post. I am experiencing a few of these issues as well..
Amazing issues here. I’m very glad to look your
post. Thank you so much and I’m looking ahead to touch you.
Will you please drop me a mail?
I blog quite often and I seriously appreciate your content.
The article has really peaked my interest. I’m going to book
mark your website and keep checking for new details about once
a week. I opted in for your Feed too.
This design is spectacular! You certainly know how
to keep a reader amused. Between your wit and your videos, I
was almost moved to start my own blog (well, almost…HaHa!) Excellent job.
I really loved what you had to say, and more than that, how you presented it.
Too cool!
Thanks in favor of sharing such a fastidious idea, piece of writing is fastidious,
thats why i have read it fully
For the reason that the admin of this site is working, no
question very soon it will be well-known, due to its feature contents.
Hello would you mind stating which blog platform you’re working with?
I’m going to start my own blog soon but I’m having a tough
time choosing between BlogEngine/Wordpress/B2evolution and Drupal.
The reason I ask is because your layout seems different
then most blogs and I’m looking for something
unique. P.S Sorry for being off-topic but I had to
ask!
An impressive share! I’ve just forwarded this onto a colleague who had been conducting a little research on this.
And he in fact bought me breakfast simply because I found it for him…
lol. So let me reword this…. Thanks for the meal!! But yeah, thanks
for spending the time to talk about this subject here on your web page.
Appreciation to my father who informed me regarding this blog, this website is genuinely awesome.
Hi there! Do you know if they make any plugins to help with SEO?
I’m trying to get my blog to rank for some targeted keywords but I’m not seeing very good results.
If you know of any please share. Thank you!
Everything is very open with a clear explanation of the issues.
It was truly informative. Your website is extremely helpful.
Thanks for sharing!
You ought to take part in a contest for one of the greatest websites on the web.
I will highly recommend this blog!
I’m impressed, I must say. Rarely do I encounter a blog that’s equally educative
and entertaining, and let me tell you, you’ve hit the nail on the
head. The issue is something that too few men and
women are speaking intelligently about. Now i’m very happy I
came across this in my hunt for something concerning this.
Greetings from California! I’m bored to death at
work so I decided to browse your blog on my iphone during lunch break.
I really like the information you present here and can’t wait to take a look when I get home.
I’m surprised at how fast your blog loaded on my phone ..
I’m not even using WIFI, just 3G .. Anyhow,
superb blog!
Hello there! This is my first visit to your blog! We are a team of volunteers
and starting a new initiative in a community in the same niche.
Your blog provided us beneficial information to work on. You
have done a extraordinary job!
Good day! I could have sworn I’ve visited this blog
before but after browsing through many of the posts I realized it’s
new to me. Regardless, I’m certainly happy I found it and I’ll be bookmarking it and checking back often!
Thanks for finally talking about > Wind Tunnel Computer for Cancer Research | Total
Geekdom < Liked it!
I don’t even know how I ended up here, but I thought this
post was great. I do not know who you are but definitely you’re going to a
famous blogger if you are not already 😉 Cheers!
You can definitely see your skills within the work you write.
The sector hopes for more passionate writers like you who aren’t afraid to mention how they believe.
Always follow your heart.
You ought to be a part of a contest for one of the greatest sites on the internet.
I am going to highly recommend this website!
Whats up this is somewhat of off topic but I was wondering if blogs
use WYSIWYG editors or if you have to manually code with HTML.
I’m starting a blog soon but have no coding experience so I wanted to
get advice from someone with experience. Any help would be enormously appreciated!
This information is worth everyone’s attention. Where can I
find out more?
Hey very cool web site!! Man .. Excellent .. Wonderful ..
I’ll bookmark your website and take the feeds additionally?
I’m satisfied to search out numerous helpful information here in the post, we
want work out extra techniques in this regard, thanks for
sharing. . . . . .
Article writing is also a fun, if you be acquainted with then you can write otherwise it is complicated to write.
I was suggested this blog by my cousin. I’m not sure whether this post is written by him as nobody else
know such detailed about my difficulty. You are incredible!
Thanks!
Hello there! Would you mind if I share your blog
with my myspace group? There’s a lot of folks that I think would really enjoy your content.
Please let me know. Thank you
Attractive section of content. I just stumbled upon your weblog
and in accession capital to assert that I get actually enjoyed account your blog posts.
Any way I’ll be subscribing to your feeds and even I achievement you access consistently quickly.
Heya just wanted to give you a quick heads up and let you
know a few of the images aren’t loading properly.
I’m not sure why but I think its a linking issue.
I’ve tried it in two different web browsers and both show the
same results.
Hmm it seems like your site ate my first comment (it was extremely
long) so I guess I’ll just sum it up what I submitted and say, I’m thoroughly enjoying your blog.
I too am an aspiring blog blogger but I’m still new to everything.
Do you have any tips and hints for first-time blog writers?
I’d certainly appreciate it.
Remarkable! Its in fact amazing post, I have got much clear idea regarding from this post.
Somebody necessarily assist to make seriously
posts I might state. That is the first time I frequented your web page
and thus far? I surprised with the research you made to make
this actual submit extraordinary. Wonderful process!
Asking questions are in fact good thing if you are not understanding anything totally,
except this article offers fastidious understanding yet.
Fantastic post but I was wanting to know if you could
write a litte more on this subject? I’d be very thankful
if you could elaborate a little bit more. Bless you!
I have been browsing online more than 3 hours nowadays, yet I by no means discovered any attention-grabbing
article like yours. It’s lovely worth sufficient for me. In my view, if all web owners and bloggers made good
content material as you did, the internet will be a lot more helpful than ever before.
This design is incredible! You most certainly know how to keep a reader amused.
Between your wit and your videos, I was almost moved to start
my own blog (well, almost…HaHa!) Fantastic job.
I really enjoyed what you had to say, and more than that, how you presented it.
Too cool!
I enjoy, result in I discovered just what I was looking for.
You’ve ended my four day lengthy hunt! God Bless you man. Have a great day.
Bye
I really like your blog.. very nice colors & theme. Did
you make this website yourself or did you hire someone to do
it for you? Plz answer back as I’m looking to create my own blog and
would like to know where u got this from.
thank you
It’s nearly impossible to find experienced people in this particular topic, however,
you seem like you know what you’re talking about!
Thanks
There is definately a great deal to know about this
issue. I like all of the points you’ve made.
I know this web page provides quality depending posts and
extra stuff, is there any other website which gives these information in quality?
It’s a shame you don’t have a donate button! I’d without a doubt donate to this fantastic blog!
I suppose for now i’ll settle for book-marking and adding your RSS
feed to my Google account. I look forward to brand new updates and will
talk about this site with my Facebook group.
Chat soon!
Howdy! Do you know if they make any plugins to protect
against hackers? I’m kinda paranoid about losing everything I’ve worked hard on. Any tips?
I all the time emailed this website post page to all my contacts, because if like to read it after
that my contacts will too.
What’s up, I log on to your blogs like every week. Your writing style is awesome, keep it up!
I like it whenever people get together and share ideas.
Great site, keep it up!
Thanks for every other informative web site. The place
else may just I am getting that kind of info written in such an ideal approach?
I have a venture that I am simply now working on, and I’ve
been on the look out for such information.
When I originally commented I clicked the “Notify me when new comments are added” checkbox and now each time a
comment is added I get three e-mails with
the same comment. Is there any way you can remove me from
that service? Thanks!
Hmm it appears like your website ate my first comment (it
was extremely long) so I guess I’ll just sum it up what I wrote and say, I’m thoroughly enjoying
your blog. I as well am an aspiring blog blogger but I’m still new
to everything. Do you have any helpful hints for rookie blog writers?
I’d definitely appreciate it.
Normally I don’t learn post on blogs, but I wish to
say that this write-up very pressured me to try and do it!
Your writing style has been surprised me. Thanks, quite nice article.
That is a really good tip particularly to those new to the blogosphere.
Brief but very accurate info… Thank you for sharing this one.
A must read article!
Thanks for finally writing about > Wind Tunnel Computer for Cancer Research | Total
Geekdom < Loved it!
Excellent blog here! Also your website loads up fast! What web
host are you using? Can I get your affiliate link to your host?
I wish my site loaded up as fast as yours lol
There’s certainly a lot to know about this topic.
I love all the points you’ve made.
Unquestionably believe that which you said. Your favorite justification appeared to
be on the internet the easiest thing to be aware of. I say
to you, I definitely get annoyed while people consider worries that they just do not know about.
You managed to hit the nail upon the top and also defined out the whole thing without
having side effect , people can take a signal. Will probably be back to get more.
Thanks
This piece of writing is actually a pleasant one
it helps new internet viewers, who are wishing
in favor of blogging.
We’re a group of volunteers and starting a new scheme in our
community. Your site provided us with valuable info to work on.
You’ve done a formidable job and our entire community will be grateful to you.
Write more, thats all I have to say. Literally, it
seems as though you relied on the video to make your point.
You definitely know what youre talking about, why throw away your intelligence on just
posting videos to your site when you could be giving us something
informative to read?
Thanks for the marvelous posting! I quite enjoyed reading
it, you’re a great author.I will ensure that I bookmark your
blog and will often come back later on. I want to encourage continue your great job,
have a nice weekend!
Great post. I used to be checking constantly this blog and I’m inspired!
Extremely helpful information specially the remaining part :
) I care for such info much. I was looking for this certain info
for a long time. Thanks and good luck.
You’re so cool! I do not suppose I have read something like that before.
So wonderful to find somebody with some unique thoughts on this subject matter.
Really.. thank you for starting this up. This website is
one thing that’s needed on the internet, someone
with a little originality!
I wanted to thank you for this fantastic read!!
I certainly enjoyed every bit of it. I have got you saved as a favorite to check out new stuff you post…
Awesome site you have here but I was wanting to know if you knew of any user discussion forums
that cover the same topics talked about here? I’d really love to be a
part of group where I can get responses from other experienced
people that share the same interest. If you have any recommendations, please let me know.
Bless you!
Thank you for another informative site. The place else may just I
get that type of information written in such an ideal way?
I’ve a undertaking that I am simply now operating on, and I’ve been at the glance out for such info.
It’s going to be ending of mine day, however before end I am reading
this great article to improve my know-how.
Way cool! Some very valid points! I appreciate you penning this article and also the rest of the
website is very good.
I really like reading through a post that will make
men and women think. Also, thank you for allowing me
to comment!
I delight in, cause I discovered just what I used to be
looking for. You’ve ended my 4 day long hunt!
God Bless you man. Have a nice day. Bye